
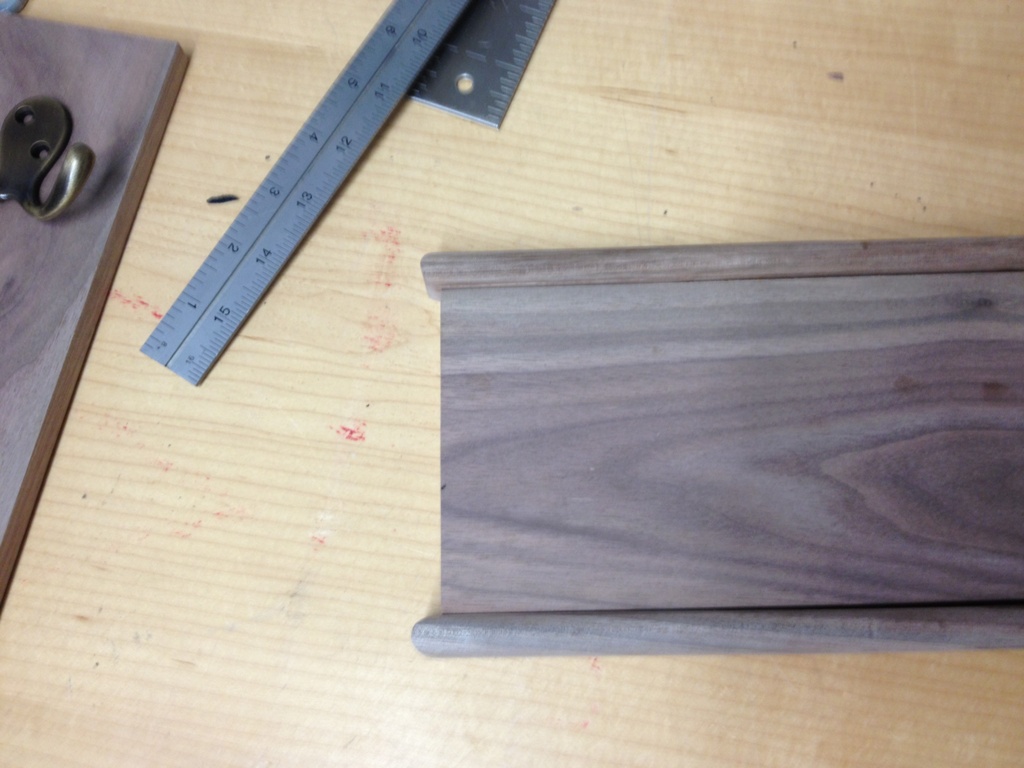
 I’m finally getting to the point where I can work on actual woodworking projects in my shop as opposed to just working on my shop. Oh my shop still needs work, that hasn’t magically come to an end. Still a lot to do and not enough time to do it and things are just hard to come by when you live on an island. But it’s close enough that I could make some boards to hold up some coat hooks I bought. I had a scrap of walnut left over from something I made probably ten years ago (and yes I moved it from Denver to here) and I really love making projects out of scrap wood. Resourceful, doesn’t let anything to go waste, and it’s free!
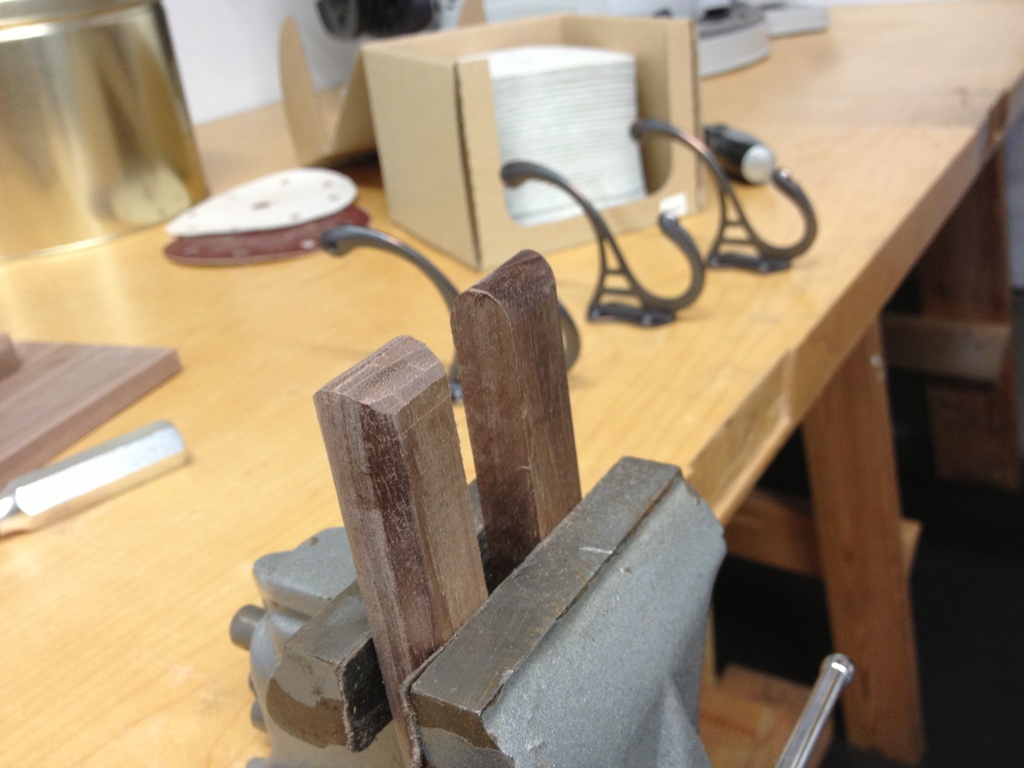 As you can kinda see, it’s just going to be a plank of wood framed on top and bottom by some half crescent trim. I used a router to make the crescent along the front but I hate to use the router against the grain on hardwood. I have a good router and good router bits but that’s a tough cut to make no matter what you do. I’d rather just do it by hand. Clamp the end pieces down and use a nice smooth bastard file.
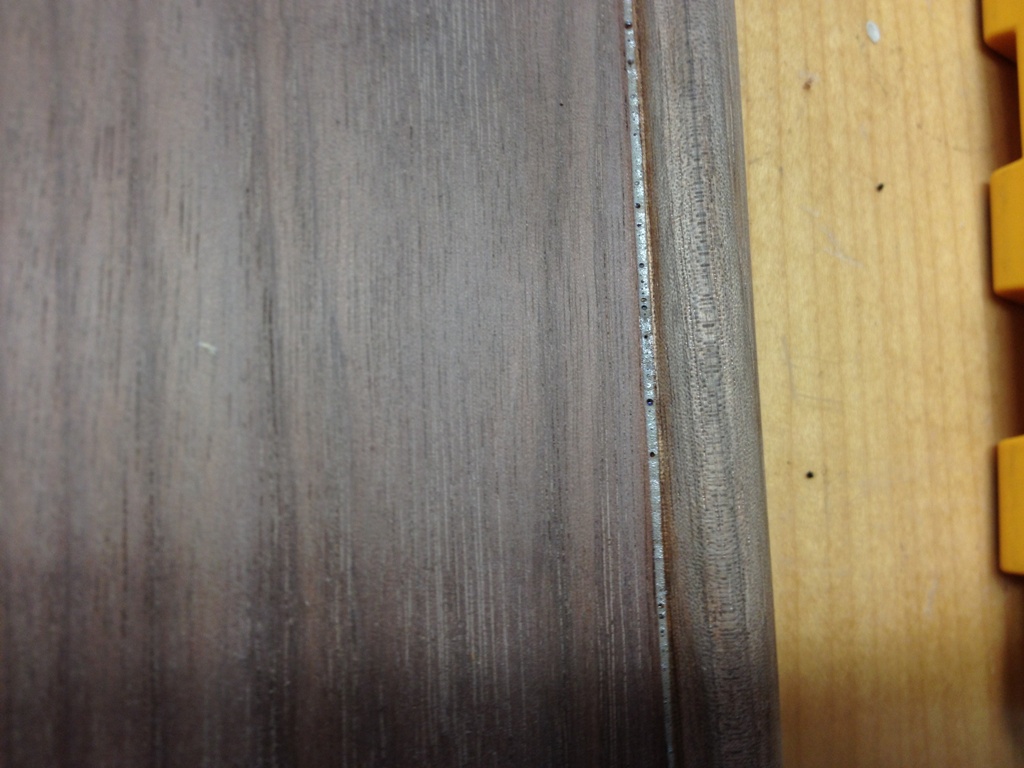
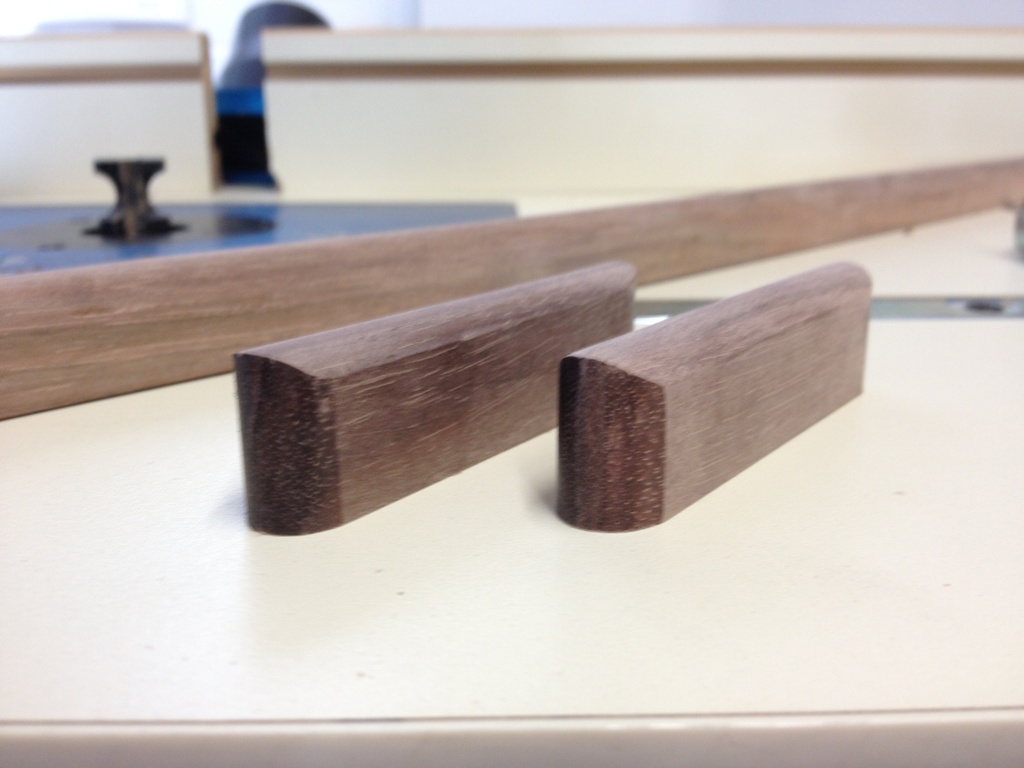 That’s the edge just with the file alone. No sanding required. In fact, sanding will make it dull. If you use a really fine file, it has an effect similar to a cabinet scraper. On hardwoods, the effect is a nice, glassy smoothness. They weren’t quite perfect, but this is just a thing to hang keys off of. I’m not making another statue of David here.
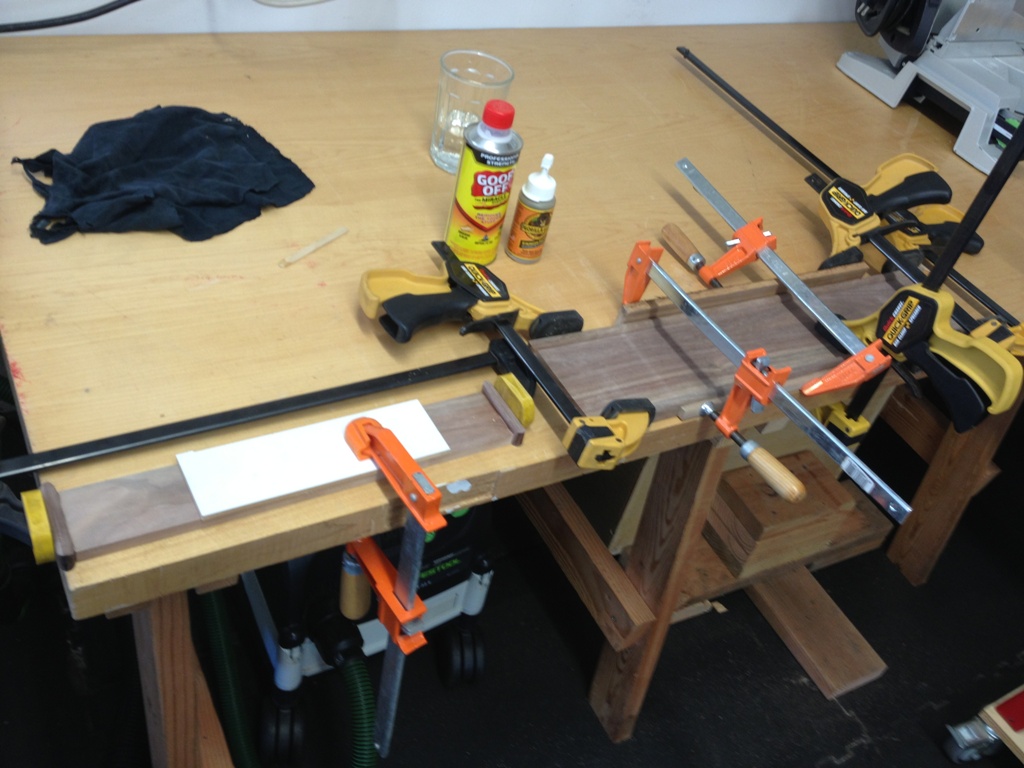 Glue up time is when you wish you had more wood clamps. Or different wood clamps. This is one aspect of woodworking I am really not that good at. Invariably I get something clamped out of place or I squeeze too much glue out or something just goes wrong. I’ve learned to live with it and just go with it. Every piece I make, no matter how simple or how complex, has anywhere from 2 to 55 flaws in it, and the only person who loses sleep over them is me. No one else ever sees them.
In this case, the flaw is that one of the crescent trim pieces bowed during the glue up, so it was not flush with the back. If you stand on a ladder and look at the finished coat hanger from the top you can totally see it. Otherwise, it doesn’t exist.
 Every bottle of glue warns me not to let the glue seep out when you clamp it. But it’s futile. A little bit seeps out and bubbles around the joints. I use gorilla glue for a lot of applications. Sometimes I use yellow glue, or aliphatic resin, but I usually save that for tongue in groove or mortise and tenon joinery. When it’s just flat grain to grain, I prefer the foamy, expansive gorilla glue. It’s not very user friendly but it is more merciful if you have some gaps in your work piece.
I’ve trained myself to just be good at scraping that excess glue out with a razor blade, or a small plane chisel.
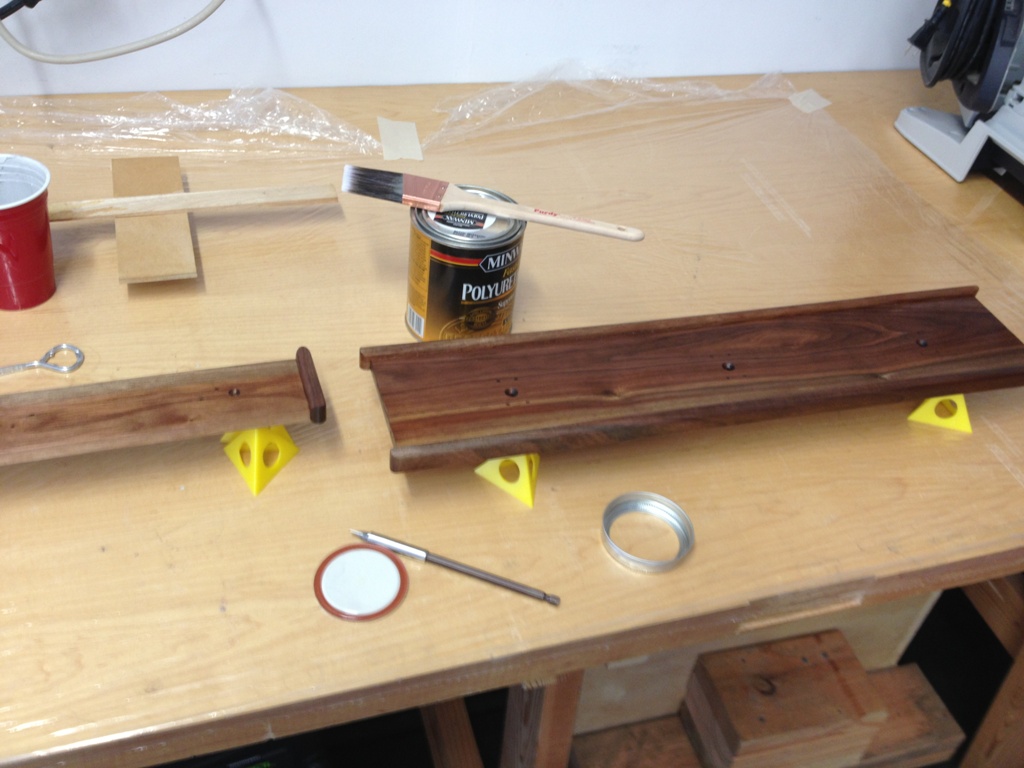 There are a lot of ways to treat wood to protect it from the elements, but my favorite for indoor projects is polyurethane. The secret is to give it 3-6 thin coats. Do not glop it on like makeup on a televangelist. The first coat of poly should just be enough to soak into the wood. Just get it wet. Let it dry a couple hours and smooth it out with a green scrubby pad and put more coats on every two hours. The more coats you get on it the happier you will be with the results. I use a brush for small stuff but a nice foam applicator is best for large flat surfaces.
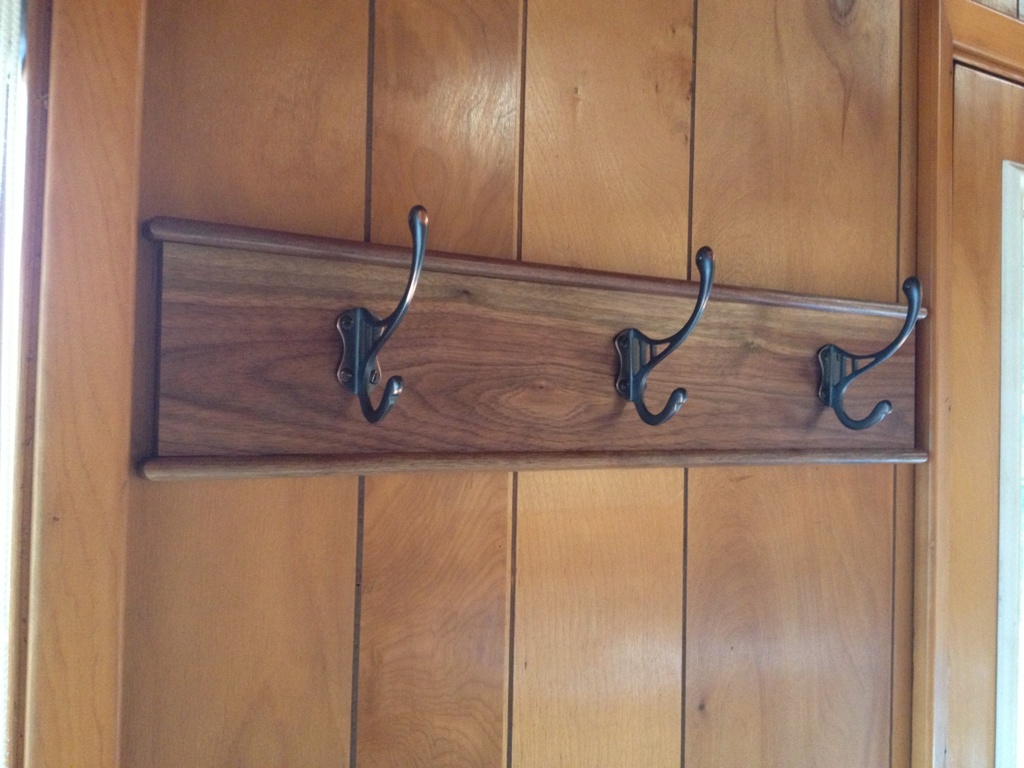
 The final product looks great. Naturally they make the paneling look even worse. And the rest of the house for that matter. But hey, it’s a step forward.
The board attaches to the wall by means of screws hidden behind the metal hooks. So you attach the board to the wall then attach the hooks to the board. Simultaneously clever and a pain in the butt to install. I was hoping to find a stud to secure the coat hooks to but no, they’re just anchored to that lovely 1/4″ paneling for now. Maybe someday.