Here’s a really quick and easy project to make some decorative switchplates and power outlet covers. It’s very simple and not terribly expensive, and can give you an eclectic look in your home.
Our home, like many old houses, came with a plethora of those cheap, crappy plastic switchplates. You know the kind. Loosely fitted with stripped and mismatched screws, shattered with tiny little cracks, splotched with paint, so dirty that you couldn’t clean it with sandpaper. I really hate those things. You can replace them, of course, either by buying the same crappy plastic plates for about 19 cents each, or you can get them from the high end restoration websites and spend about 19 dollars each. Or anything in between. You get what you pay for. The expensive ones are really nice, but when you have 64 plates in your house it really adds up.
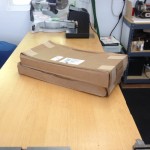
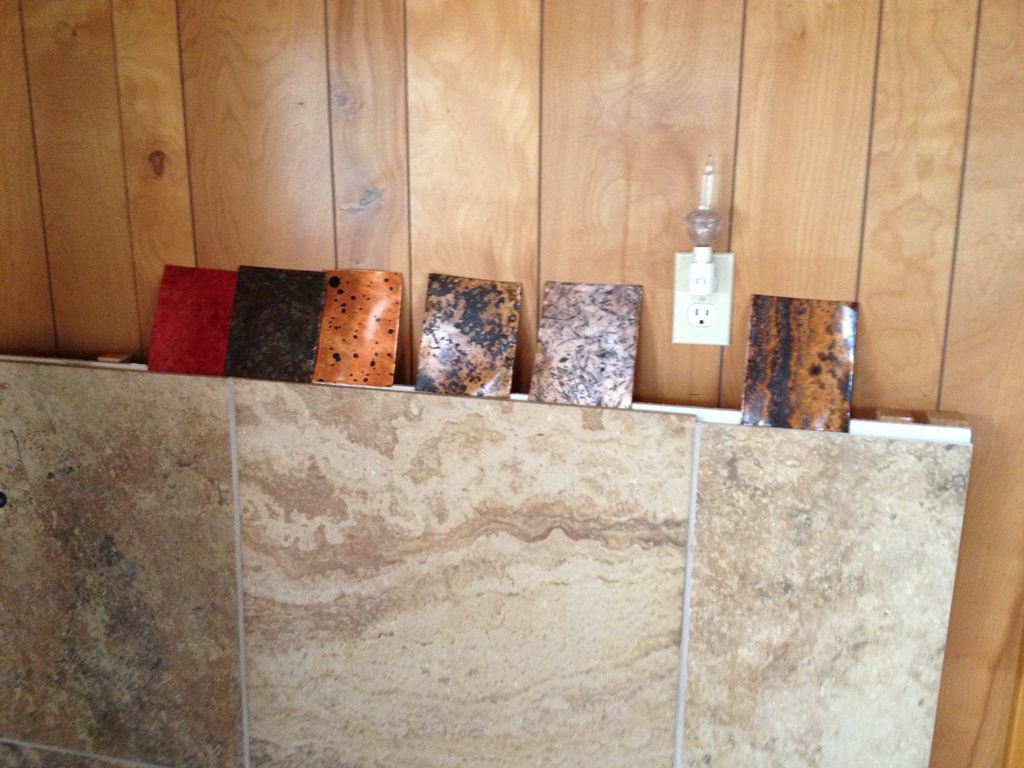
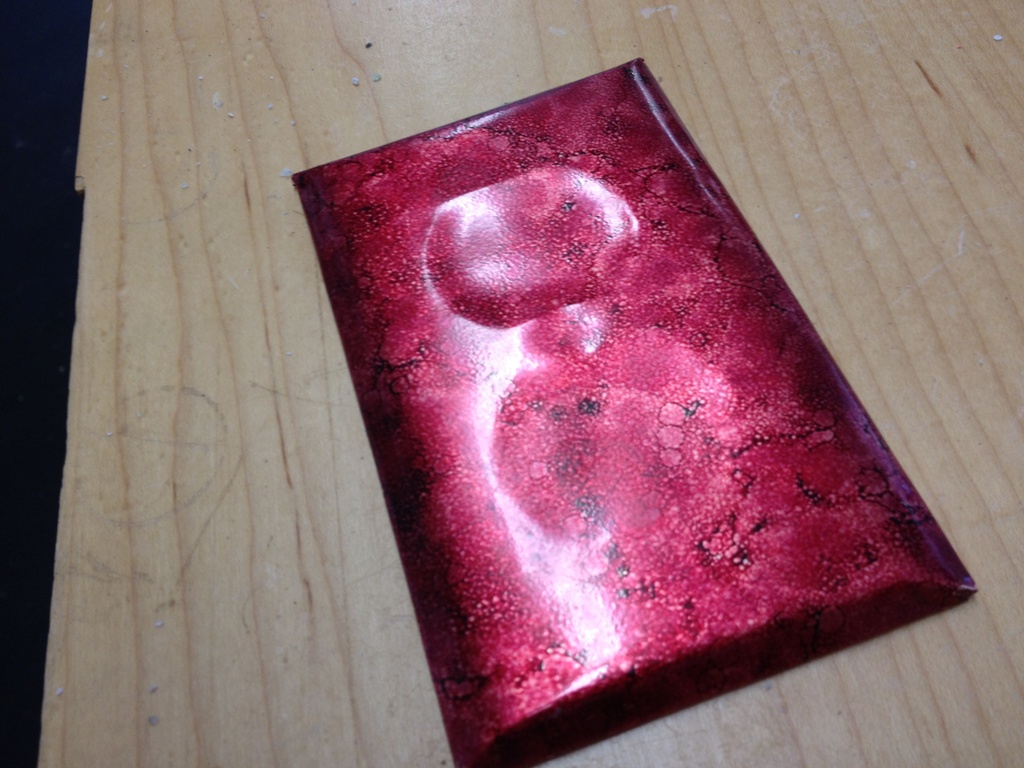
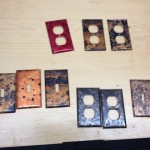
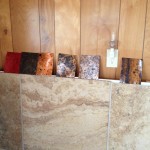 Well, we were looking for copper sheets for a completely different purpose and we ordered a sample pack to see what the colors were like. We got a variety of 36 gauge copper sheeting, each one with a decorative finish on it. It’s like malleable foil, soft but durable. The samples cost money so I considered them mine to do with whatever I pleased. I decided to use them to cover some switchplates around the house.
My only real concern was that the switchplates would look just as cheesy and stupid as the ones people cover with wallpaper. Well, they don’t look quite that cheesy. Copper sheeting is way cooler than wallpaper. Okay, I admit the final product does have a bit of cheese factor in it, but it sure beats the craptastic plastic ones I replaced.
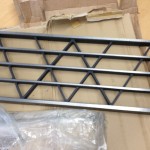
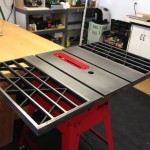
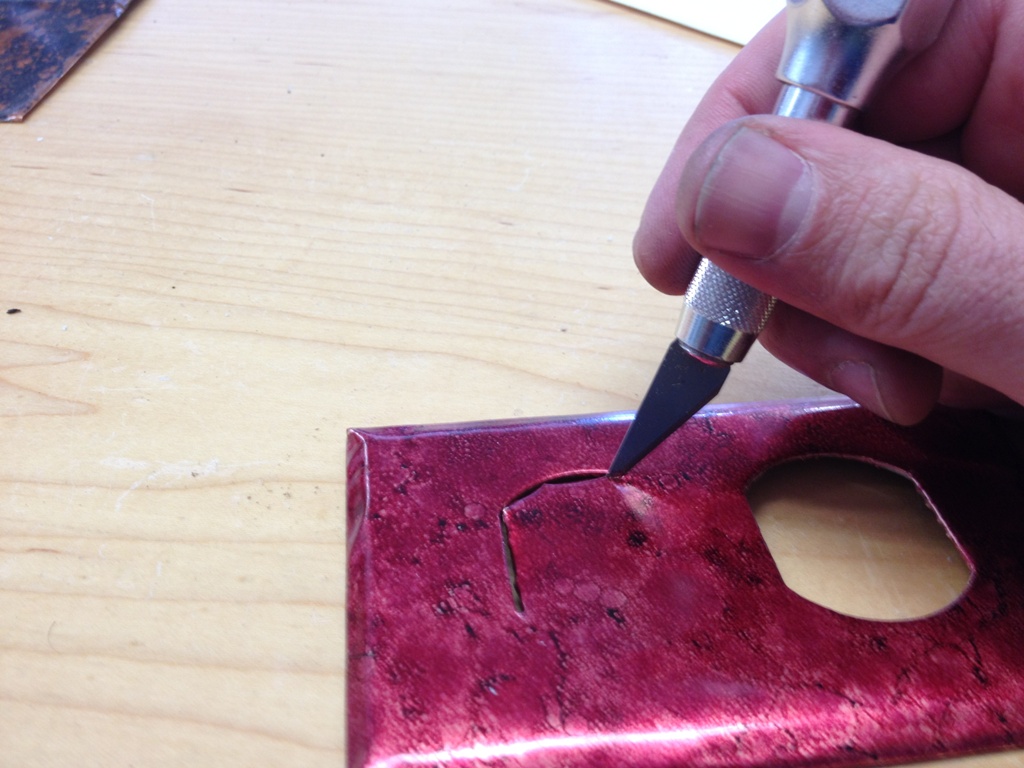
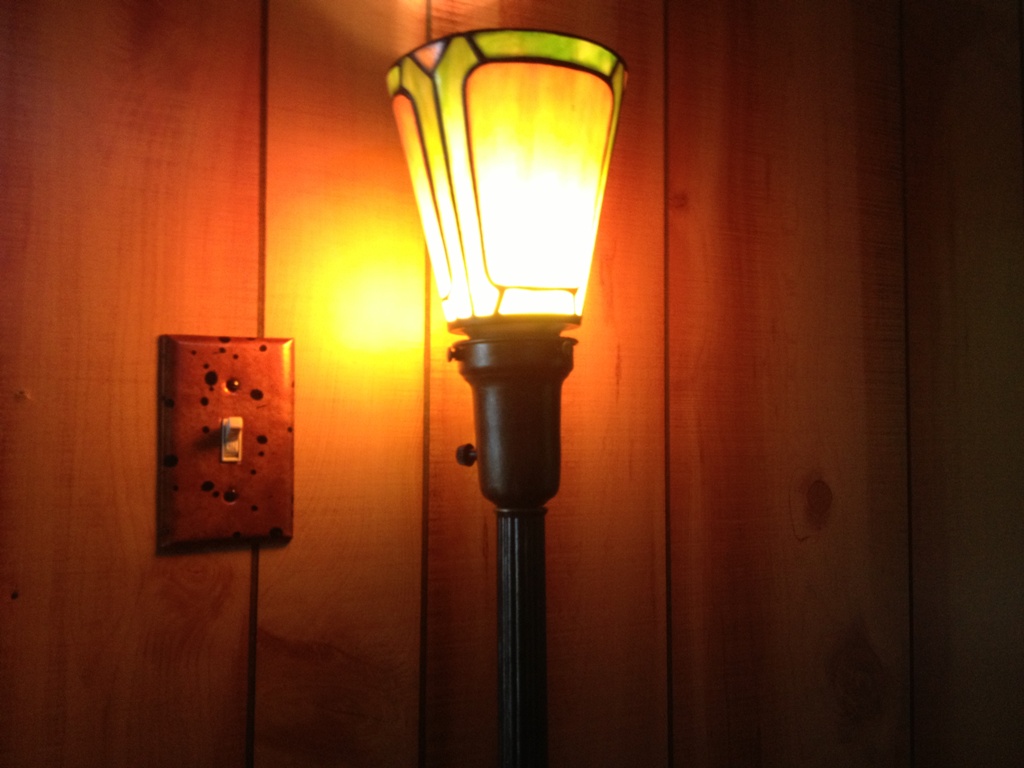
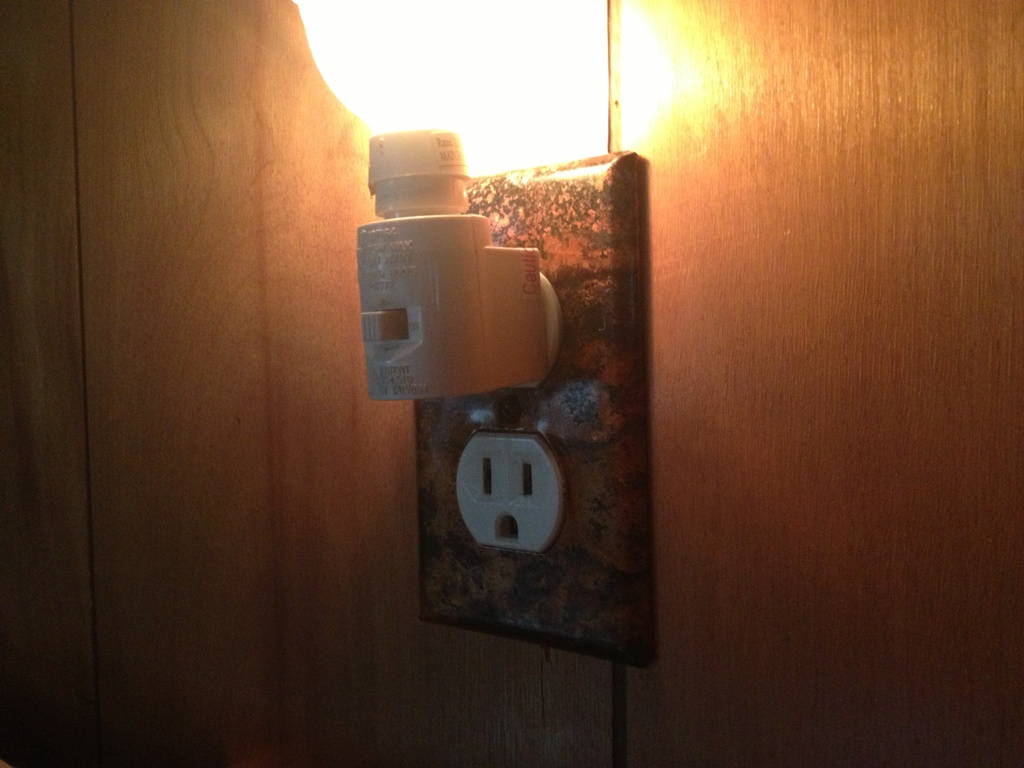
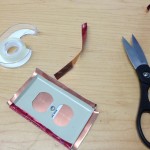 Like any good handyman, I have a small collection of existing switchplate covers of various sizes and materials. It’s a good idea to use metal ones for this purpose. You’re going to form the copper foil around them and plastic just won’t take the beating. The cheap metal ones retail for about a dollar or two so it’s not like some huge expense. Anyway, use metal ones for the backbone.
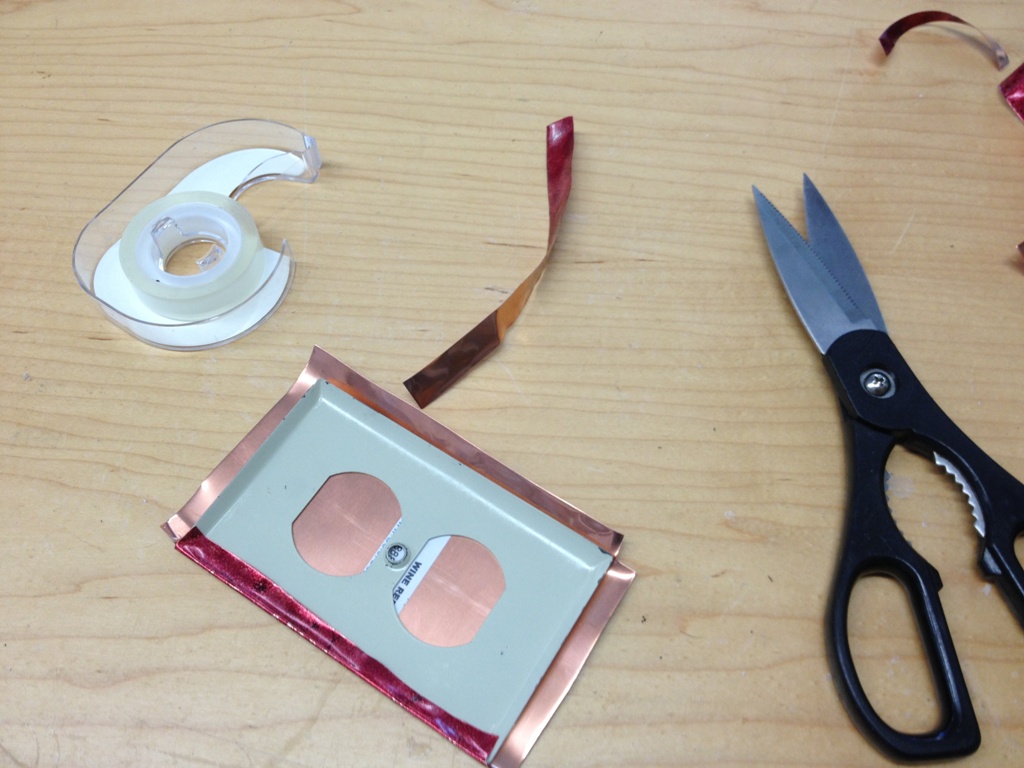
 Once you wrap it around, you can press it down to kind of see the outline of the holes you must cut. This copper foil cut really easy; scissors cut through it like paper and all it took to punch out the holes was a dull x-acto knife. Don’t use your pocket knife; the copper will dull it very quick and you’ll be sharpening it for two hours to get the blade right again.
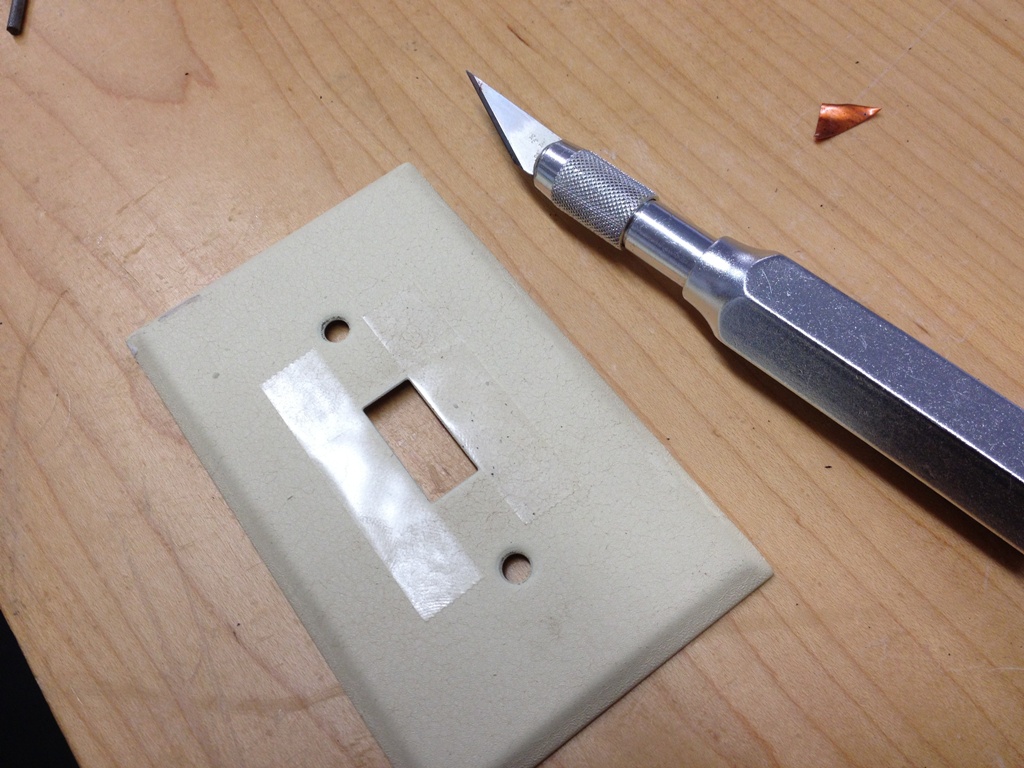
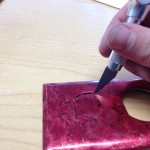 Just follow the edge and saw your way around and it should look great. Again, this is why you use a metal backbone.
You don’t need to use an adhesive, but it’s not a bad idea. I did one without any adhesive and the copper wrapped around sufficiently to hold together, but over time it might fail, and I wasn’t very happy with it. A spray adhesive would probably work best but that’s messy and I was all out of spray adhesive so I used some double sided tape that I bought two years ago and never found a use for. That’s why I buy things like that. It may take two years but you never know when you’ll need it and if you have it when you need it you’ll be glad.
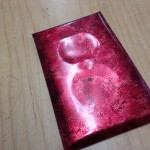
 The only drawback is the tape is thick enough, believe it or not, that its contour will show through the foil if you look at it from a certain angle. Had I known, I probably would have run to the store to buy some spray on adhesive. Yeah, I’m kind of a perfectionist. But I’m also a realist. I’m making really cool switchplate covers for about $3 each instead of spending $19 each at some fancy pants restoration store.
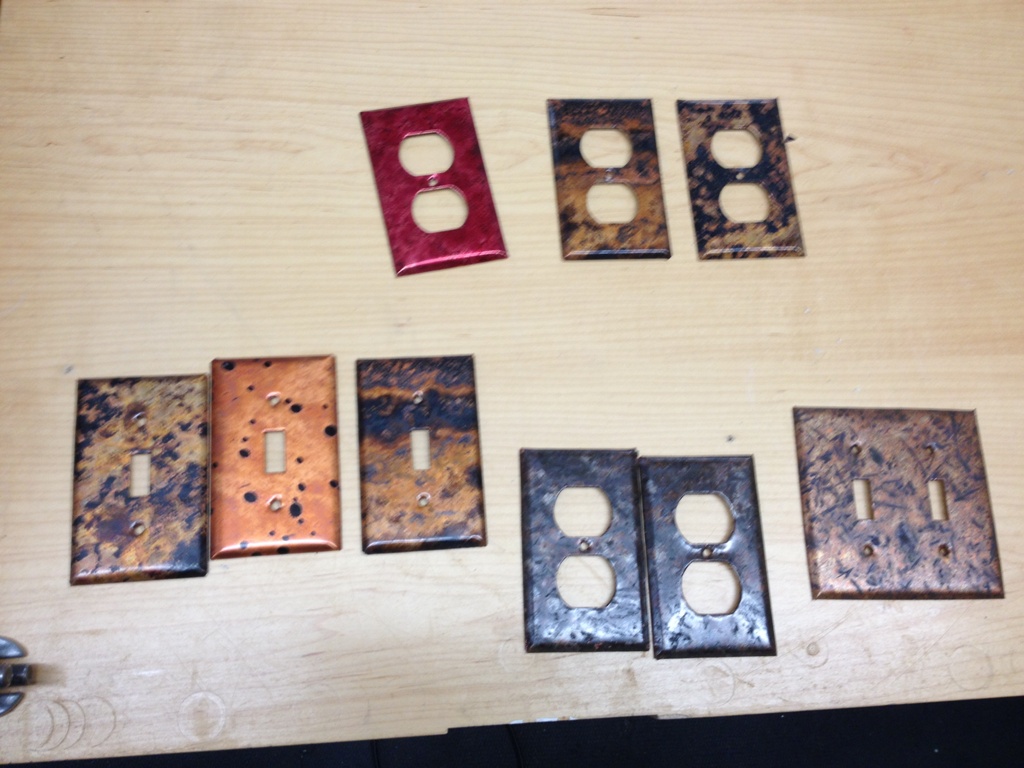
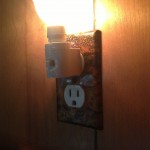
 The final product looked great. I mean, not nearly as cheesy as wallpaper covered switchplates and a vast improvement over the shoddy plastic ones I had. One of the covers I replaced was this resin bas-relief of a moose and a tree that looked like it was a rejected prop from the Red Green Show. I’d post a photo but it’s too embarrassing. I didn’t have enough to do all the switchplates in the house but I got most of the visible ones.
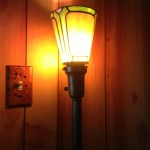 Sadly, they make the paneling look even worse. But the paneling is not long for this world. Never fear, it will soon come down, replaced by sensible drywall and real woodwork.
 Anyway, I thought that was a good use of the samples we bought. Adios, amigos. Until next time!