

My shop needed some organization. I didn’t realize until now how hastily put together everything was. I didn’t have any time to spend on the shop because I needed to get the house put together. Now that the house is habitable and, dare I say, finished, it’s time to make some storage and organization out there. I have so many homeless, orphan tools in boxes and I don’t even know where they are. Several times I’ve bought a duplicate tool because I forgot I had it. Well, now, maybe some places to put things so that they’re accessible, it’ll help.
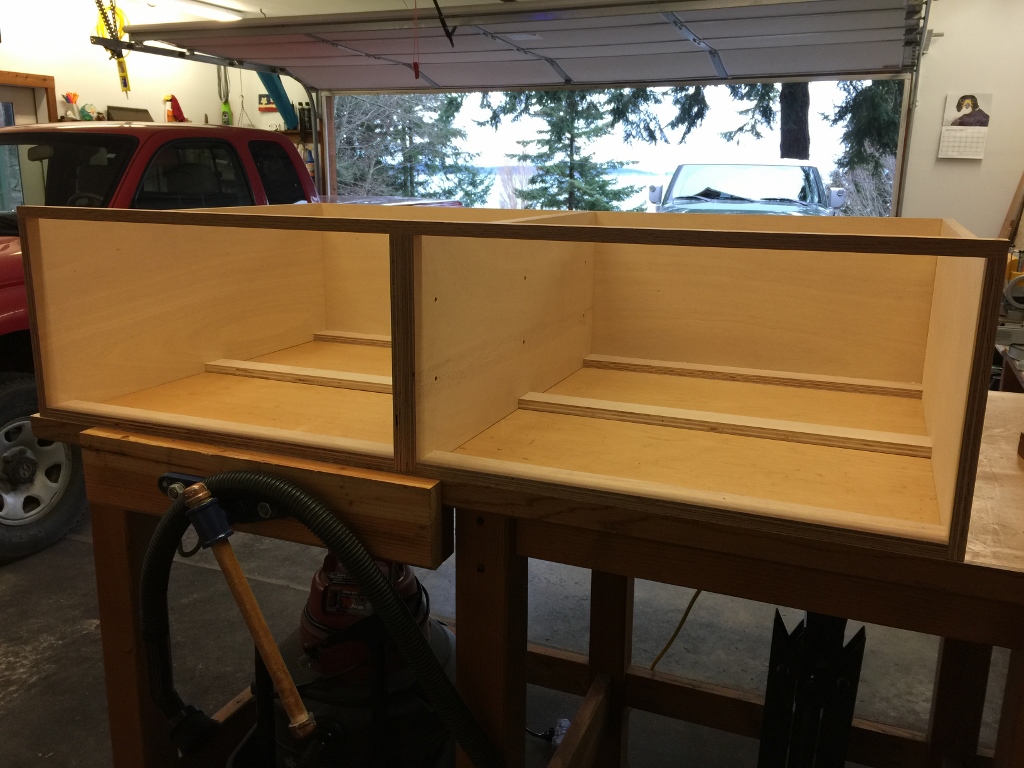
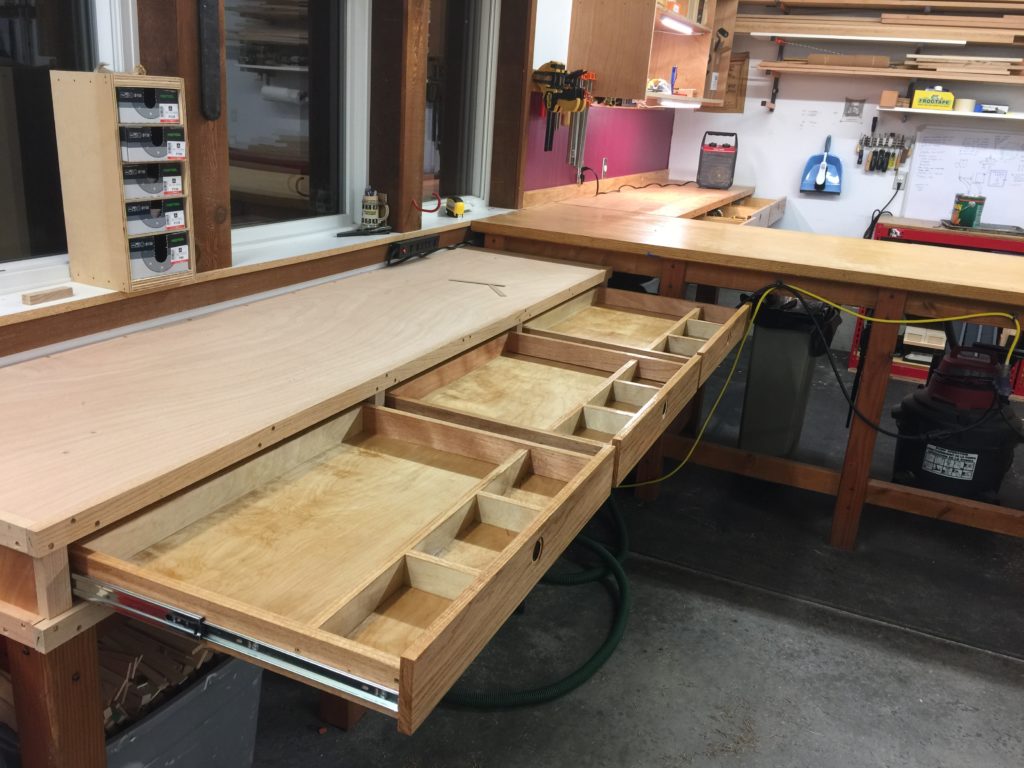
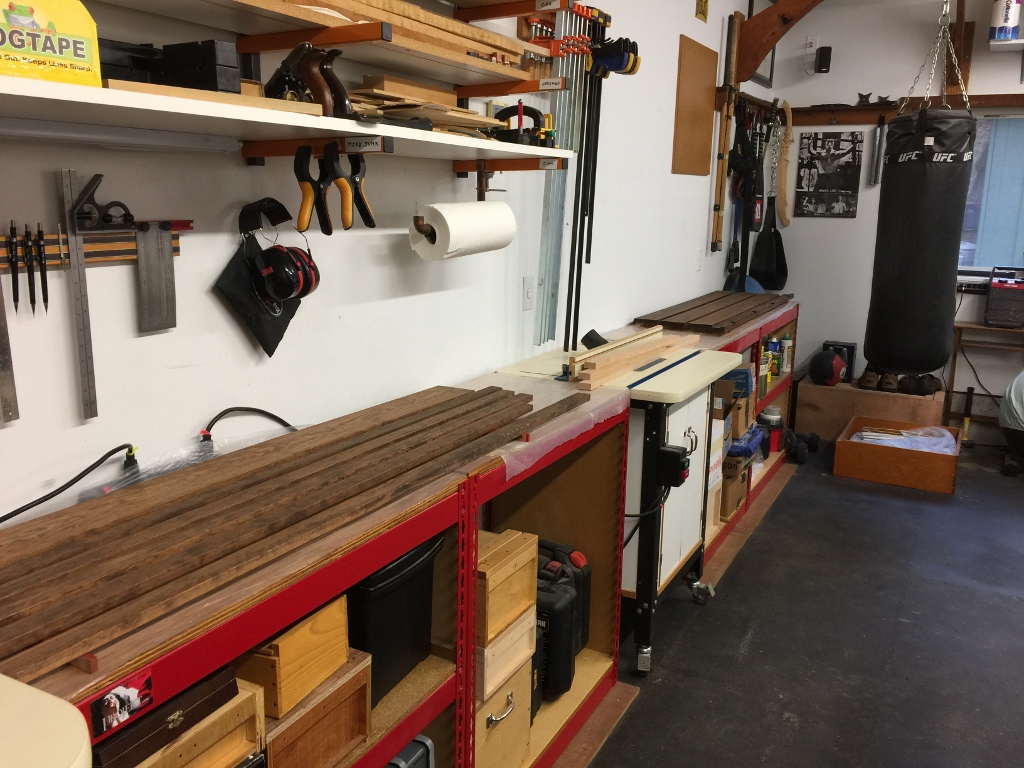
As part of all this, I’m raising the heights of my side tables a bit, and to do that I’ll build some drawers to go on top of them. I’ll get more storage space, and I’ll be able to use all the tables to support large pieces of wood when I’m cutting them.
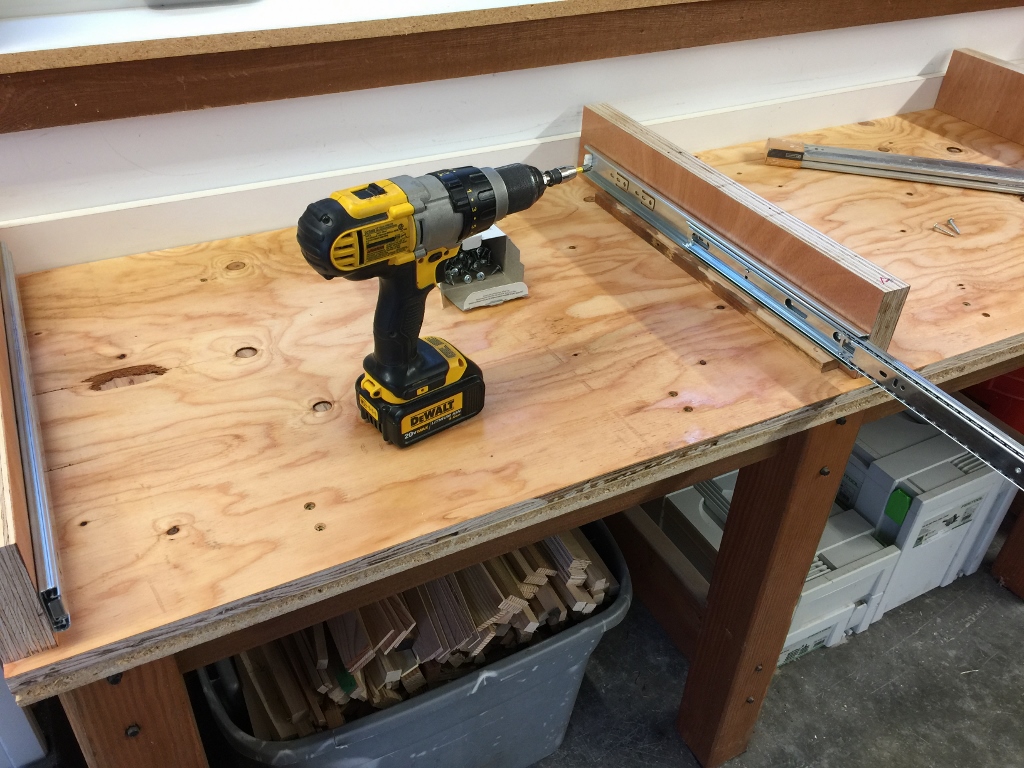
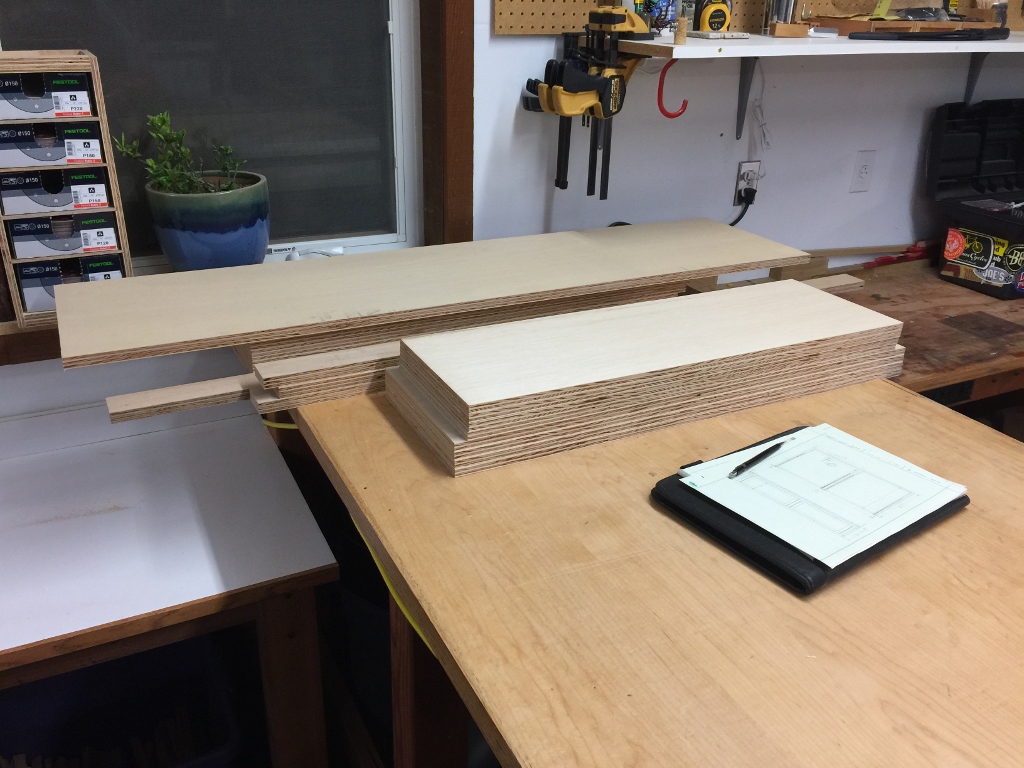
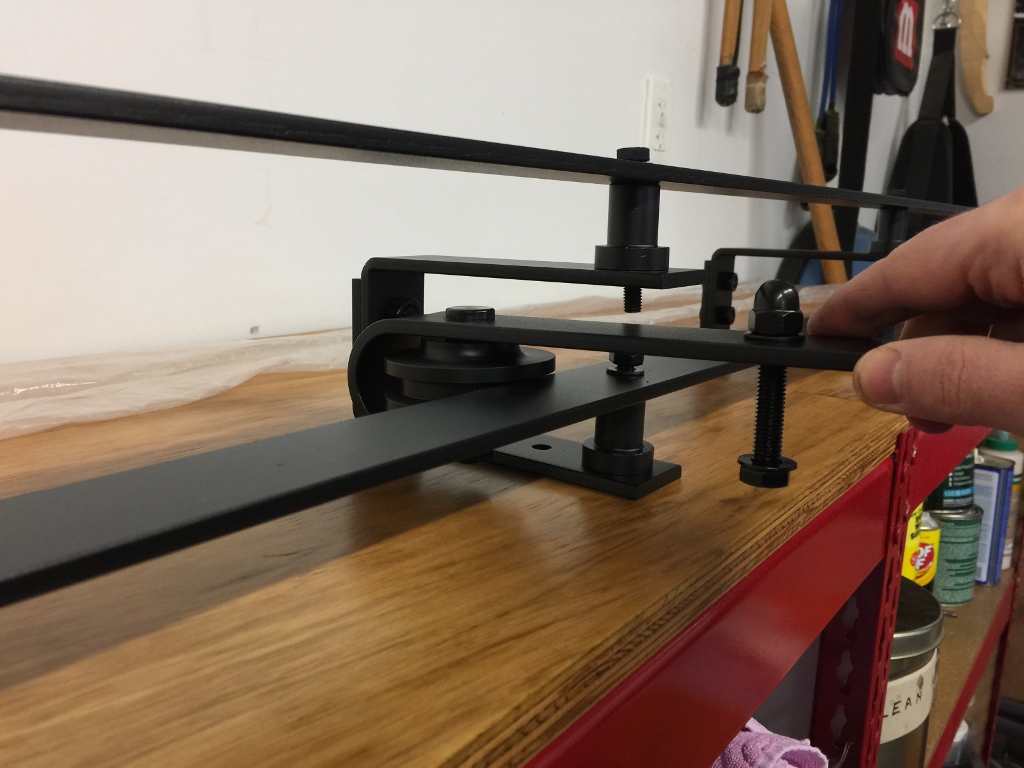
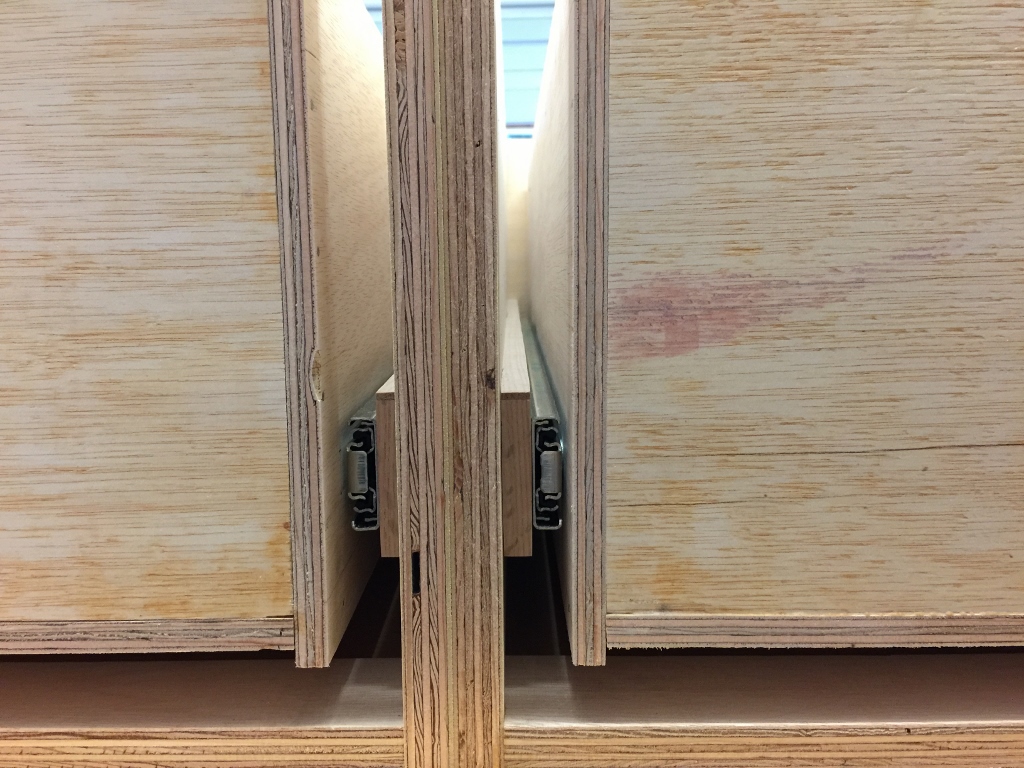
It’s easy to install the drawer hardware if you do it before everything’s assembled.
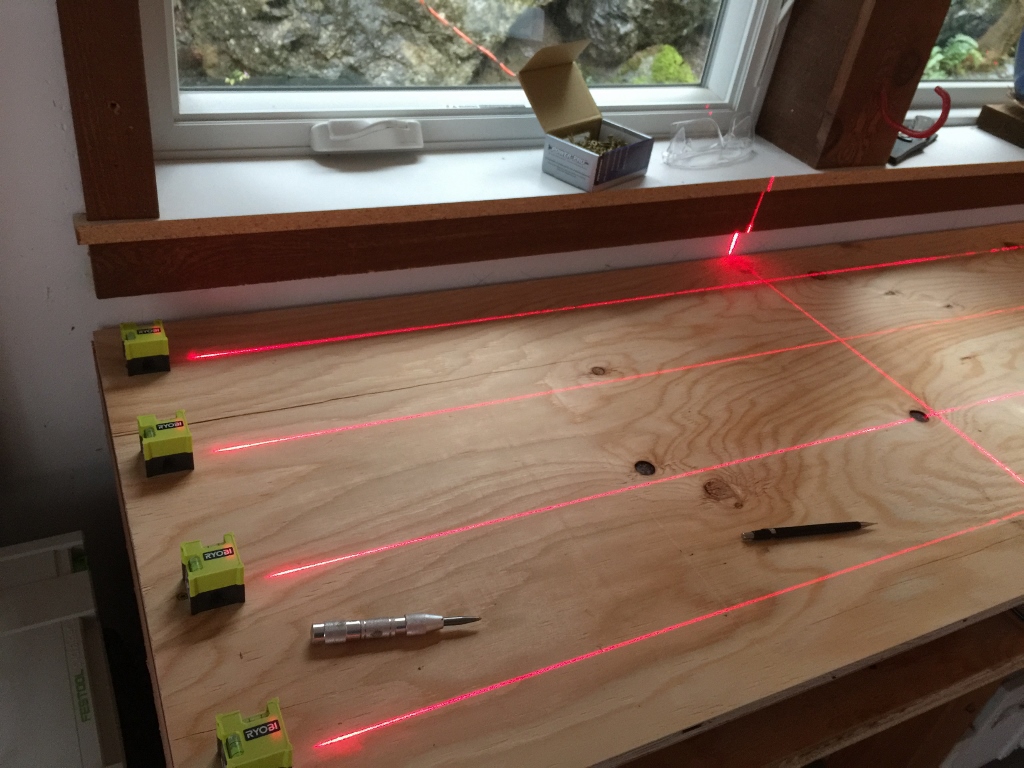 Not sure if lasers make anything any easier, but it is more fun.
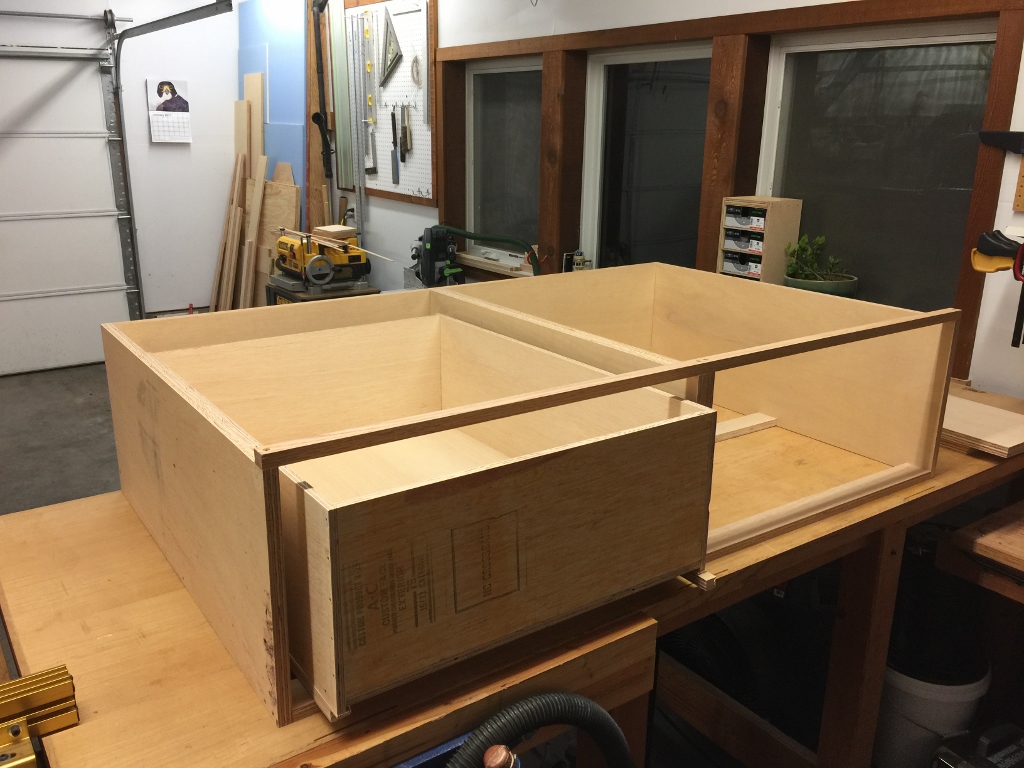
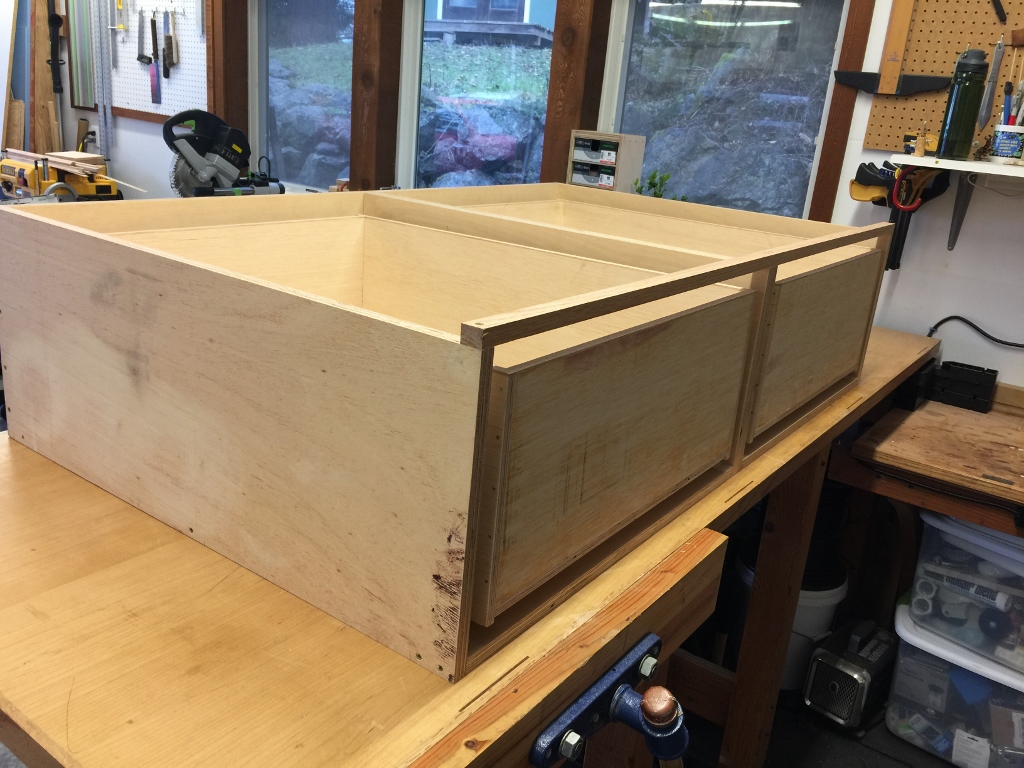
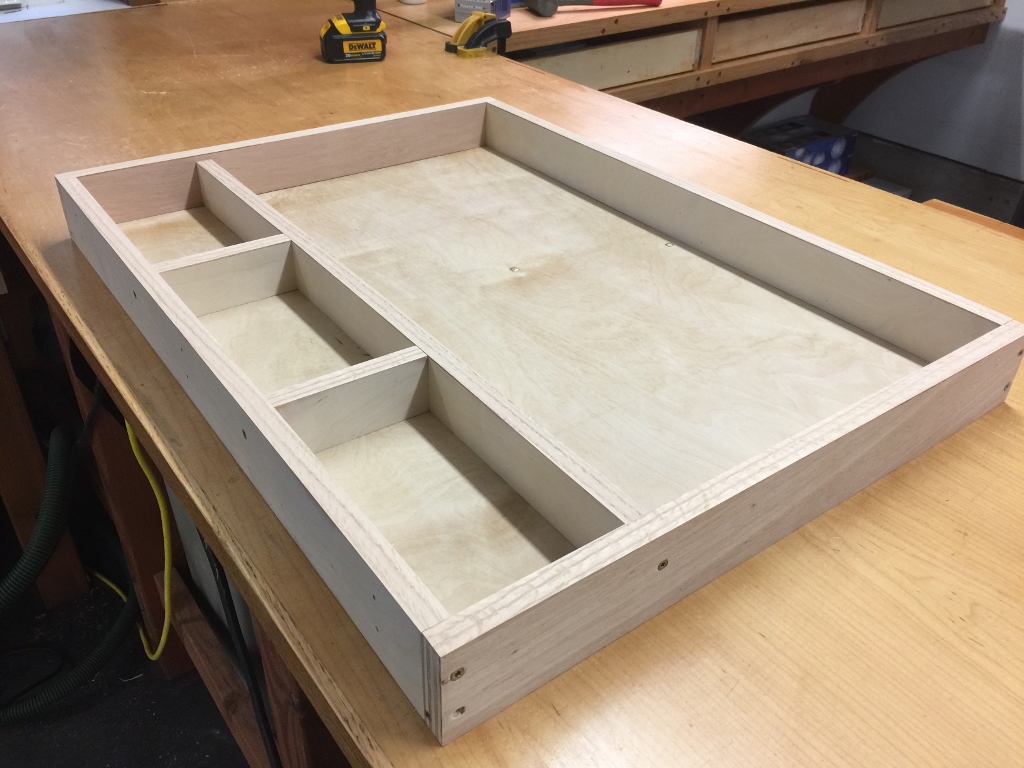 The drawers are pretty solid, and I made some partitions in front to help sort things out. It’s a pain to do, but worth it in the end.
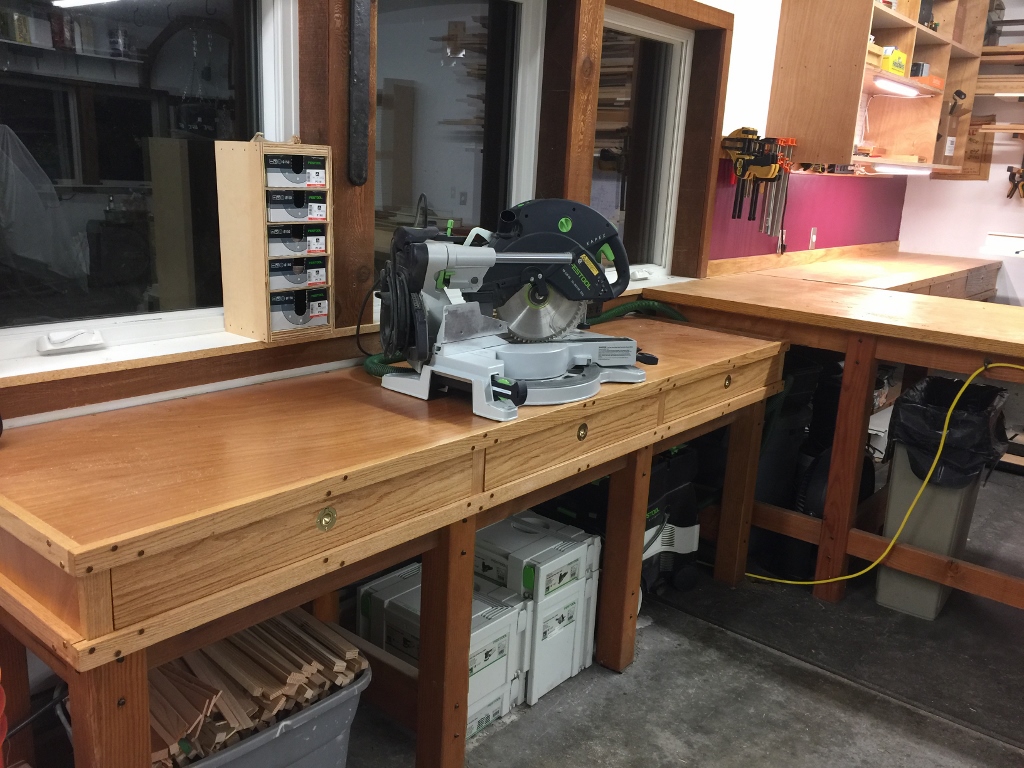
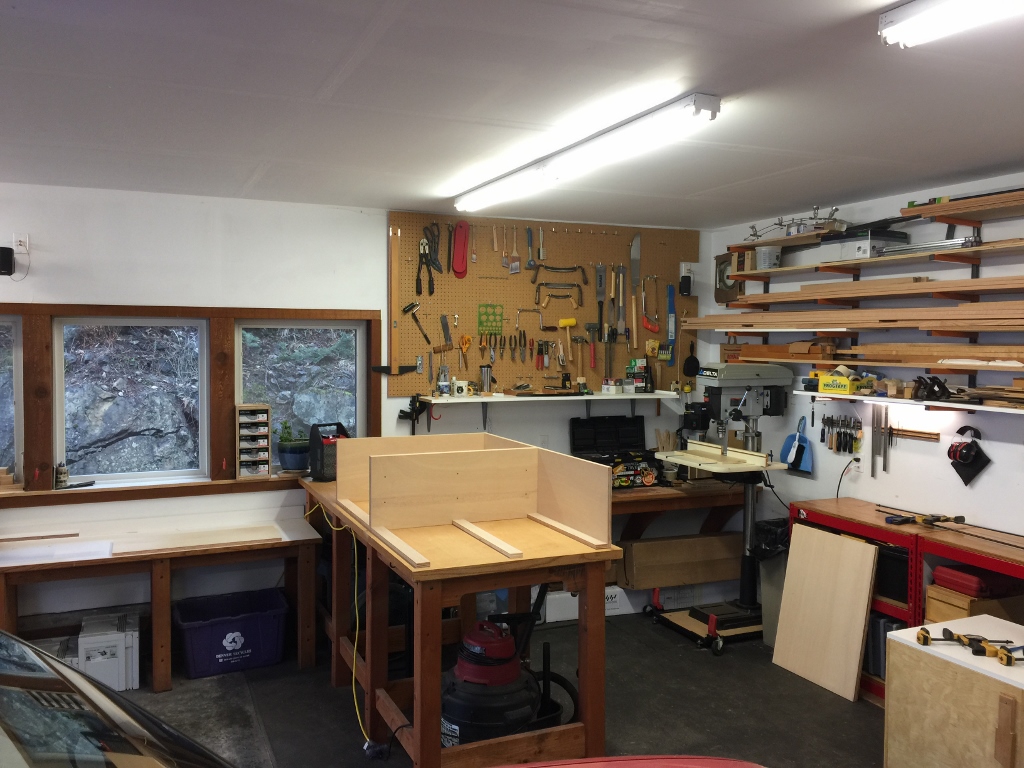
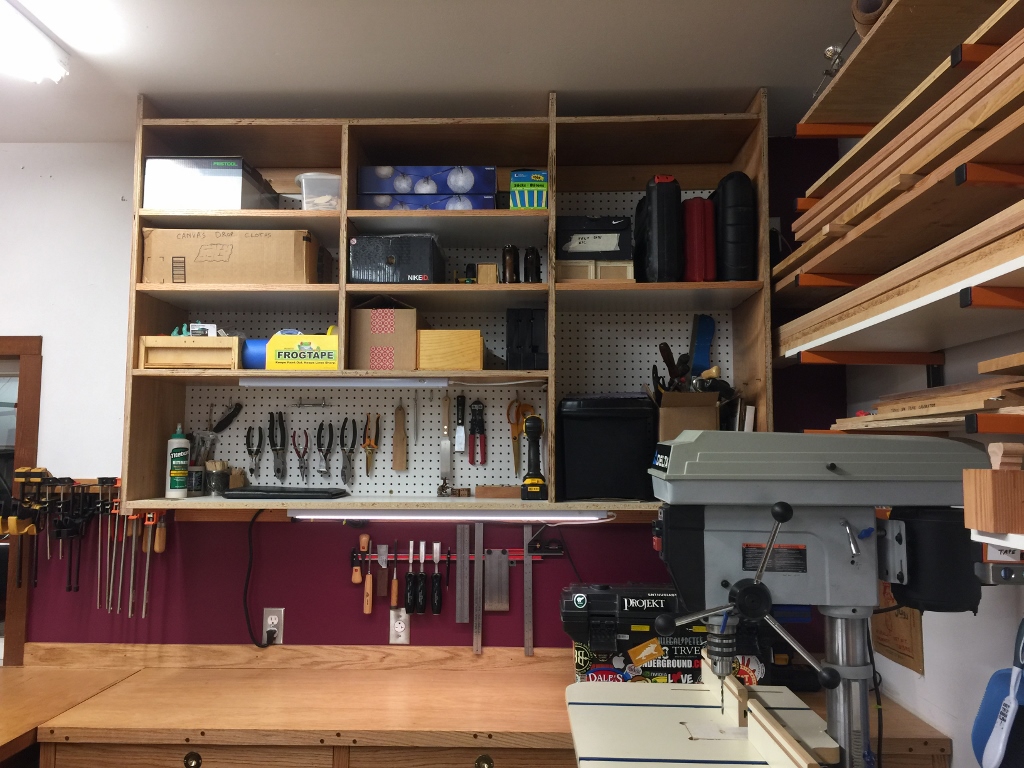
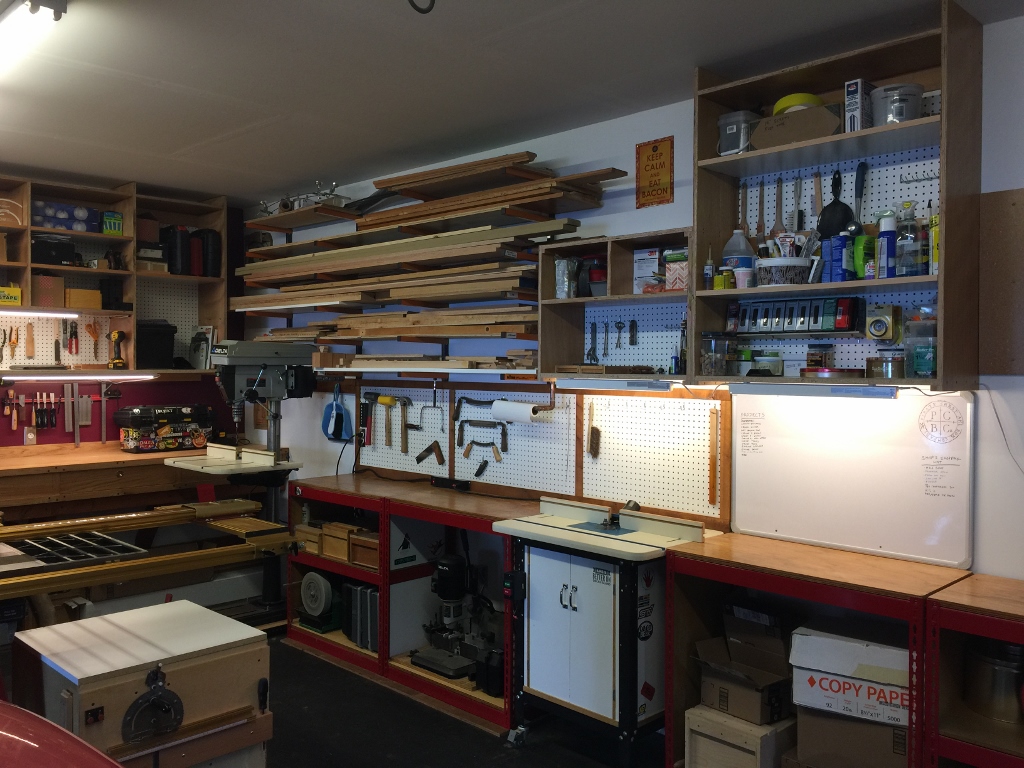
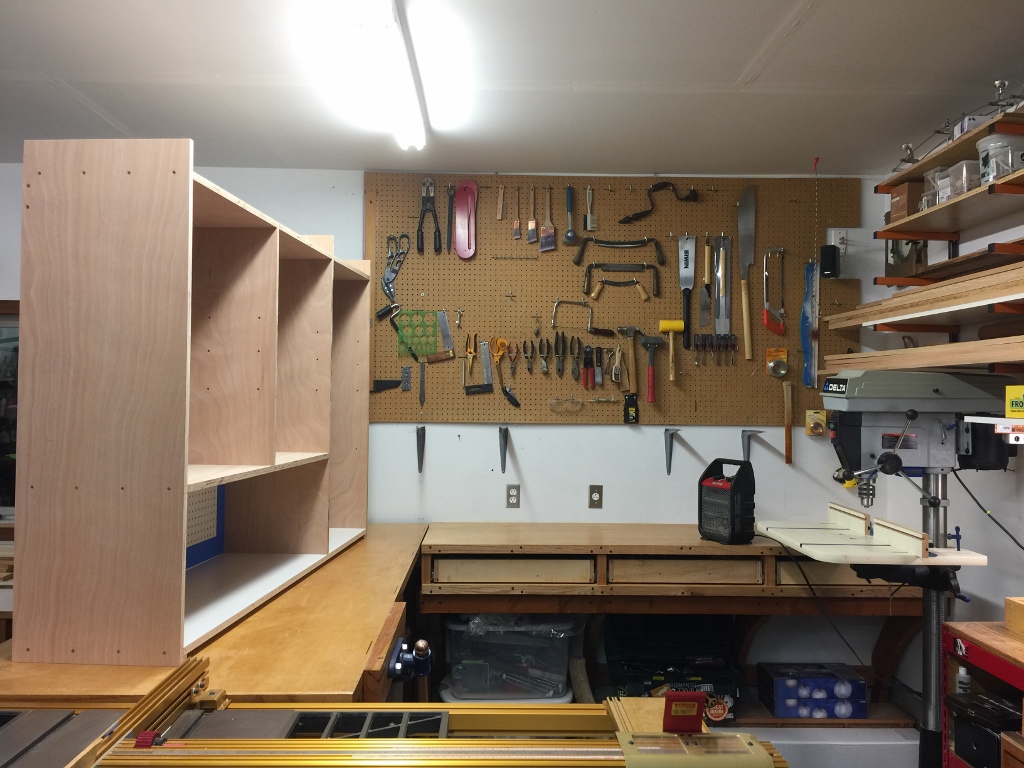
Now I’ve got a little Festool work station going on. And when I put a piece of wood on that saw, it’s the same height as the tables over to the right, so I can cut large pieces and they’re fully supported.
A little paint along this wall made a big difference.
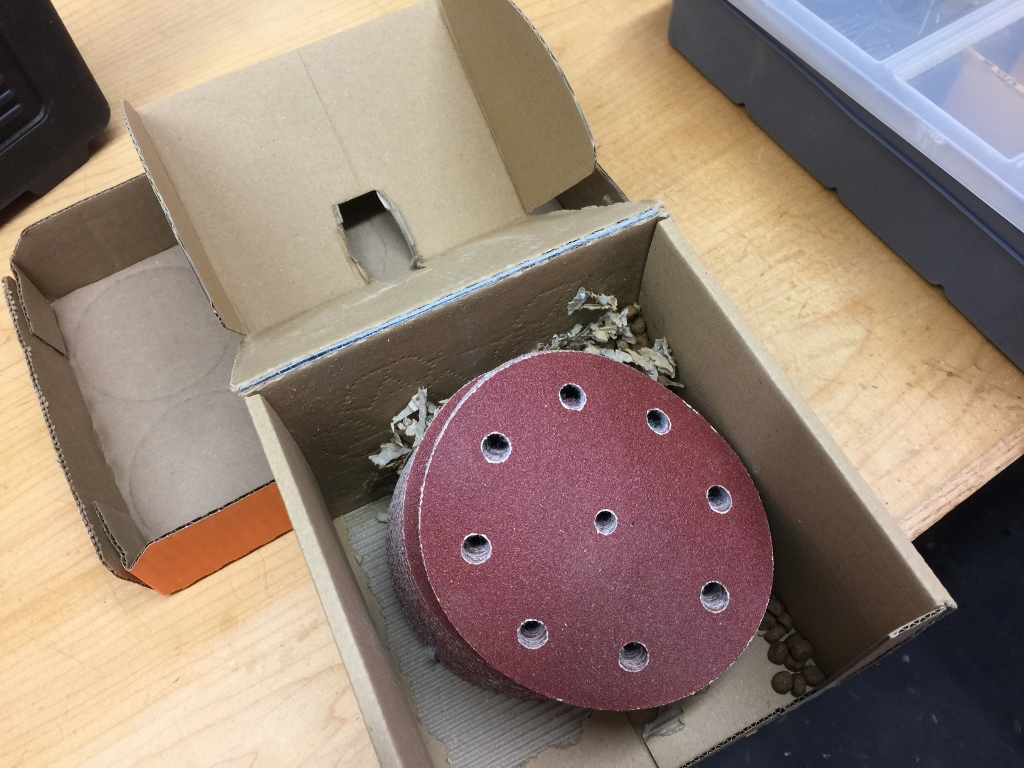
Every once in a while, I open an old cardboard box and find some torn up cardboard and a small pile of cat food. A mouse was nesting in this box. I think he was gathering cat food to have enough to survive a zombie apocalypse.
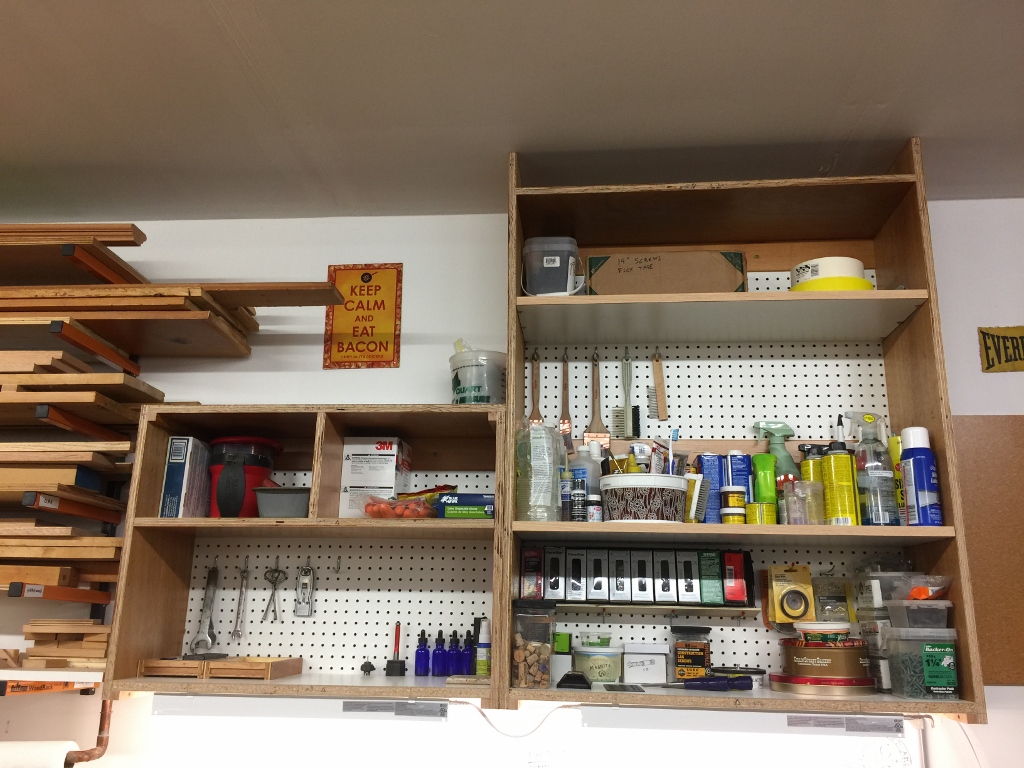
More cabinets went up over the router table.
Even more cabinets. And no, I’m not done. I still have about 22 square feet of wall space I can cover with more cabinets.
 Yeah, I know, I get more excited about shop cabinets than most people do, or should.
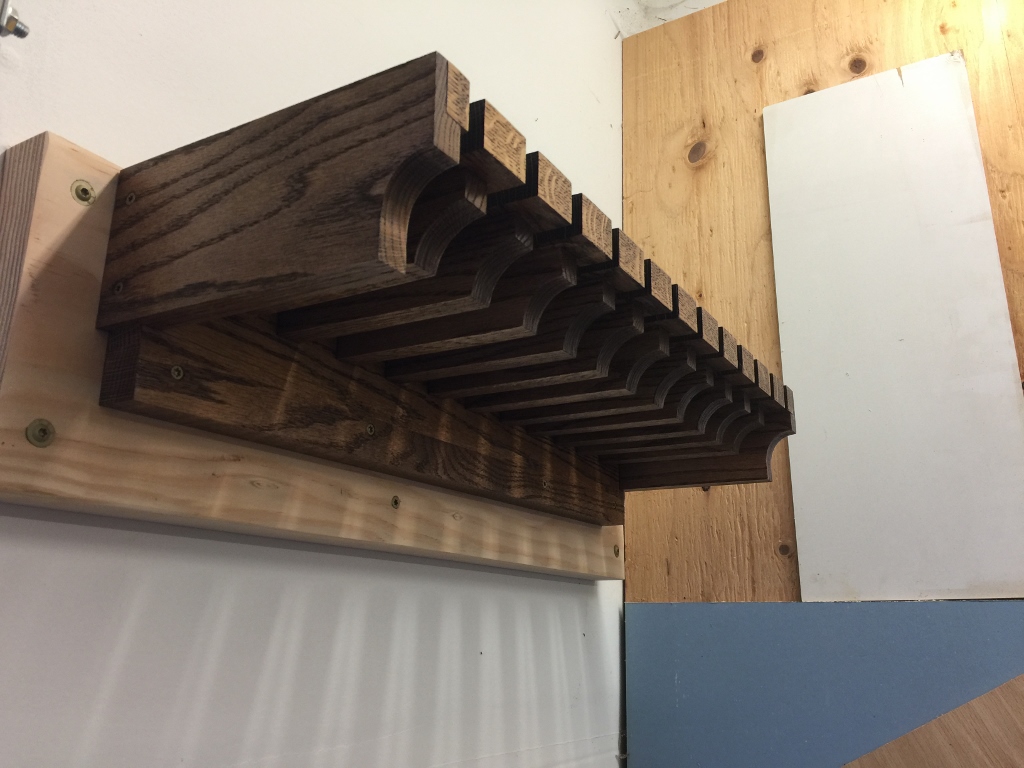
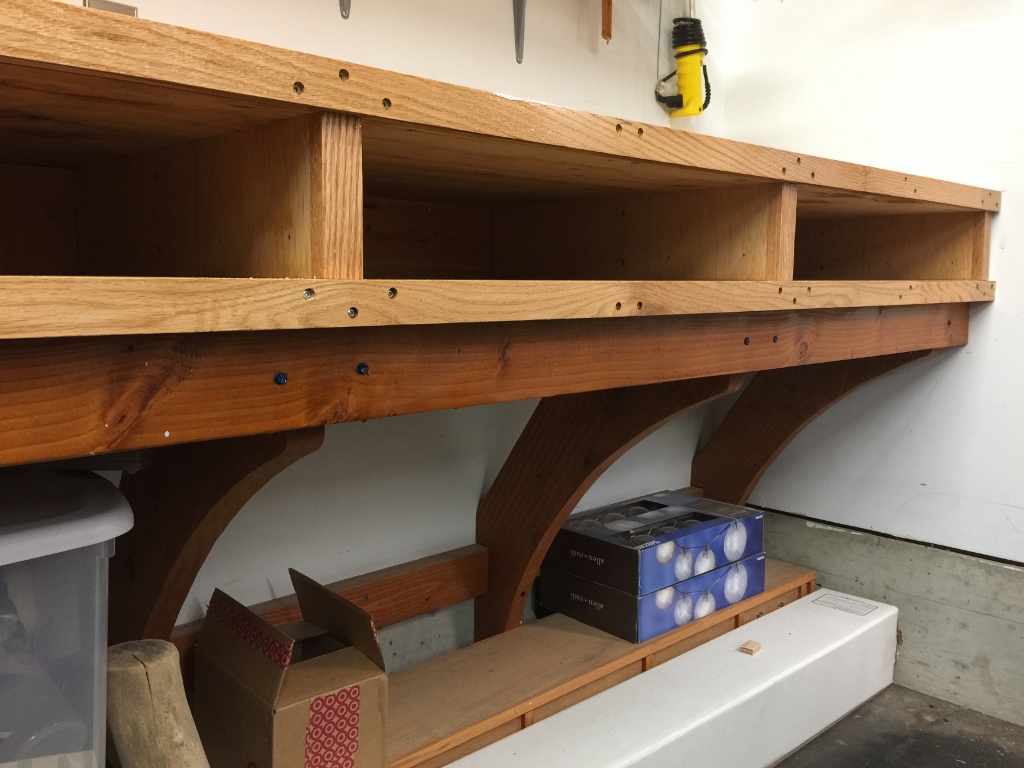
I’ve been badly in need of a new clamp rack. Of course, I make the biggest, heaviest monster clamp rack that I can. The top is 1″ thick solid oak and because I didn’t think that was strong enough I put some 1.5″ thick brackets underneath to reinforce them.
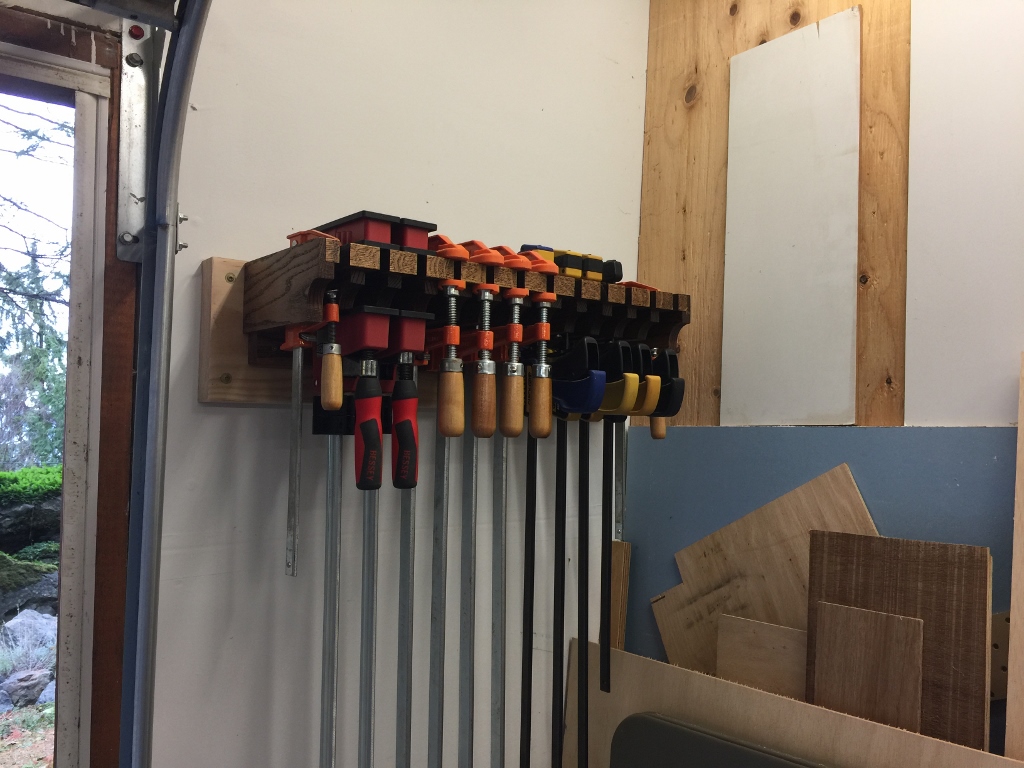 Unfortunately, no room for expansion. But that’s okay, there’s no room for another clamp rack in the shop. Well, I’ll have a separate rack for small clamps.
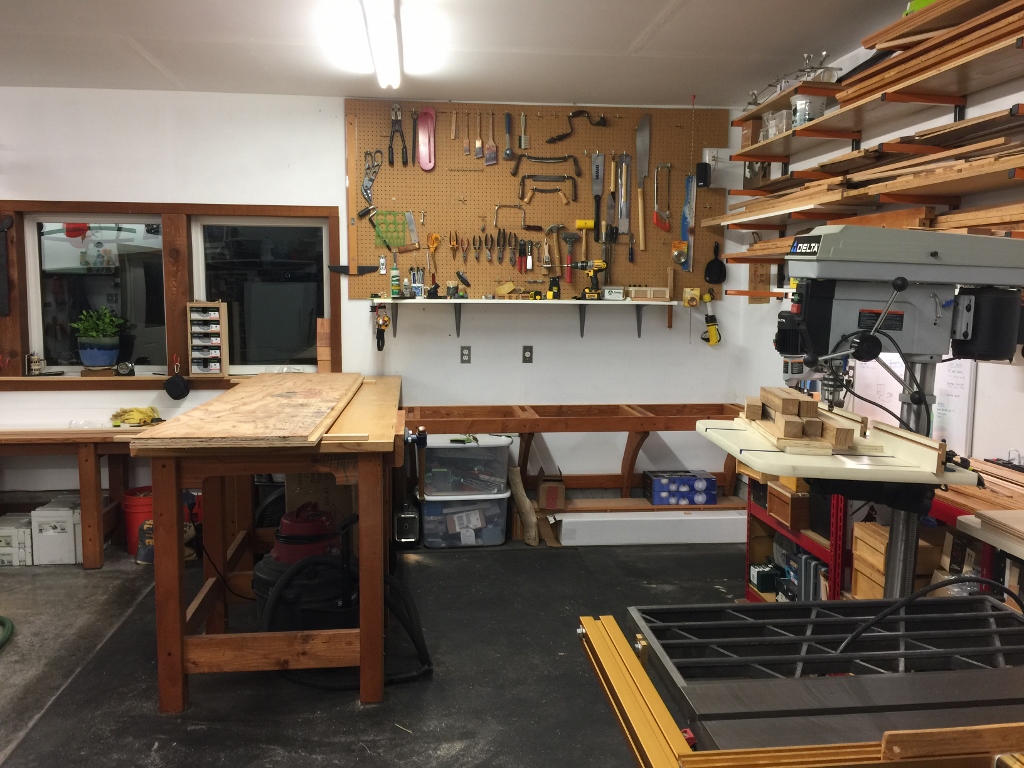
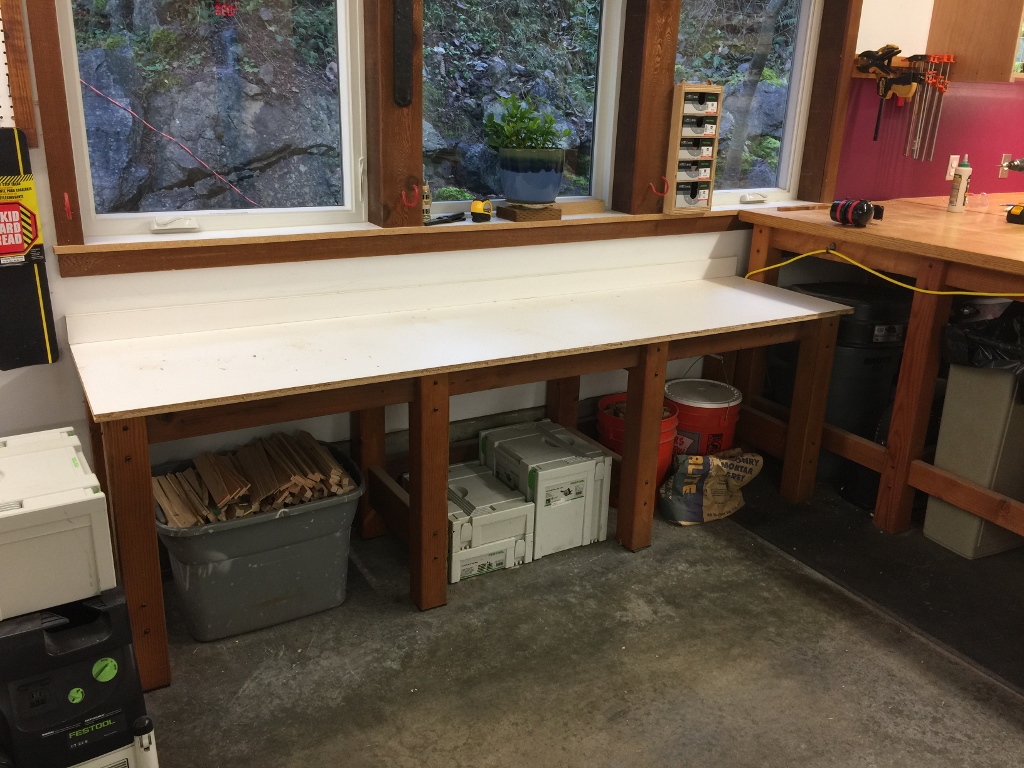
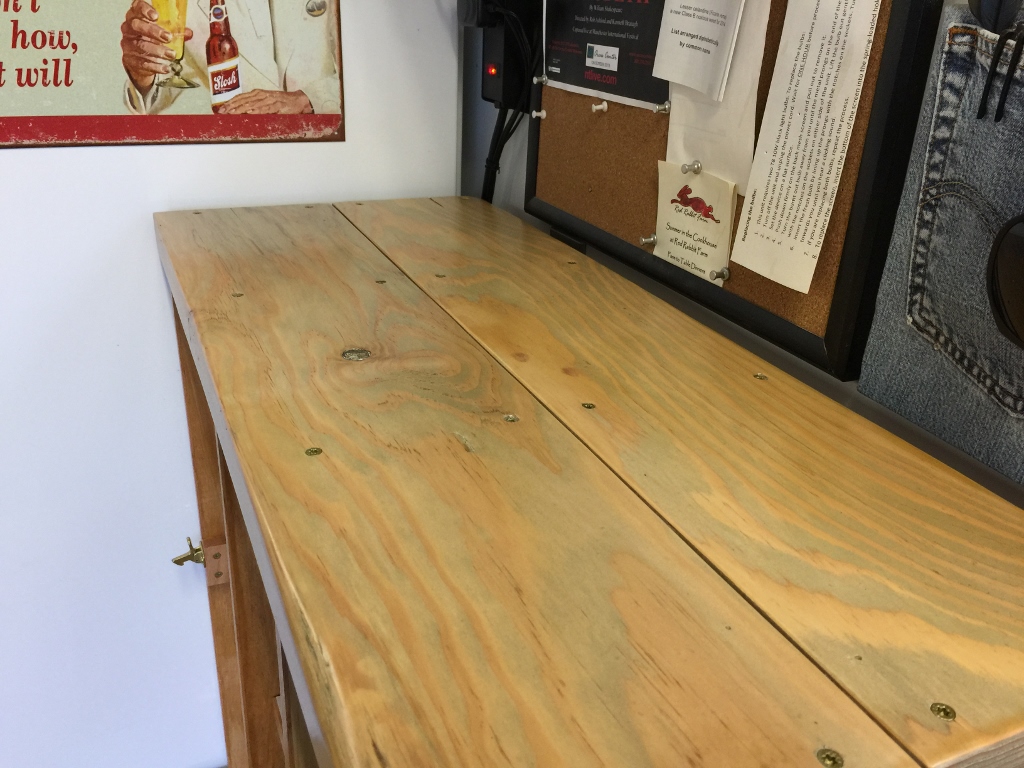
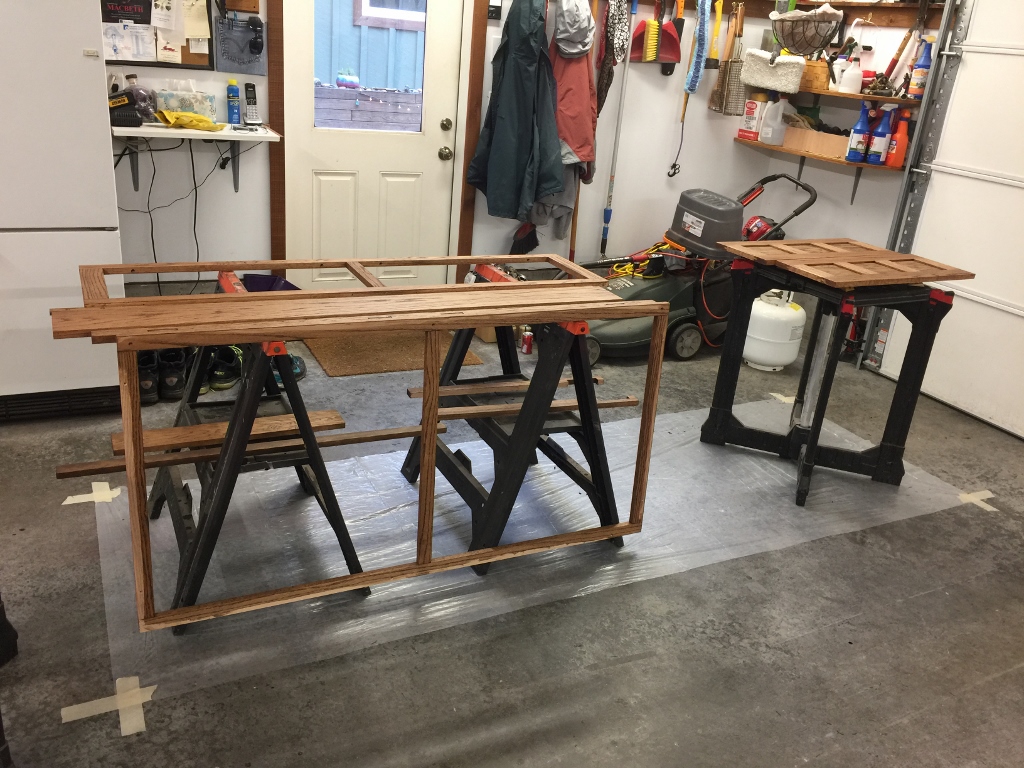
So, I have this little side table along that back wall, you can see it here with the brackets underneath. I’m reworking some storage and work surfaces in the shop and I wanted to raise that side table to the same height as the main bench. I figured the best way to do that was to built some boxes on top of it. And then I can make drawers!
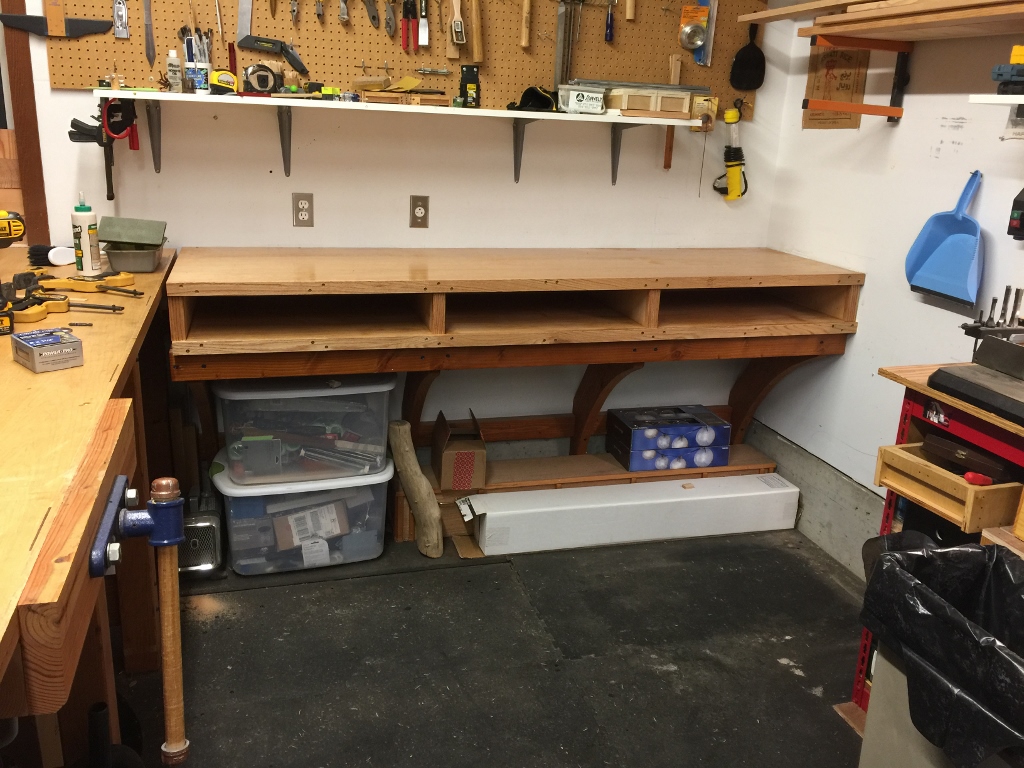
So yeah, double plywood sheets for added strength, well bolted into the wall and reinforced by those brackets. The drawers should be a nice size.
This will really help de-clutter the corner. Of course, I’m just going to re-clutter it…
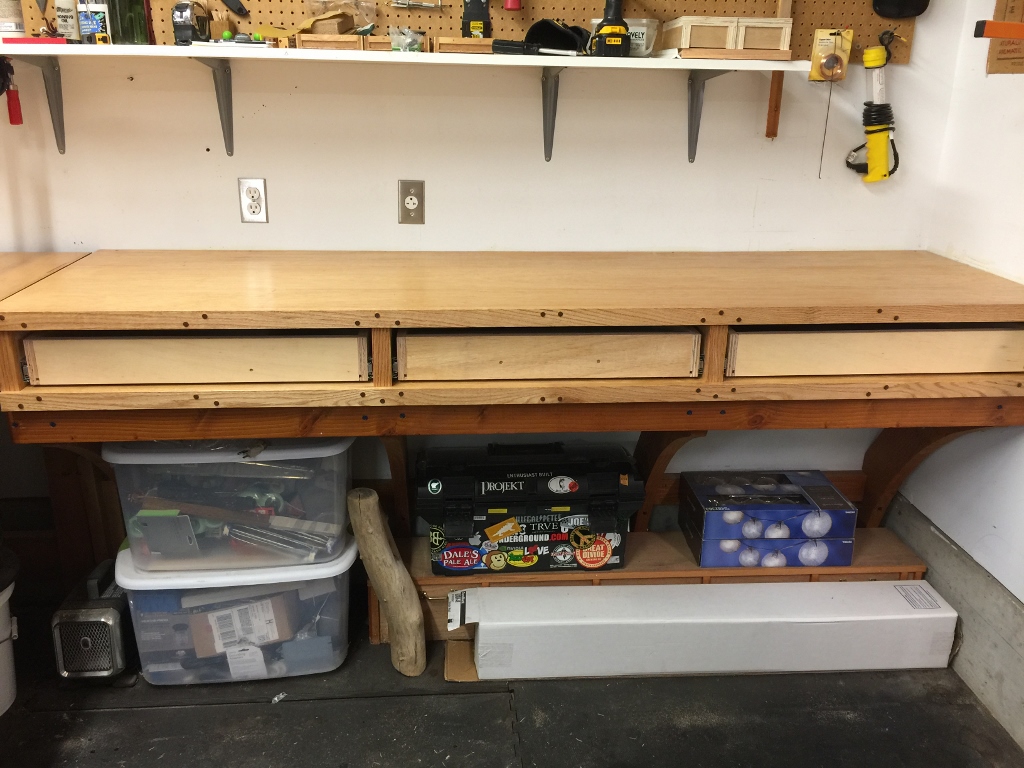
The drawers fit great. I’ll put some oak drawer fronts on them at some point.
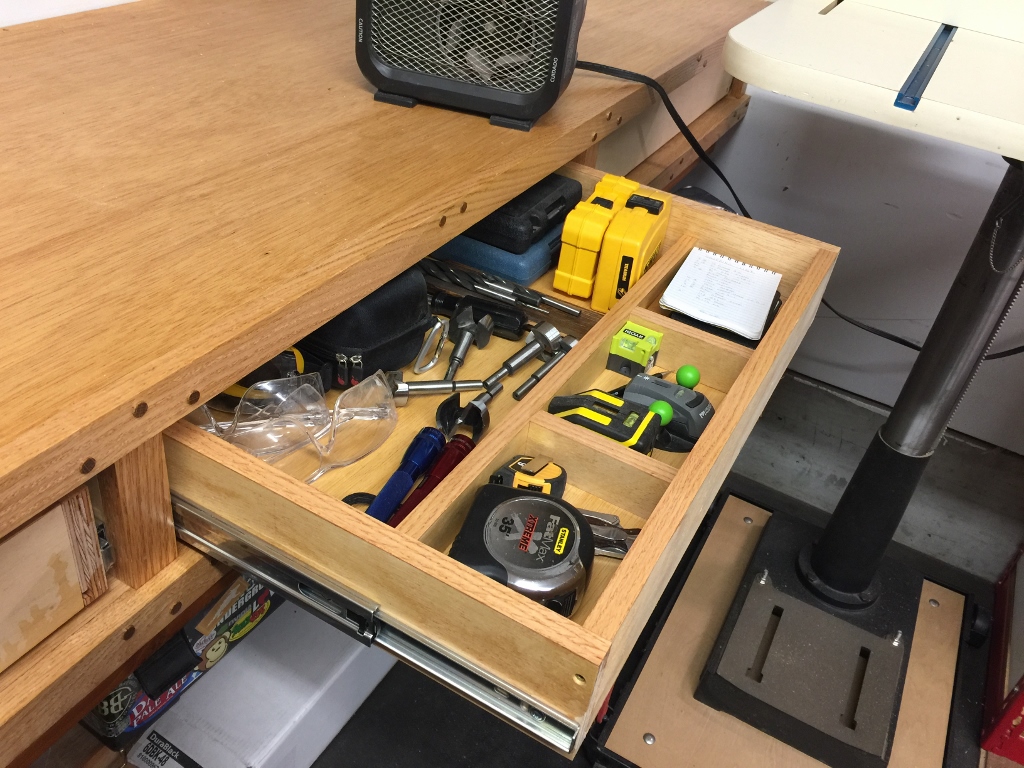
I partitioned one of the drawers, and now I’m wishing I did it to all of them. It was a pain, but having little boxes to organize things is really nice.
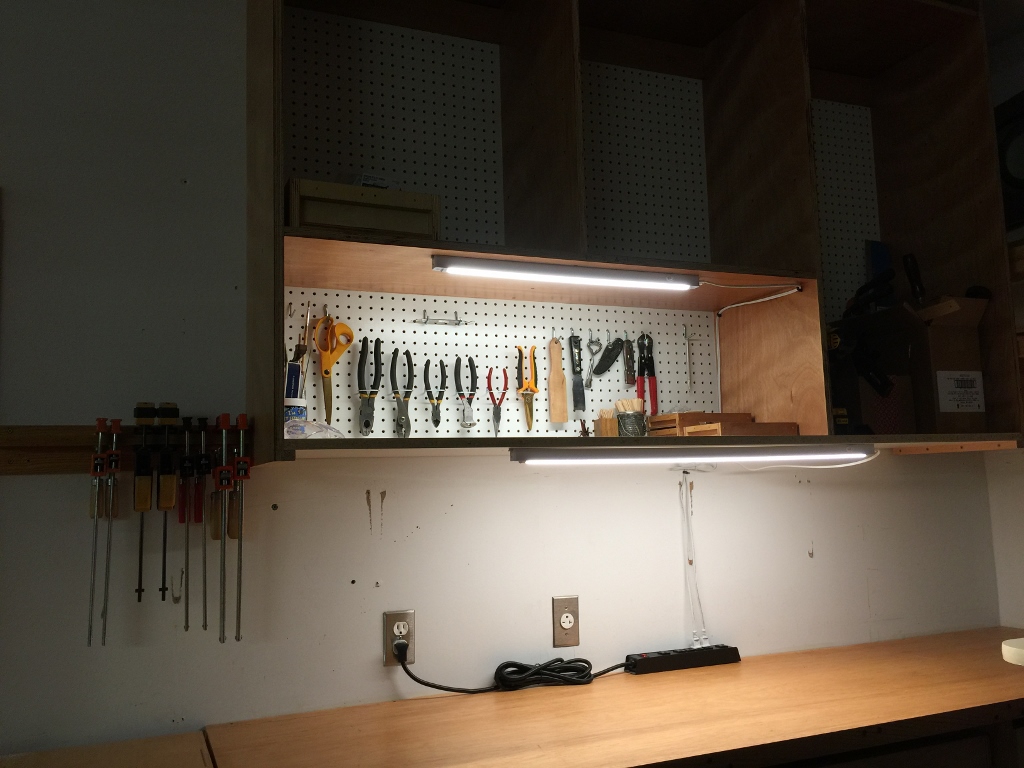
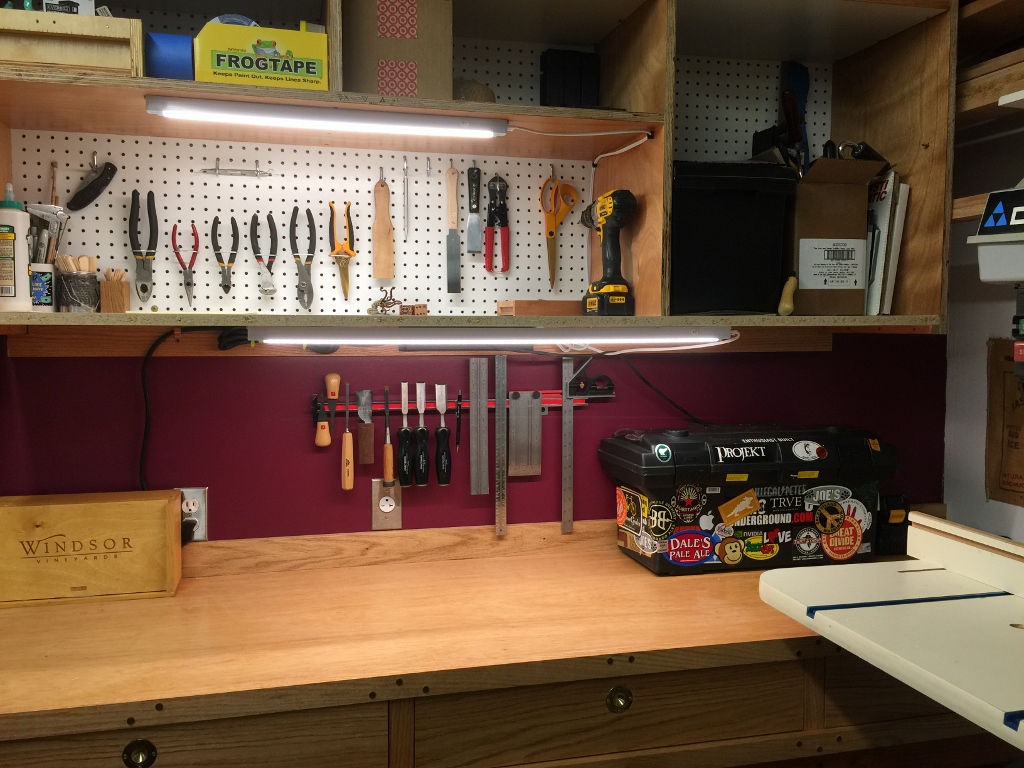
Up next: cabinets.
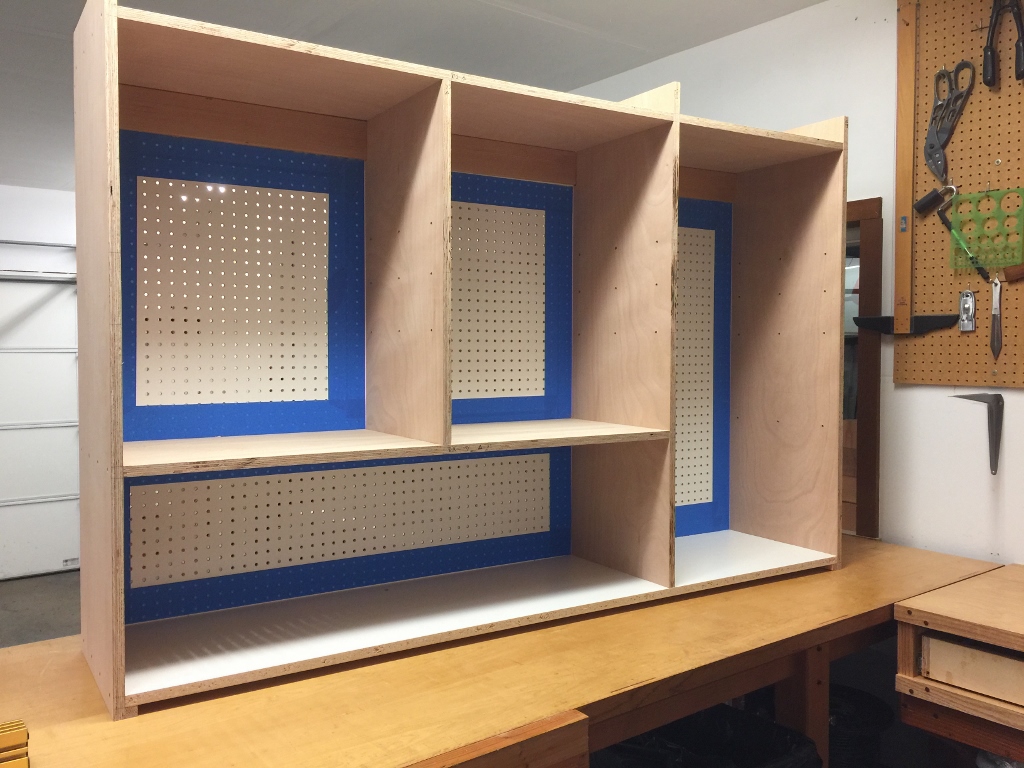
Big cabinets. They’re going to go where that awful brown pegboard is now. There will be under-cabinet lighting and doors that close and all sorts of fun stuff. I like using pegboard for cabinet backs, especially for utility cabinets, as you can hang crap on that back wall if you need to. Maximize your space.
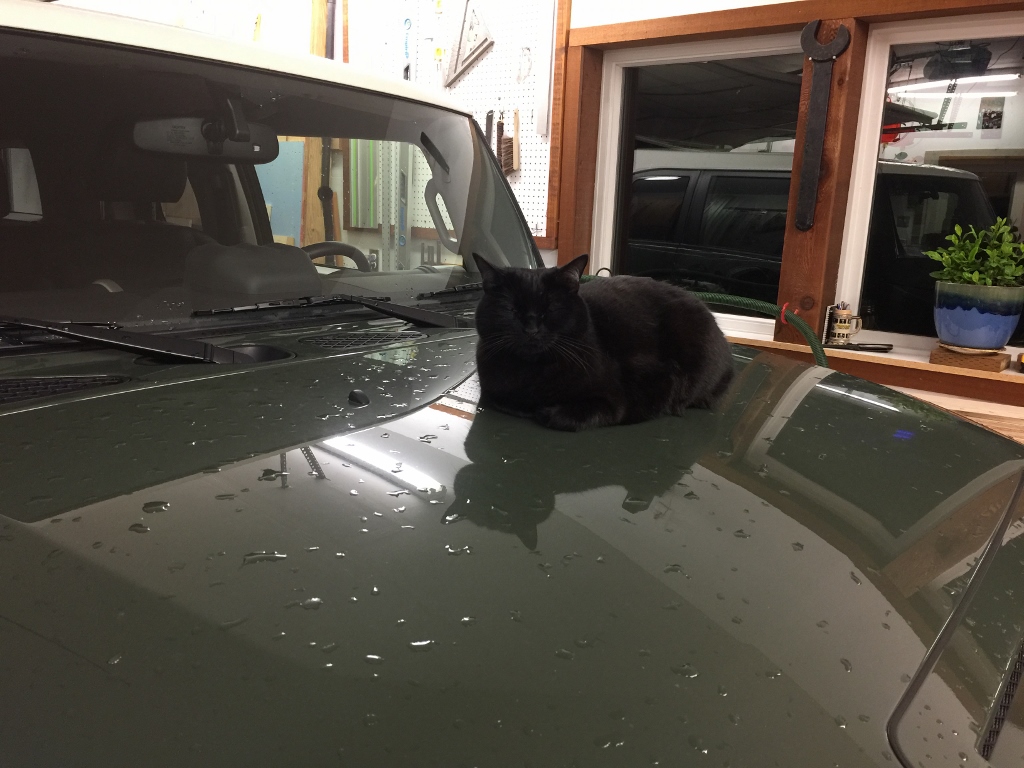
No help whatsoever.
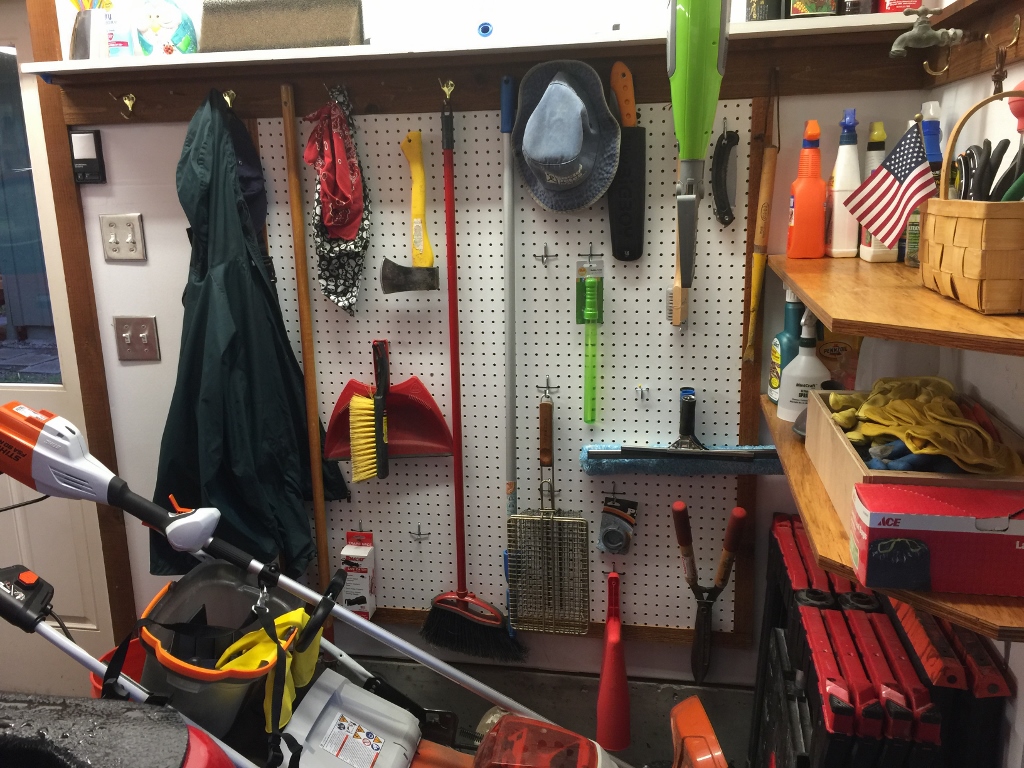
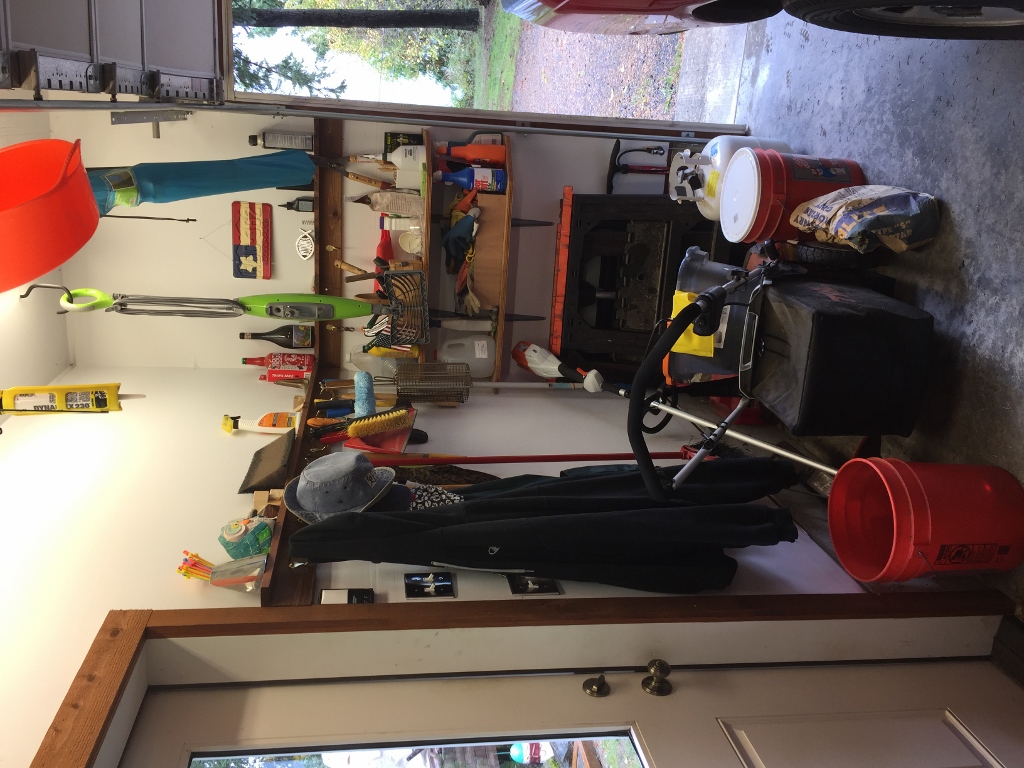 This has been a cluttered corner for a long time. Things go here when they have no place else to go. Gardening tools, bags of mortar, sawhorses, bicycle pumps, camping chairs, floor steam cleaners. Hey, it’s what a garage is for, right?
Well, this winter I’m going to be spending a lot of time introducing better storage solutions, cabinetry, drawers, better layout, doing all sorts of things to make the garage work better for us. In this corner, I’m going to put up some pegboard to help hold the little stuff and keep it easy to access and out of the way.
Yeah, okay, it’s still totally cluttered. But it’s an organized clutter! A big part of any organization effort is just getting rid of the crap you don’t use anymore. That always helps.
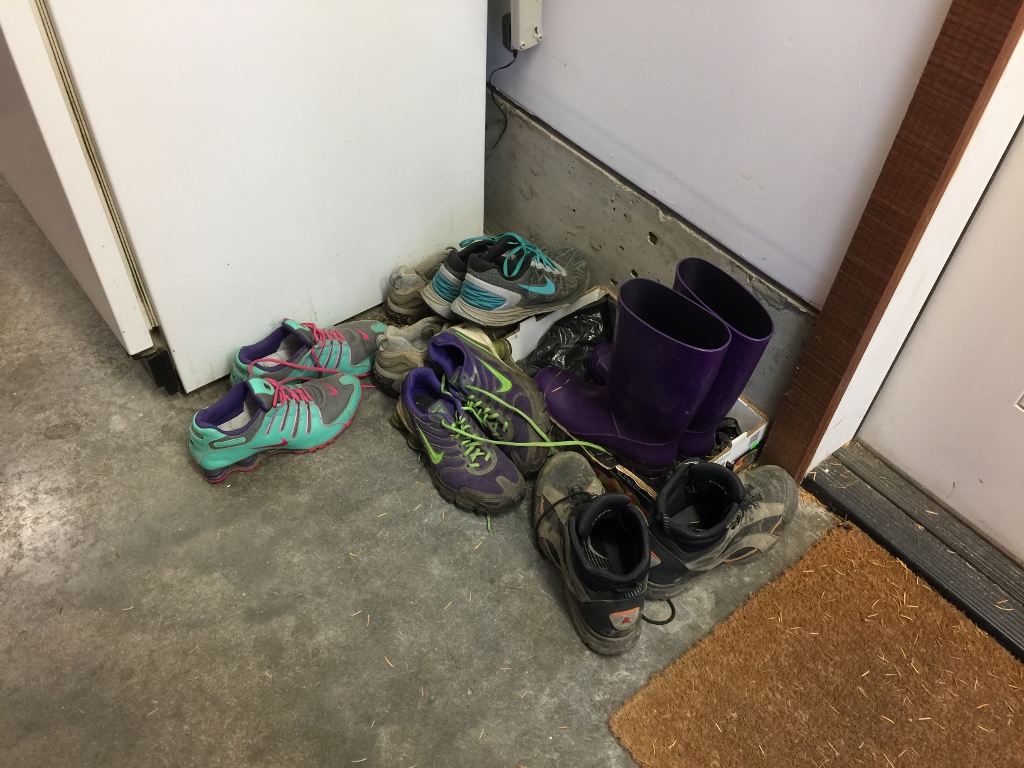
Okay, this is a problem that we’ve been tripping over for years. This little corner by the rusty fridge has stored our shoes, but I’ve always thought this was a wasted space. So much more can be done with this area.
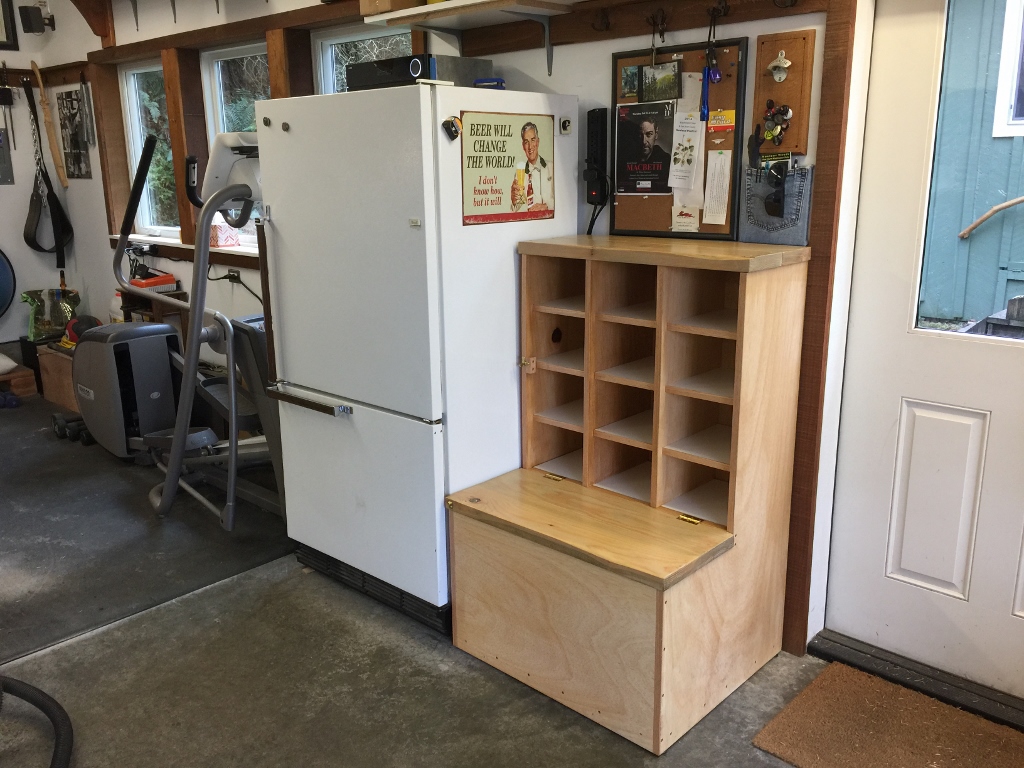
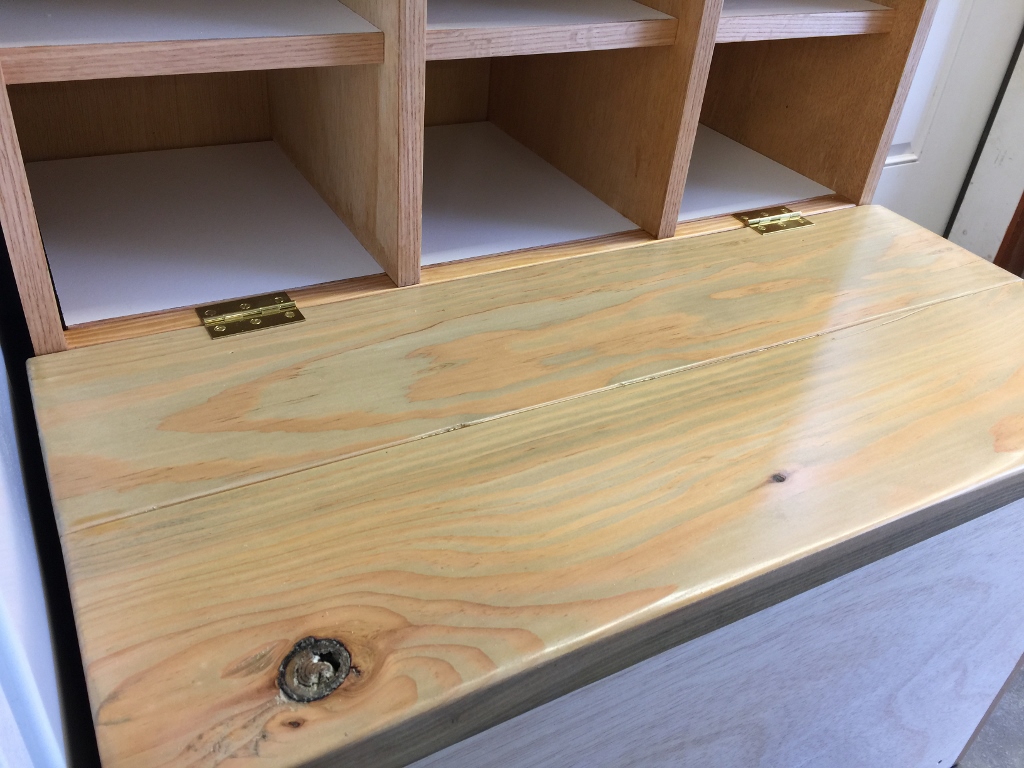
Yeah, now we’re talking. A little plywood, some lumber, a few pieces of hardware, and suddenly we have a space to store a dozen pairs of shoes, with a place to sit to put shoes on, and a storage trunk to store whatever you want!
 I’m not fond of plywood for making furniture, but this is my garage, not the Earl Gray Tea Room in Buckingham Palace. Function beats out aesthetics. All it has to do is work.
I bought 2×8 lumber for the top and the bench, and I dug up the most beaten, moldy and weathered pieces I could find out of the wood pile. Old wood like that can polish up pretty good. I like the color, and it’s sturdy as hell.
I went cheap for hardware, but made sure to use solid brass. It can get a little humid out in the garage.
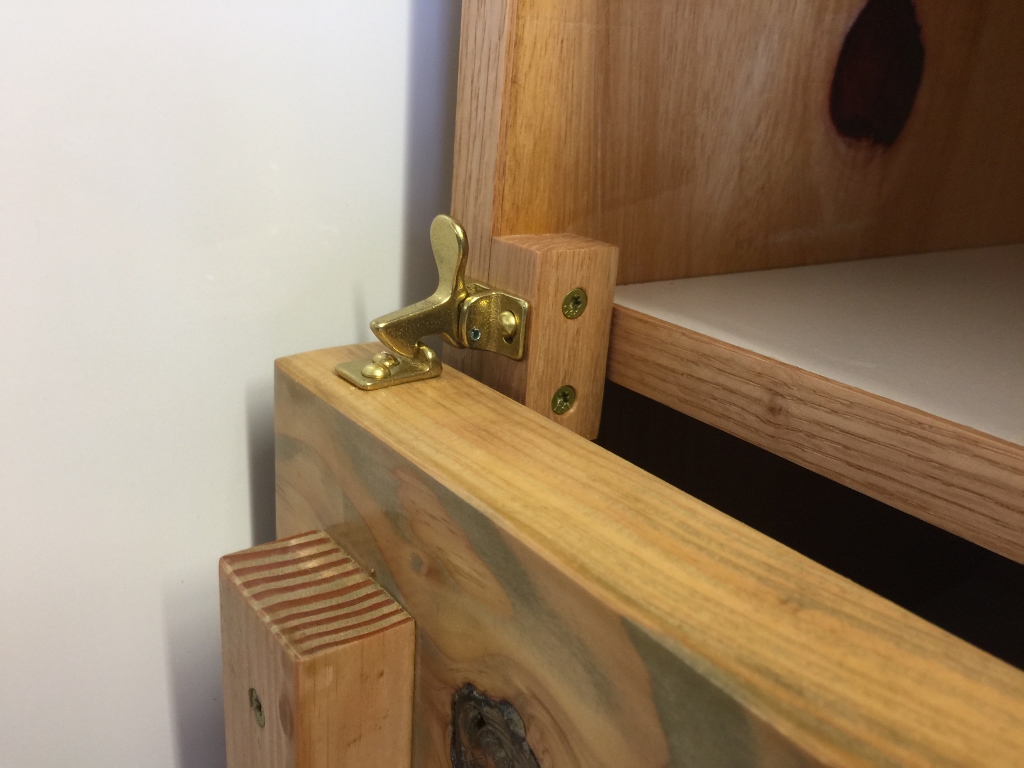
I’ve had this little clasp for ages, finally found a use for it. I think it probably wanted to go in a window or something, but here it works great, holding up the lid to the trunk so it doesn’t break your arm.
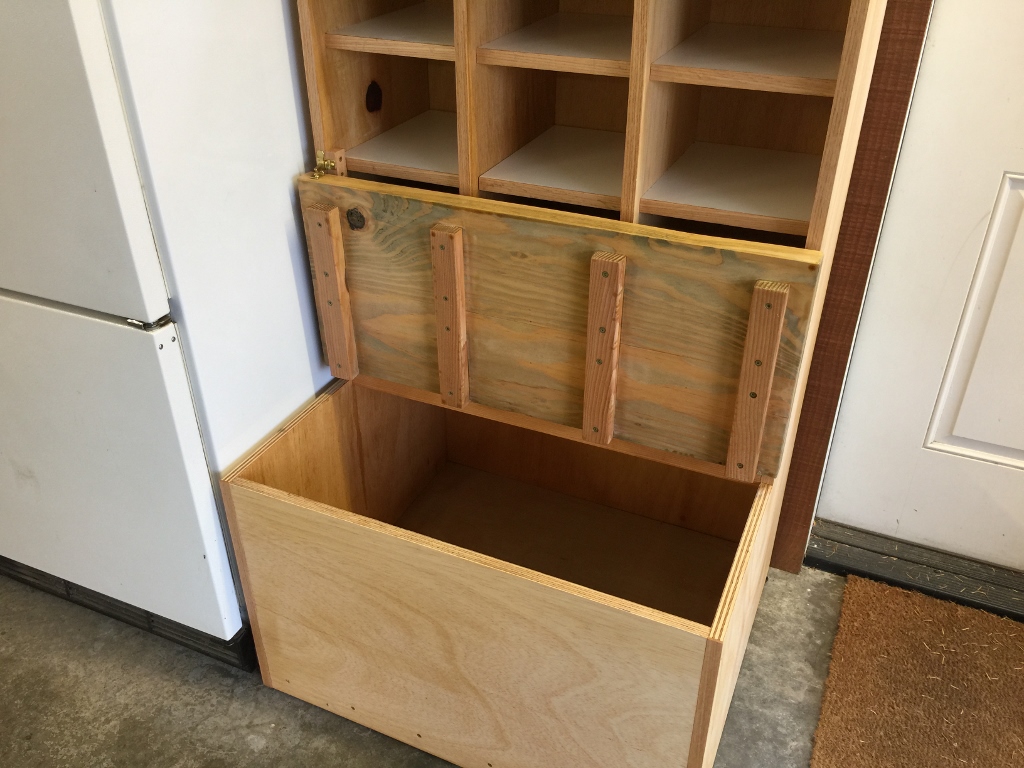
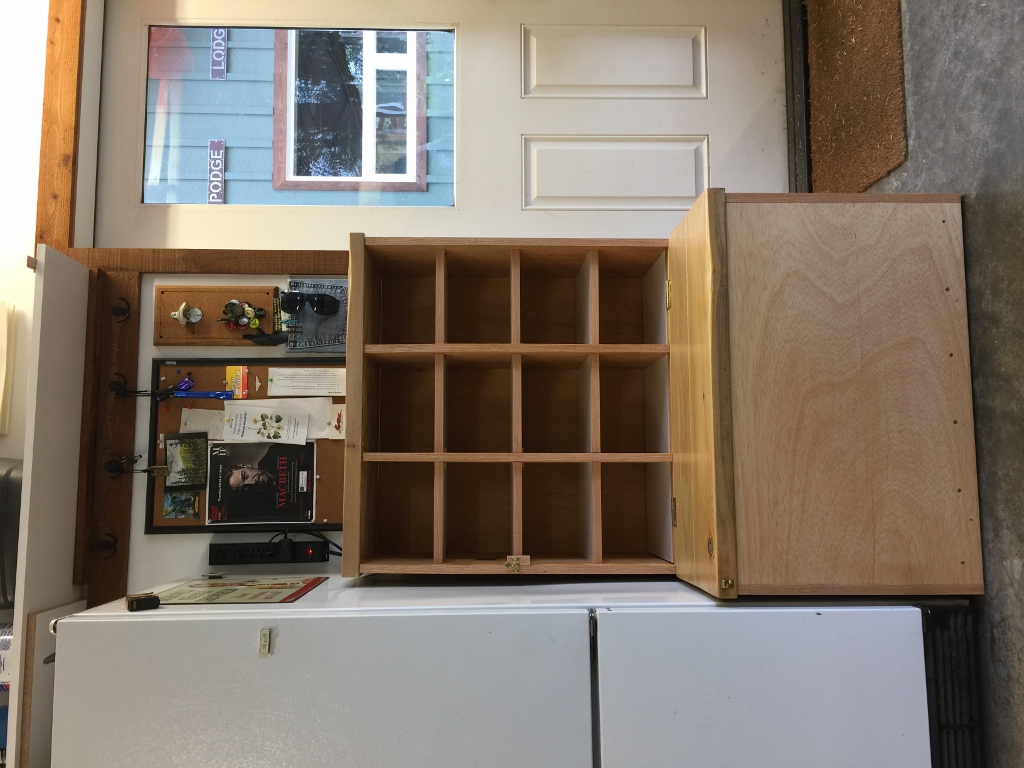
That’s like 10 cubic feet of storage in there!
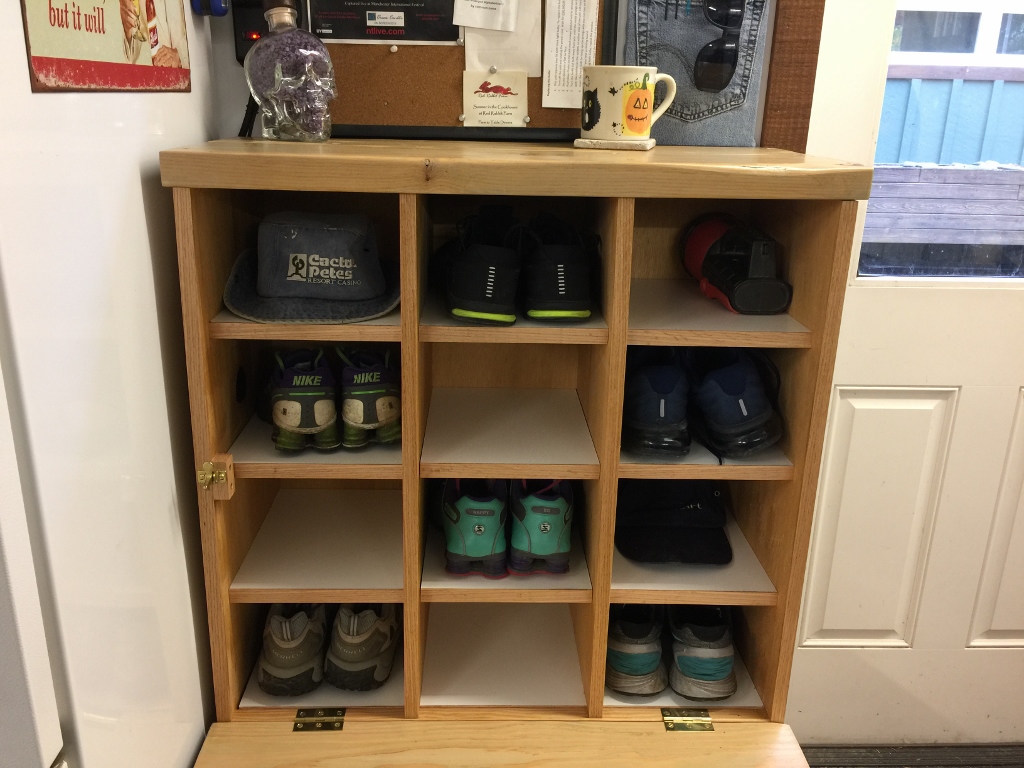
Happy shoes. They all have a home and there’s room to grow.
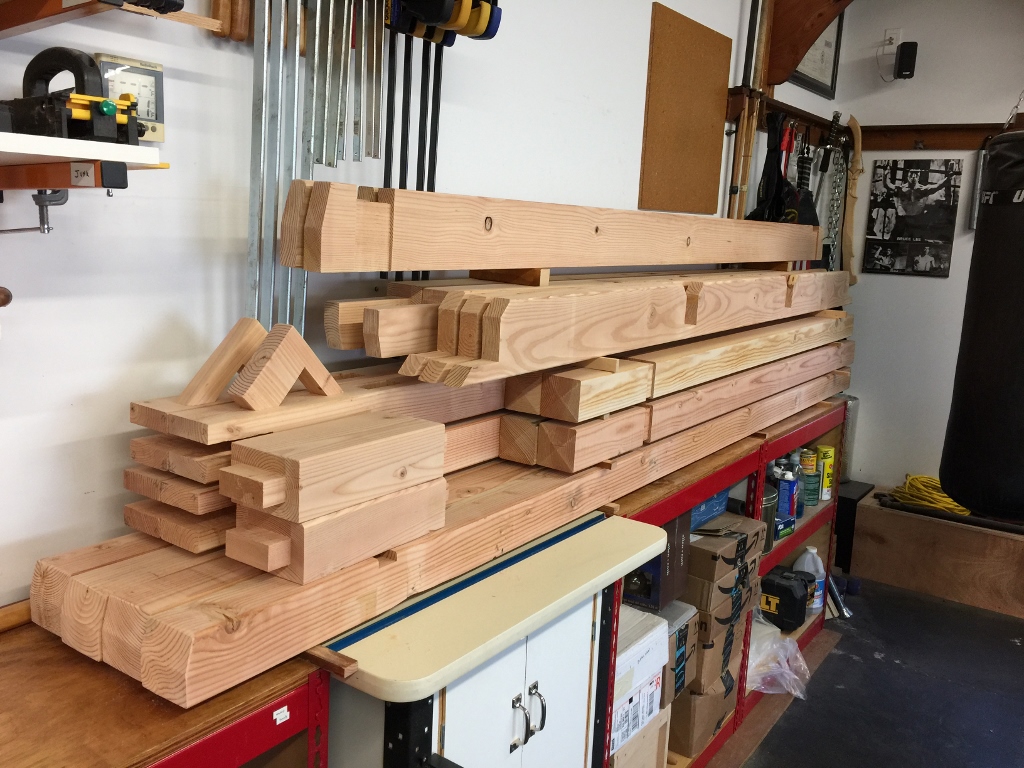
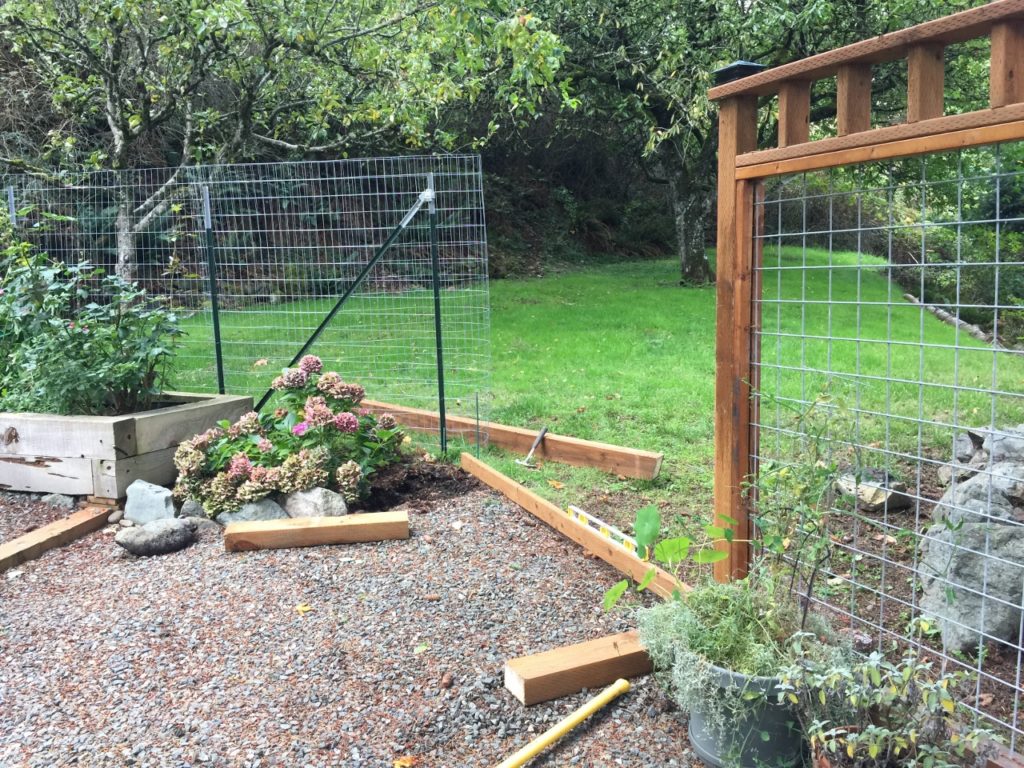
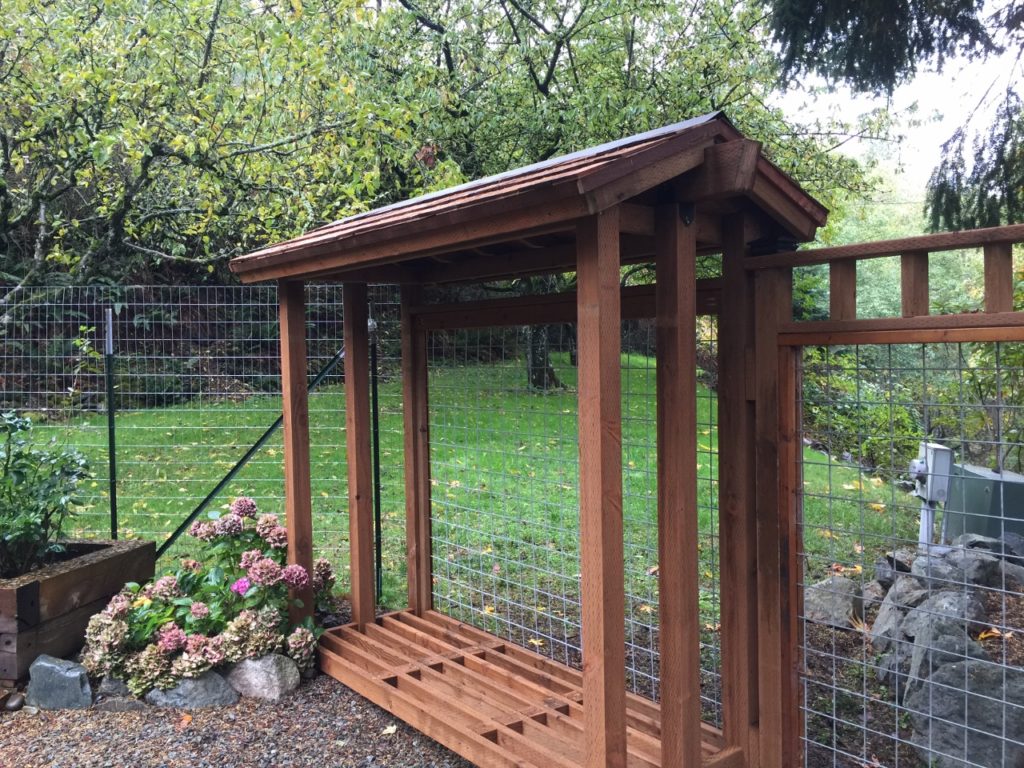
Here is my pergola. Some assembly required. I’m not really a pergola guy, and I never envisioned myself making one, but I had an empty space at the end of the deck and some kind of garden structure seemed to be the best fit for it. The garden area needed something with height, some kind of third dimension, to make it into the kind of outdoor space that we like.
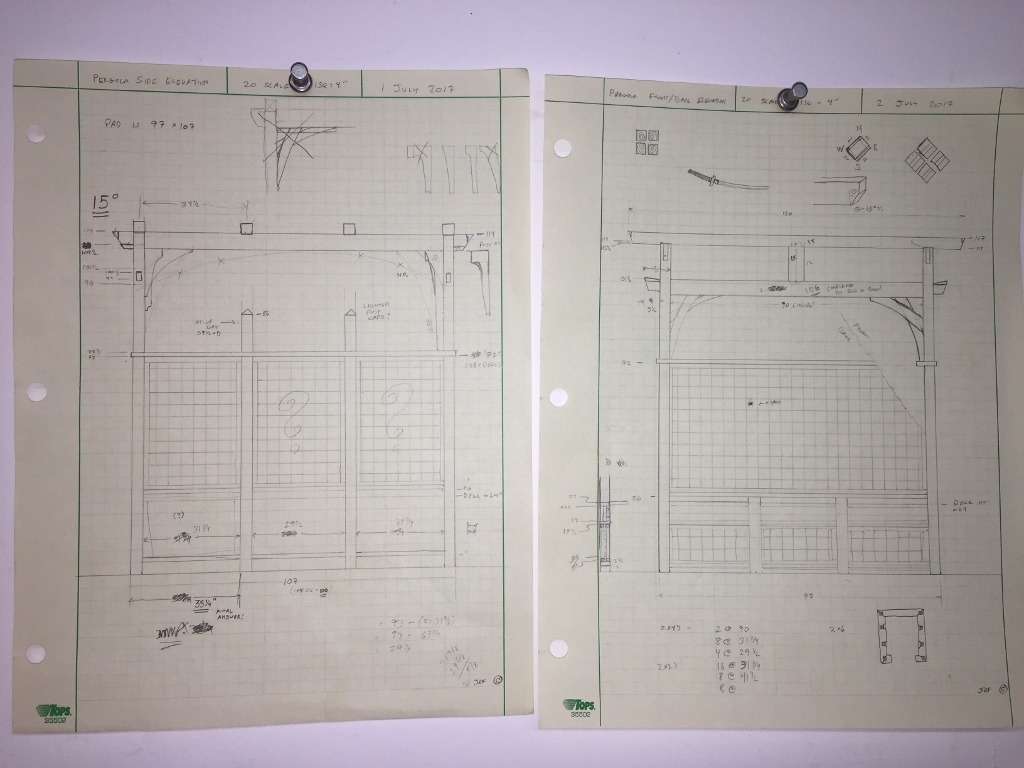
I followed very professional and detailed plans.
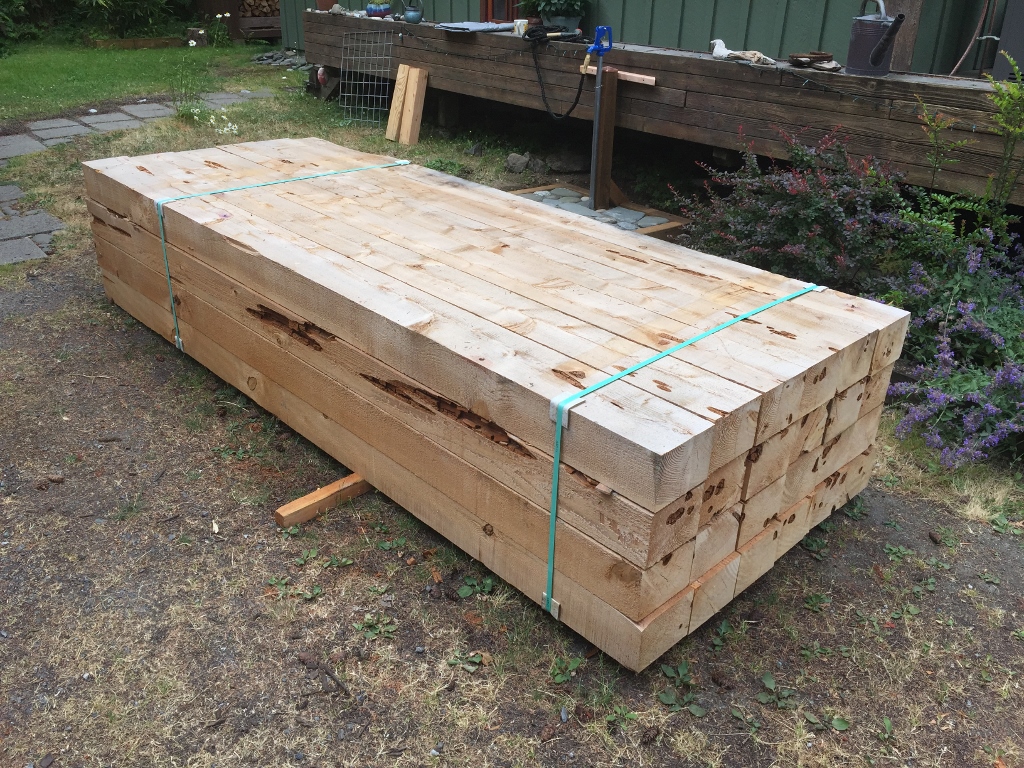
And here’s the cedar I’m going to use for the raised beds. 80 cubic feet of wood right there. As I started carrying them, they didn’t seem all that heavy, and I figured it was nothing I couldn’t handle. But the pieces on top had been roasting in the sun for a few weeks, and the middle pieces were sopping wet. Those pieces were easily twice as heavy. I’m so glad I lift weights.
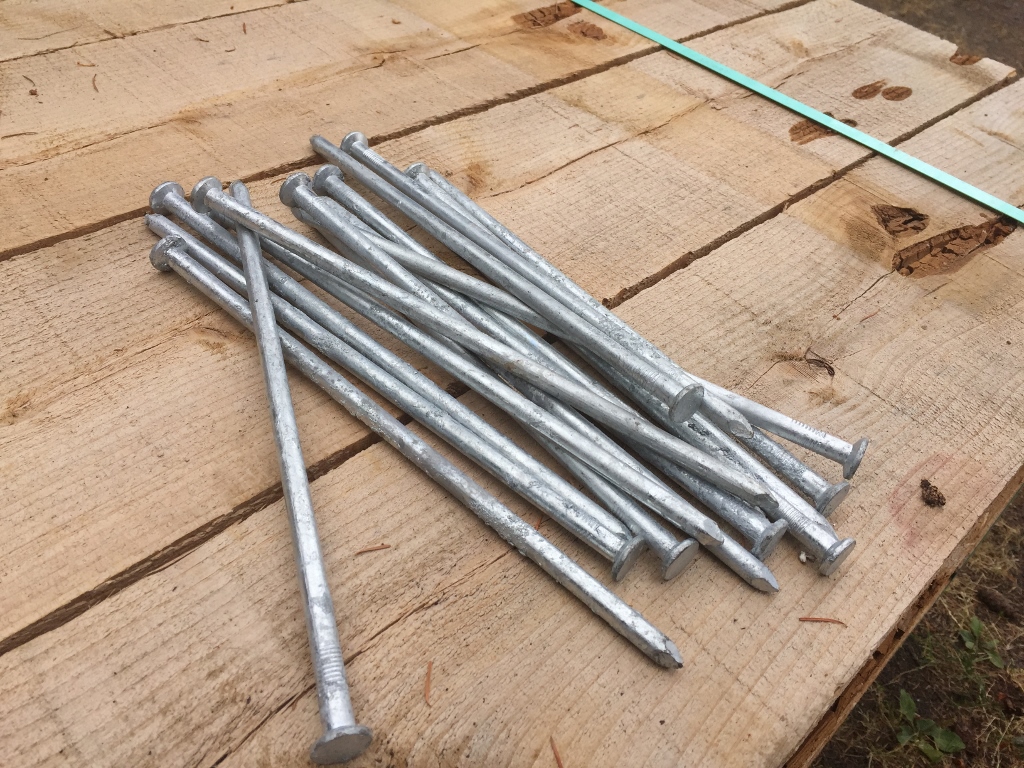
Biggest nails I could find.
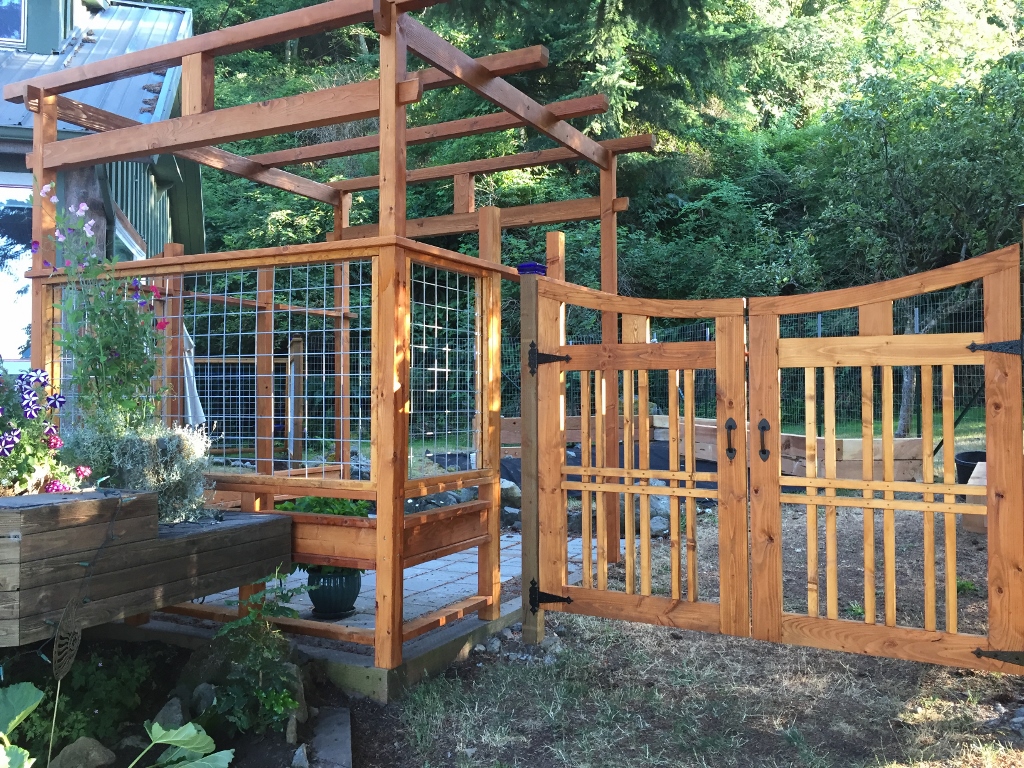
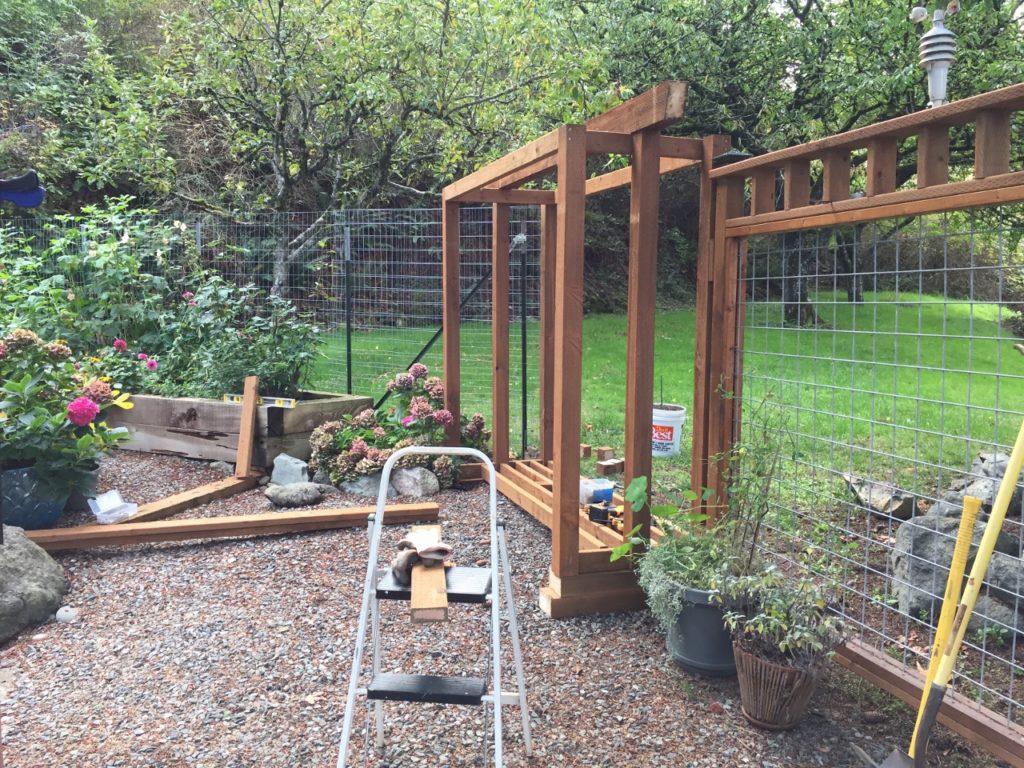
All put together. The pergola goes very well with the garden space. It ties into the fence and the gates around it, and (most importantly) keeps the fricking deer out.
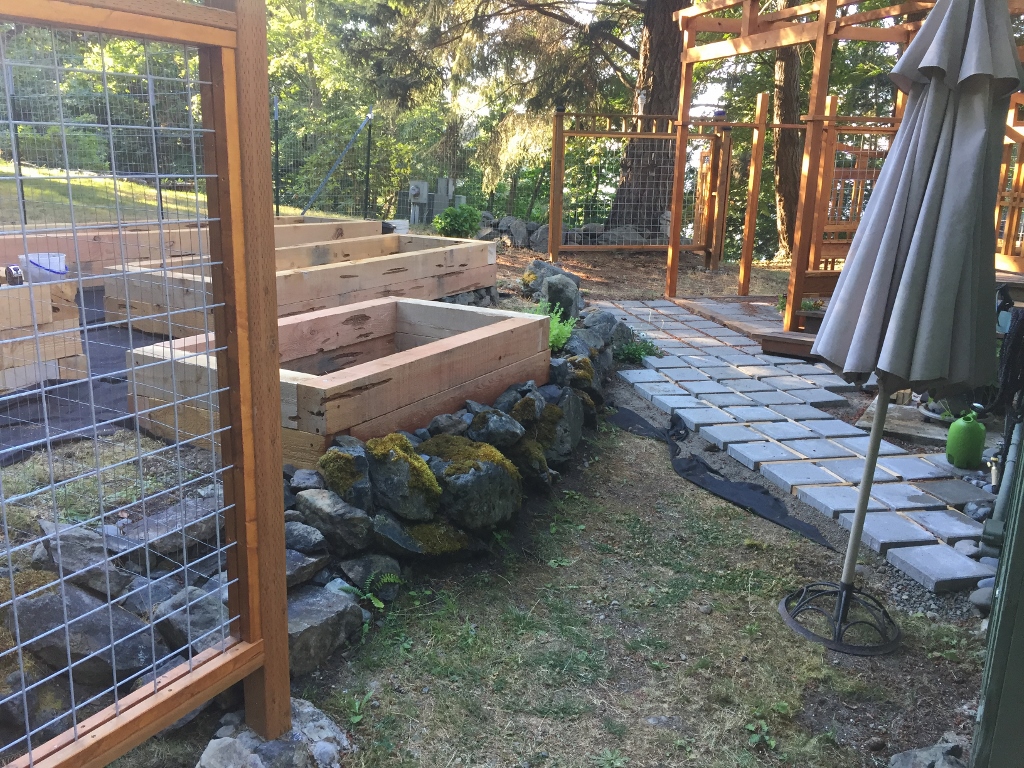
Outdoor living space is really important to us. The pergola and the gates will open up into a small patio area (which is about 1/3 finished right now) and the garden with the raised beds.
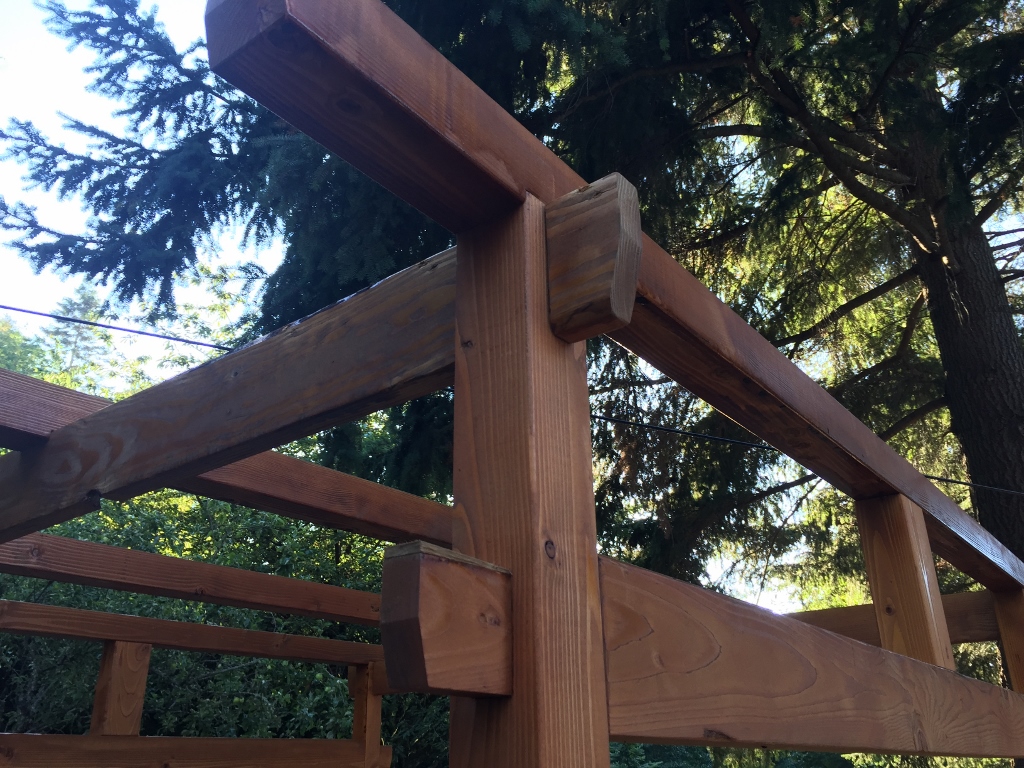
It’s all traditional joinery holding this thing together. I even got to do some wedged tenons, my favorite!
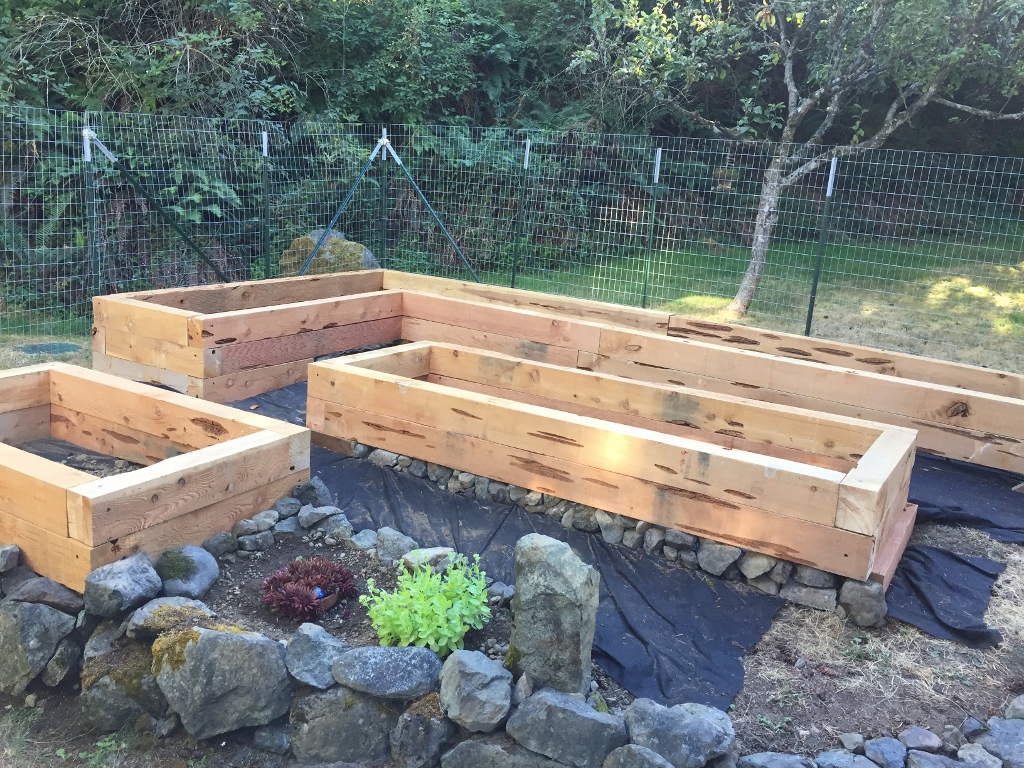
The raised beds make the foundation of a tight little planting area with lots of paths like little streets and avenues. I might even name them. Put in a traffic signal, some stop signs, etc. Most of this area gets full afternoon sun but we have some shaded areas as well, and once we get things planted and growing it should make for a nice place to spend time. The fence in the back is temporary, I’ll put in a good post and frame fence now that the beds are in place.
It’s still a bit of a war zone. We probably won’t start planting things until next year. Need to get gravel, dirt, sand, all sorts of landscaping things. At least we have rock, as much as we could possibly want.
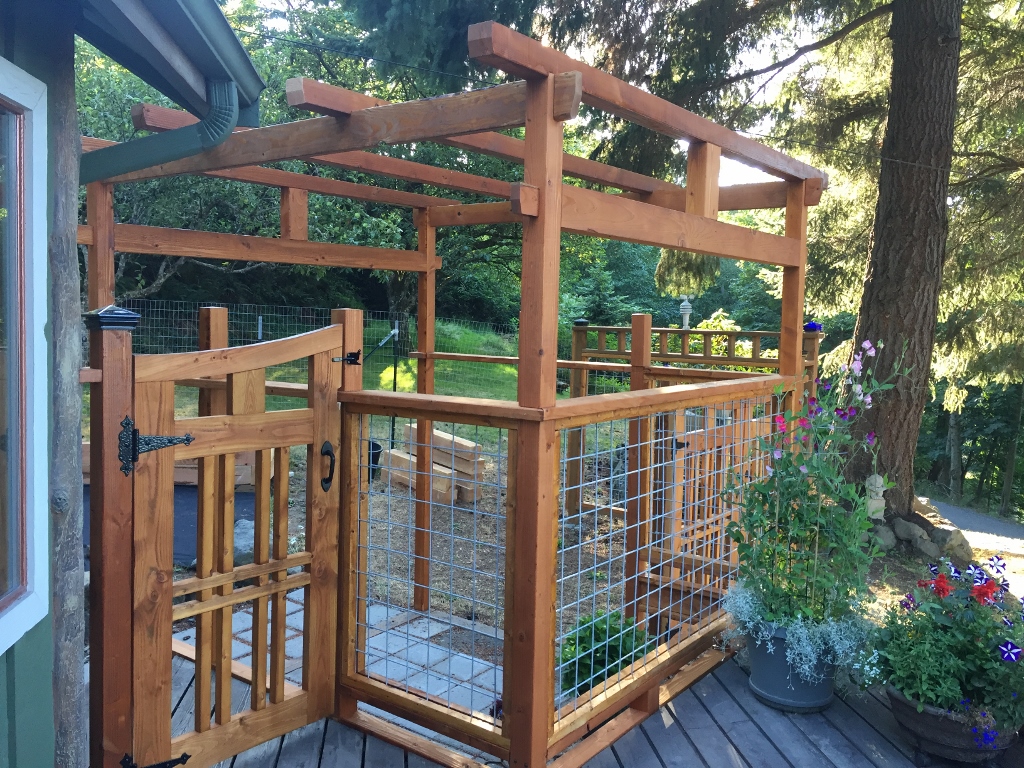
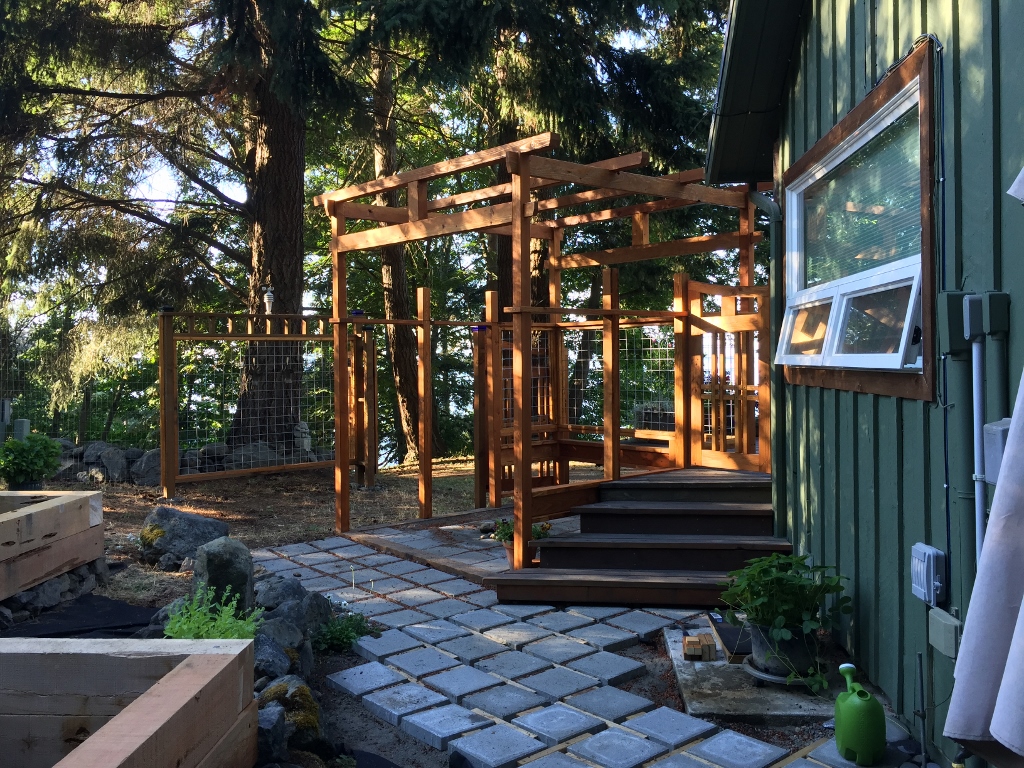
The view from the deck is nice. The pergola right now is just a skeleton, a frame of what it’s going to be. We’ll add pots and plants to it, maybe hang some kind of artwork, put in some patio furniture inside (somewhere to sit and roast marshmallows, maybe). It’s just going to be another space that we can enjoy.
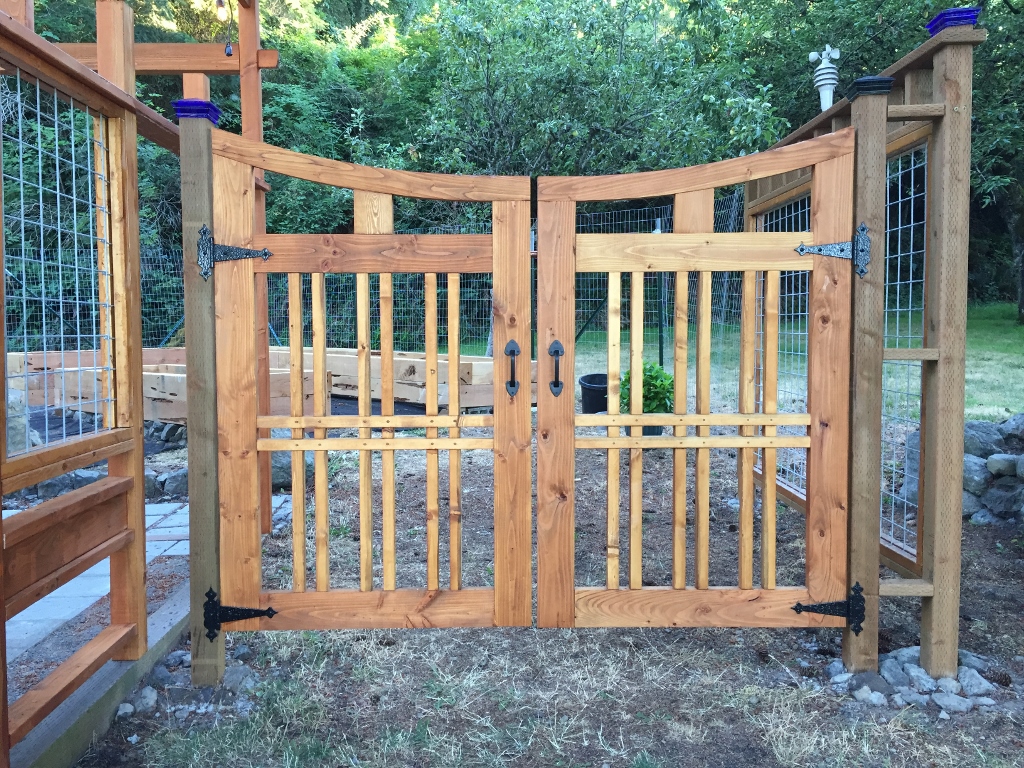
I’ll probably call it the Garden of Seven Gates when it’s all finished.
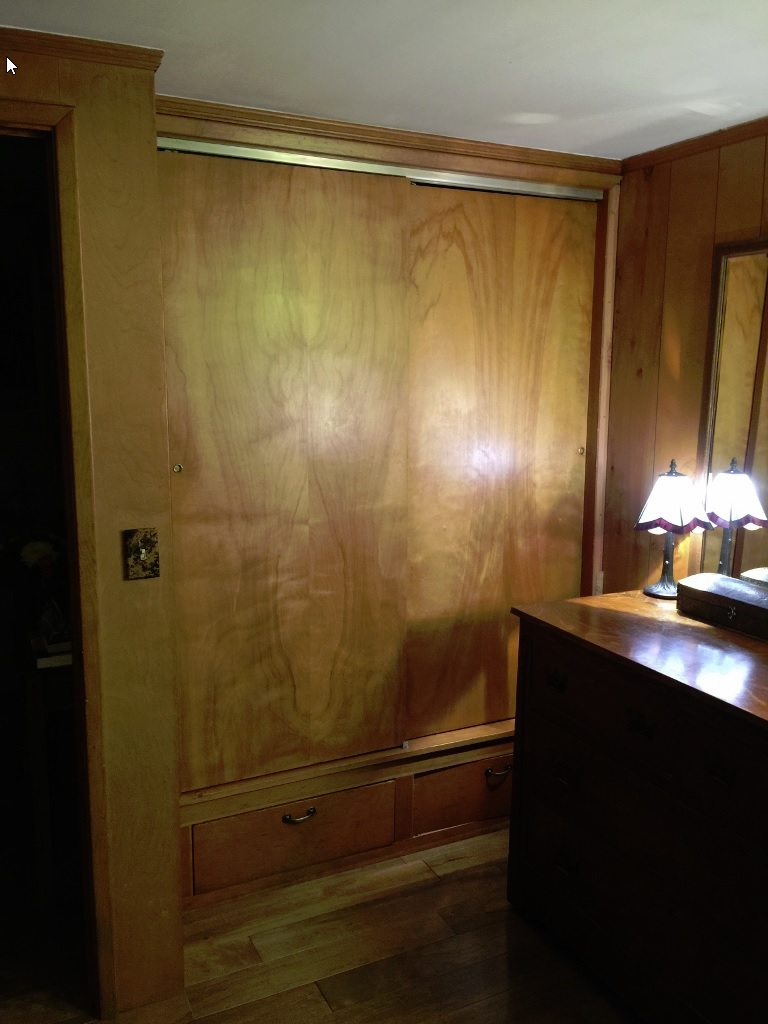
It’s been a trying few weeks. All our clothes and shoes have been scattered to the four corners of the house while I’ve been working on the closet. Our hanging clothes hung from one of the beams in the living room, blocking the television from my favorite chair. Shoes and boots have been on a towel next to the tv. Other shoes and boots are in a box out in the garage. Sweats and sweaters are on a high shelf in the laundry room. My jeans are on the bookshelf behind me.
It’s the War Zone. We’re used to it by now, and we know the drill. It doesn’t last forever, and when things go back where they belong, it’s refreshing to see the house all nice and clean. It’s like the day you put all the christmas decorations away. They’re nice to have out for a while, but eventually, you want your house back.

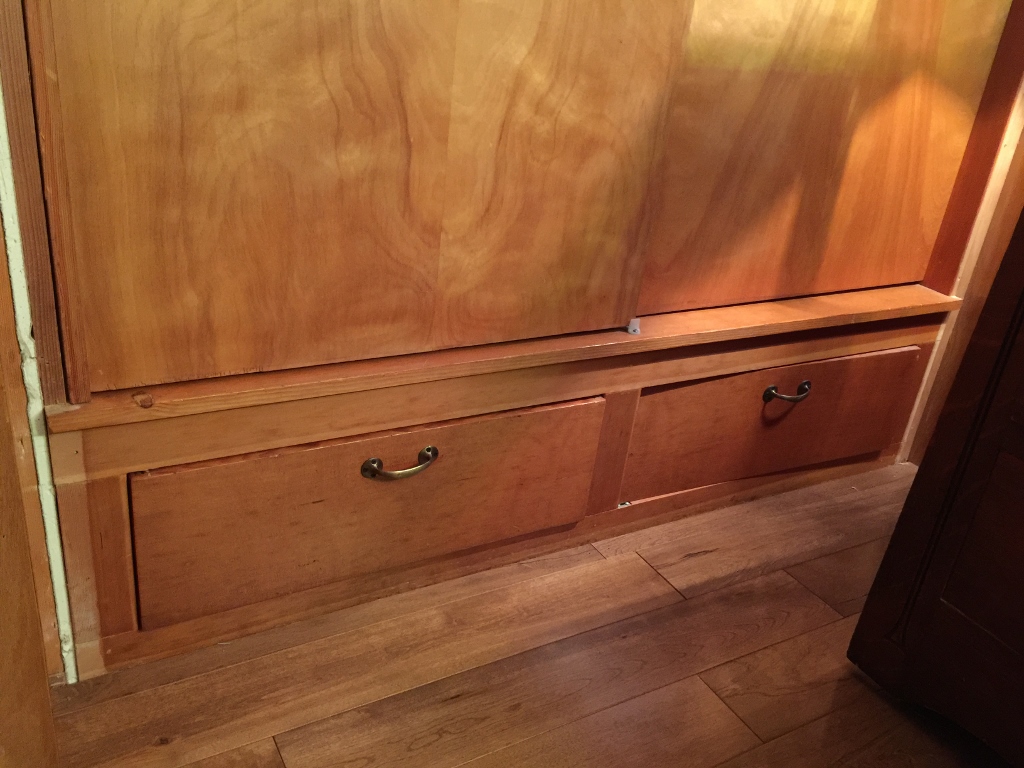
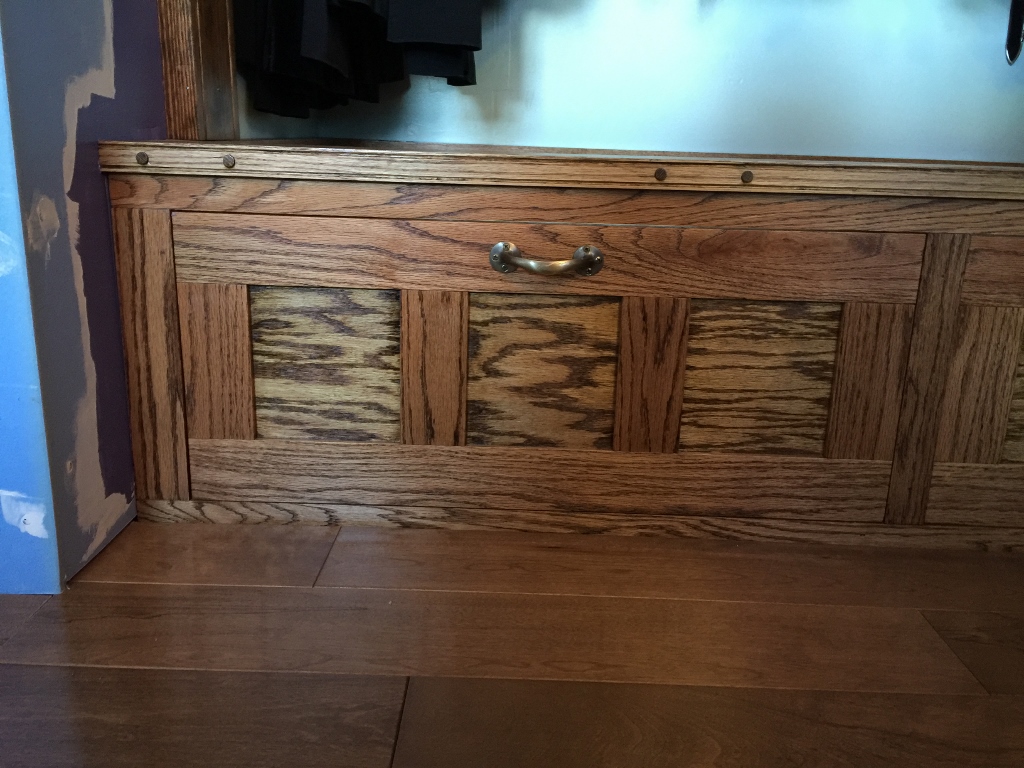
The drawer fronts came out great. Cannot complain. I just did simple tongue and groove with panels, which got glued and screwed to the drawer box. They should last the life of the house, or longer.
It’s really nice to be working with oak again. Hardwoods are hard to come by out here, and expensive. These are the frames that go on the built in boxes already in the closet.
I rarely do mitered joints (because I’m not very good at them) but the corners on this one came out pretty good. I cheated. Before I cut the strips, I cut one end of the board to 45 degrees, so that I had at least one perfectly clean miter without any tear-out or burn marks.

Everything installed pretty smoothly. A lot of math went into all that, and I guess I did it right this time because I didn’t have a whole lot of problems.
For closet doors, we got these hugely big rails for barn doors. This thing is very heavy and I had to put in a new header to support it. The header is bolted in place with these gigantic lag bolts and then reinforced with some additional framing. I think these are going to be the strongest doors in the house.
The hardware instructions were ridiculous enough, but I ended up modifying the install anyway so they were completely worthless to me. I ended up drilling holes in the brackets to accommodate another lag bolt to make sure it was secure enough. This steel was tougher than the cheap packaging would have you think it is. A hint: when drilling through thick metal use a little machine oil on your drill bit. It makes a big difference.
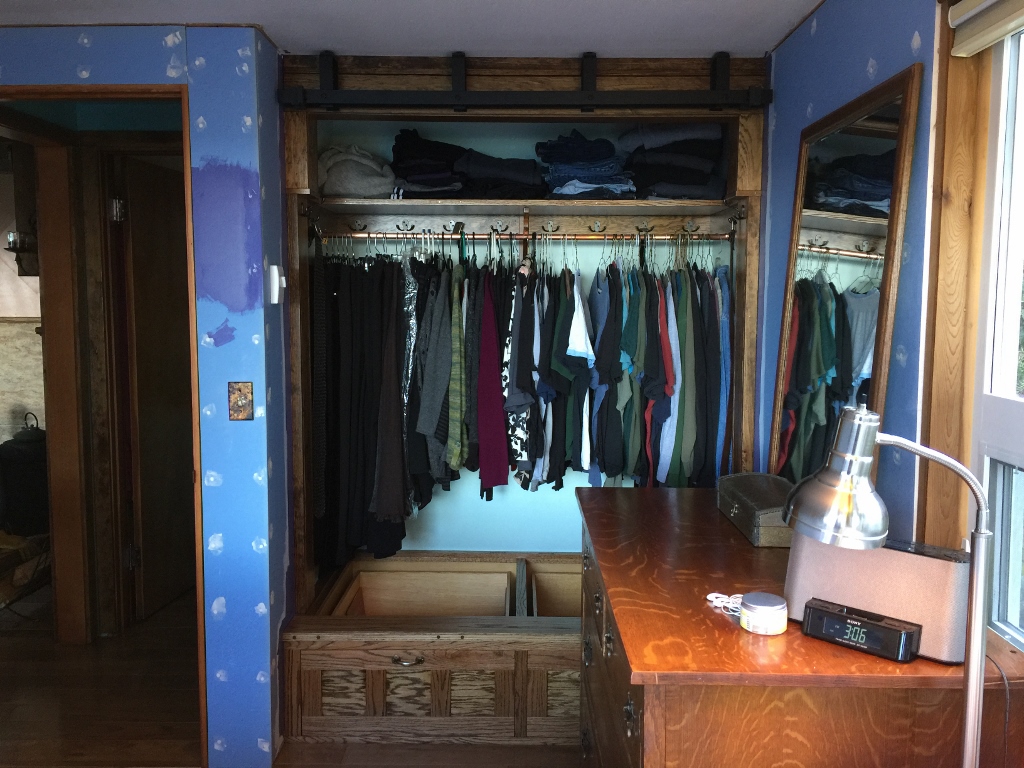
Nice! I don’t even need doors, I’ll be happy just looking at my open closet.
The drawers work great, very smooth operation.
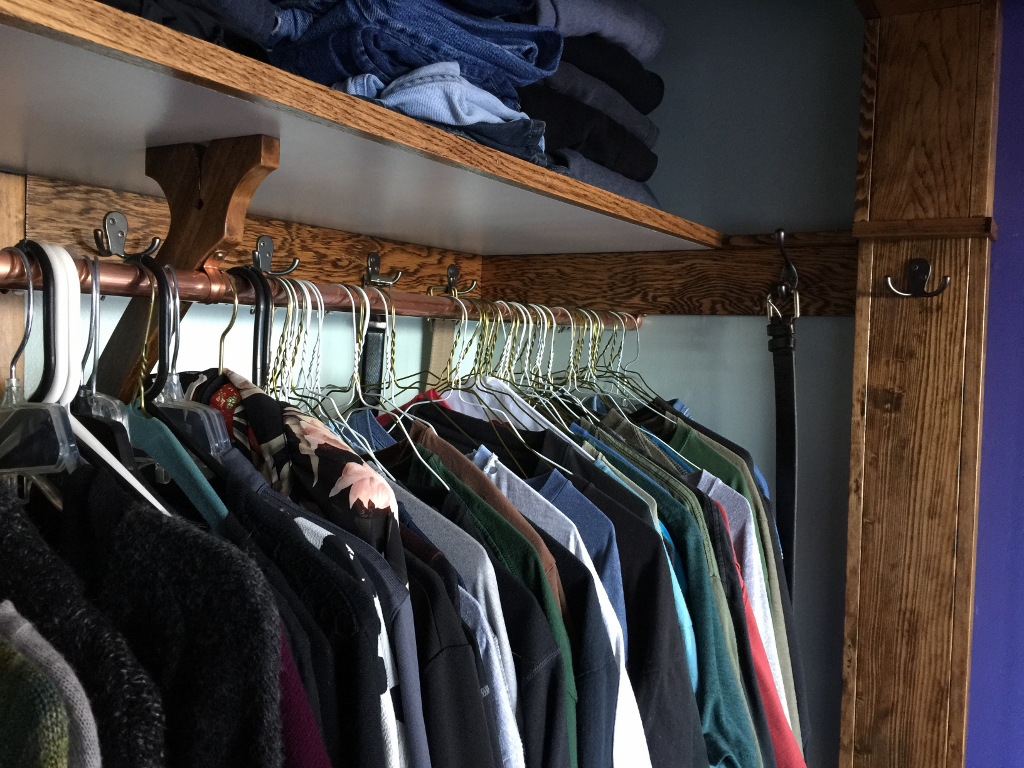
Using a polished copper hanging rod really helps the clothes slide a little bit. The old rod was badly worn. Kind of looked like driftwood found on the beach.

Here’s the rails for the bypass barn doors. The house isn’t level but these needed to be, so they do look a little crooked if you stare at them long enough. But the last thing I needed were sliding closet doors that rolled out of place when you weren’t looking.
I do love the built-in drawers. Such a huge difference over the last ones.
Next up, I’ll make the Bam Doors … er, the Barn Doors for the closet.
I need to remember to take some pics of the existing drawers when I smash them to pieces while cackling like a maniac do the demolition work. I just want the world to see how special they are. Well, the internet. Okay, the ten or twenty people who visit this blog. The existing drawers are just hideous. Maybe that’s why I’m putting so much time and care into the drawers that will replace them.
The new drawers are coming along wonderfully. I’ve only screwed up like four or five things so far, all easily fixed, so I’m going pretty good by my standards. I didn’t have much time this weekend, though, as I was up on the hill behind my house clearing brush with a machete.

This is no-man’s-land. We get these vine-like bushes that sprawl like weeds, and overtake everything on the hillside. They’ve already devoured a spruce tree near the driveway. I needed to clear a bunch of them that were threatening the shed behind the house, and ideally on a warm, dry day before spring. Once spring comes along, they’re heavy with new growth, full of bees, swarming with wasps, and covered with new, sharp thorns. Got my opportunity on Saturday, a nice dry day here, so I was up hacking way at them.

It’s rocky, it’s overgrown, there is no good footing, and thorny plants and vines are everywhere. But it’s remarkable how peaceful it all is. One of these days I need to forge some kind of a trail or a path up there. Maybe make a hidden Buddha shrine or two.
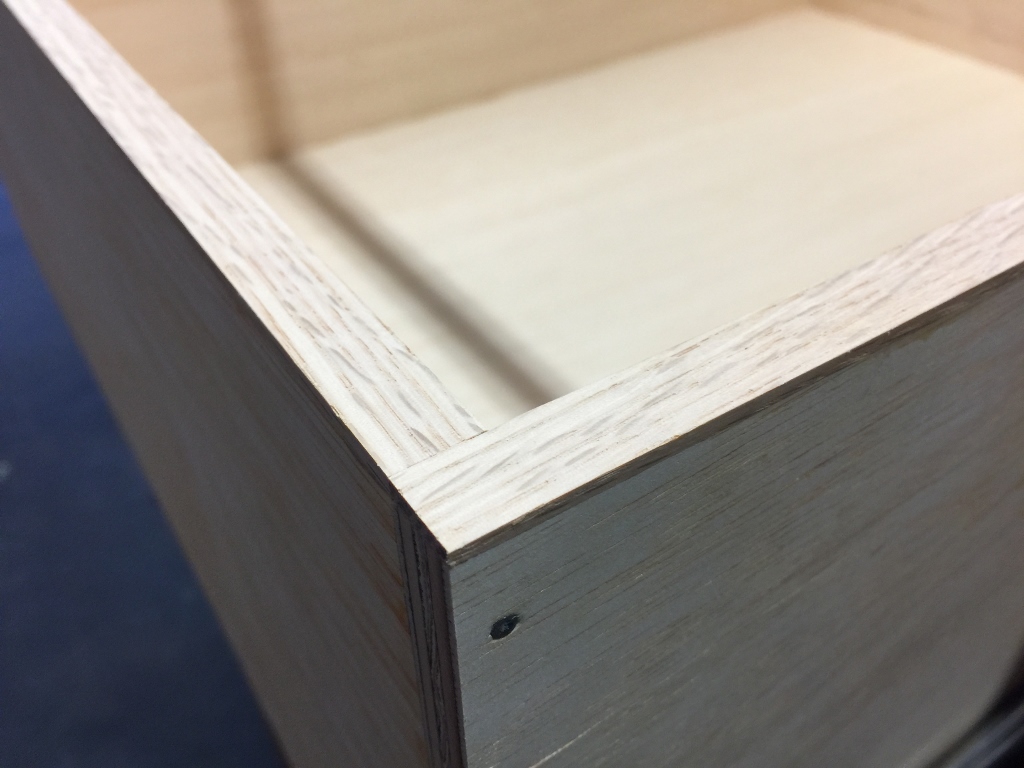
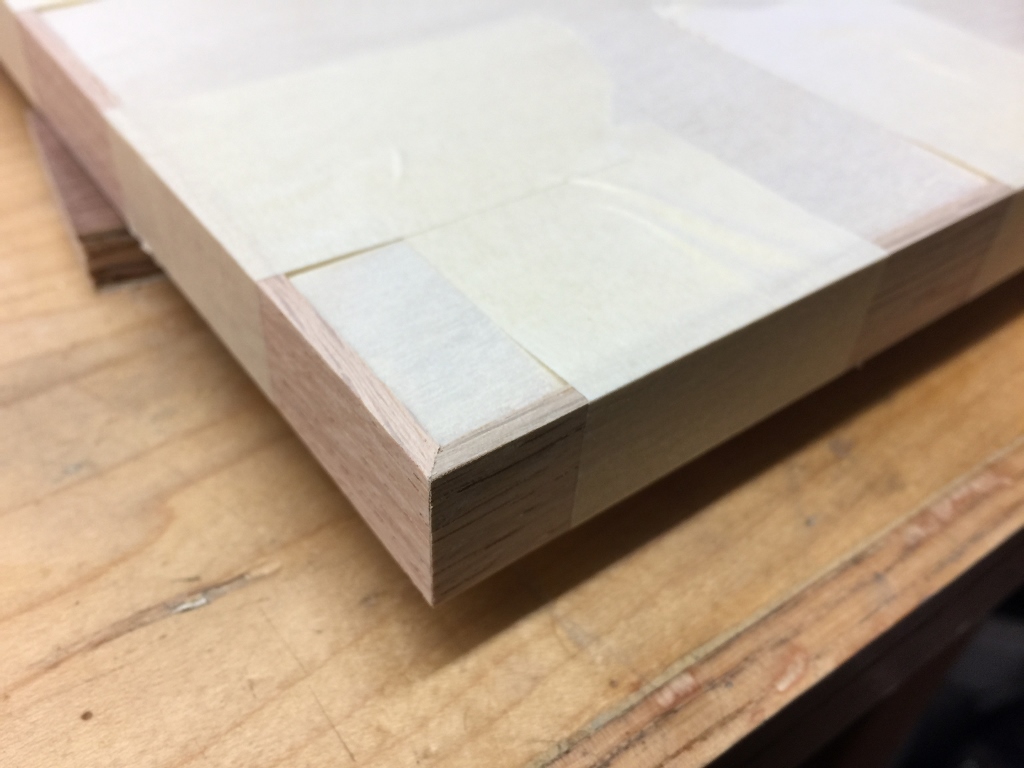
So after a few hours of grueling labor it was back to the shop. I decided to cover the end grain of the plywood with oak strips. I wasn’t going to do it initially, it’s kind of a pain and takes a bit of time and care to do correctly, and all the other drawers in this house have exposed plywood end grain. But I wanted these to look nice.
Nicer, anyway.
The drawer glides are these big beefy 24″ steel contraptions that are several orders of magnitude stronger than the drawers themselves. They’re a little finicky to install but when it’s all done the drawers open and shut beautifully.
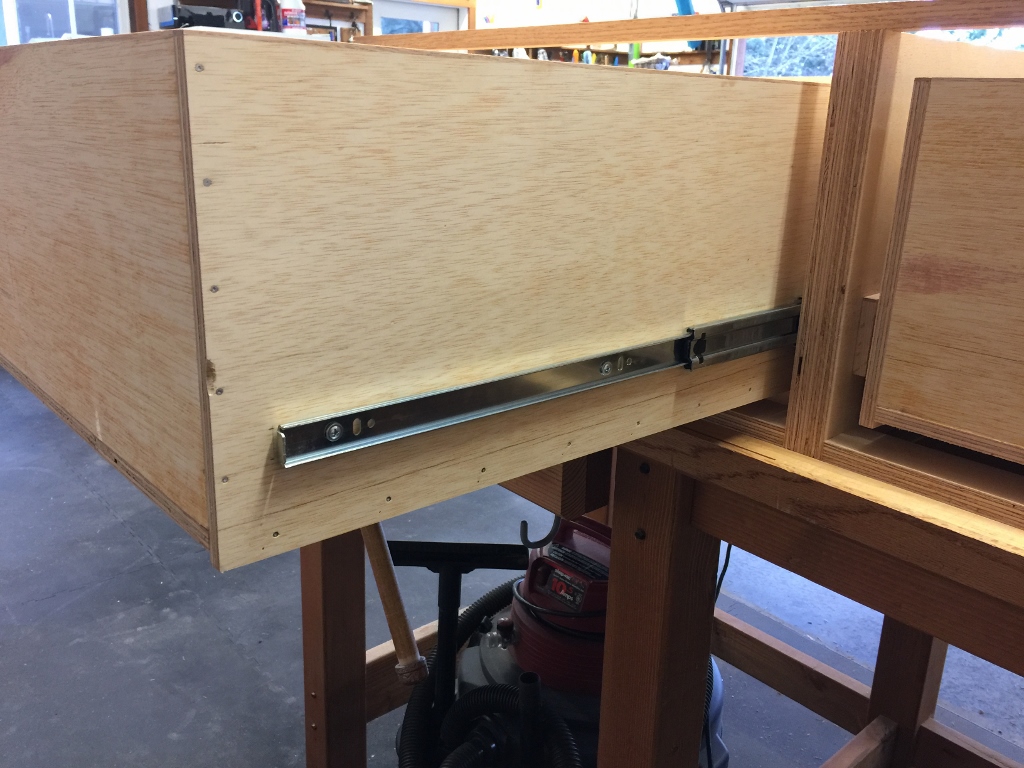
Looking pretty is nice, but at the end of the day, they just need to open and shut.

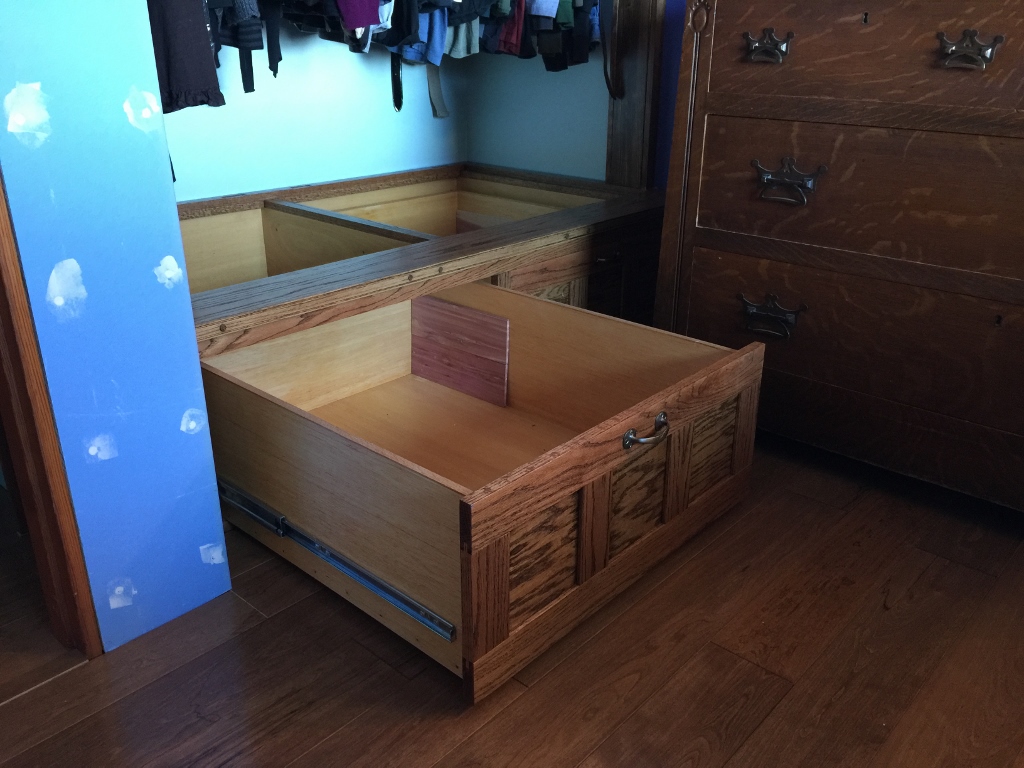
Drawer fronts and framing will all be out of red oak. I need to install this base first, though, before I can make the exact measurements of where everything is supposed to be. It’ll be fun getting this into the closet.

All that hard work this weekend. I need to go down to the beach again soon!

We’ve had a few stormy days up here. It wasn’t as bad as they predicted, thankfully, but we had some very high winds and tons of rain. This is how bad it was: usually when we look out to sea we’ll see at least a boat or two out there, even in bad weather the big tankers will go out and the tugs will take barges across the strait. But for a few days, we didn’t see one damn boat out there. No one wanted to sail in these waters.
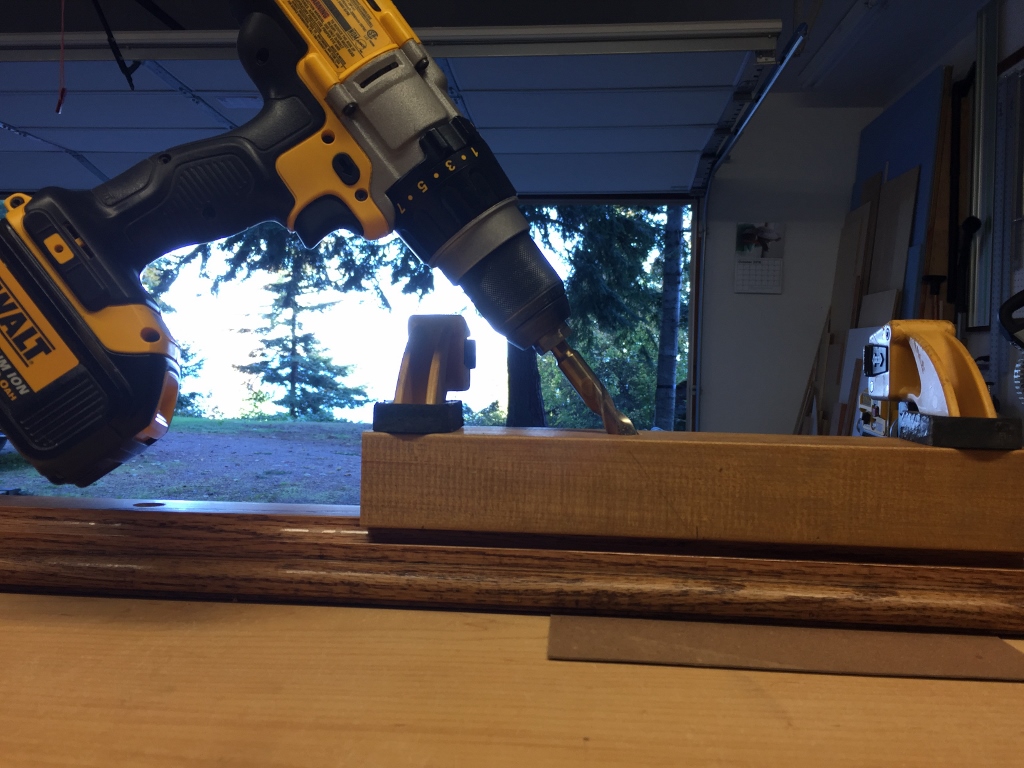
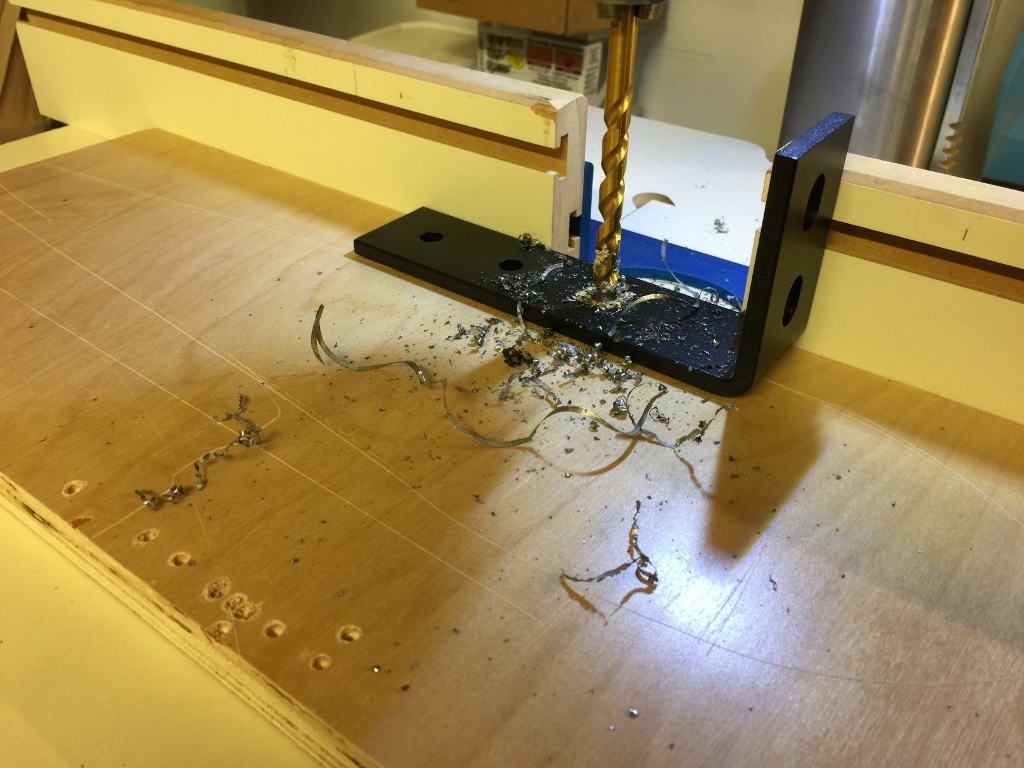
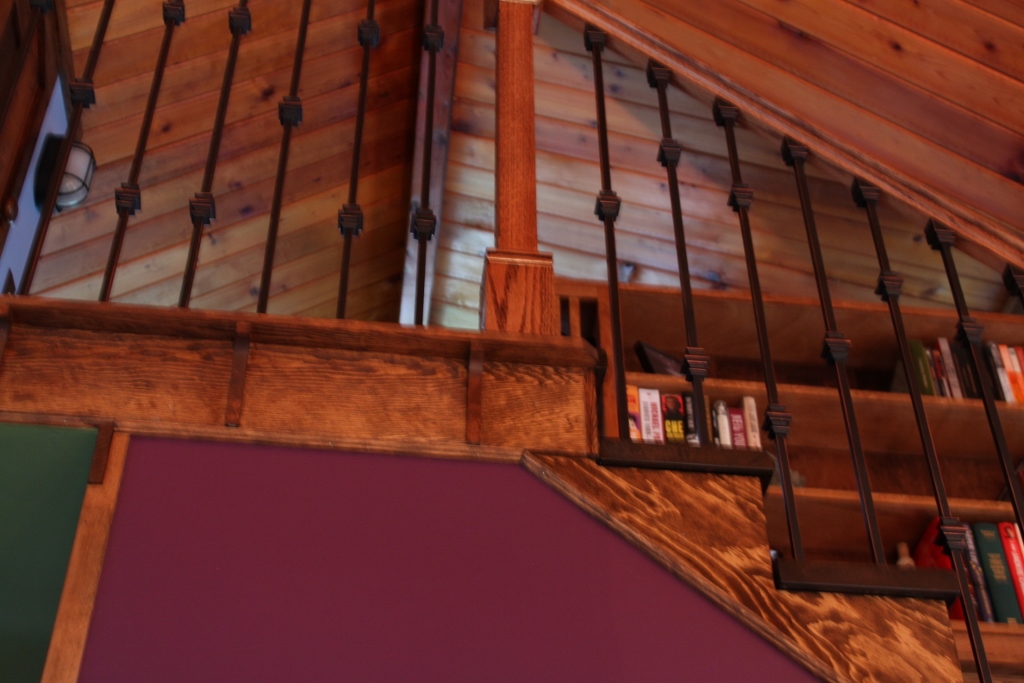
Well, despite the looming possibility of the power going out for a few days, I was able to get in the shop and finish up my stair project. Above is the jig I made to keep my drill holes at the correct angle for the iron balusters. That’s a 2″ thick piece of rock maple, and it held the angle great over all 19 holes I had to bore.
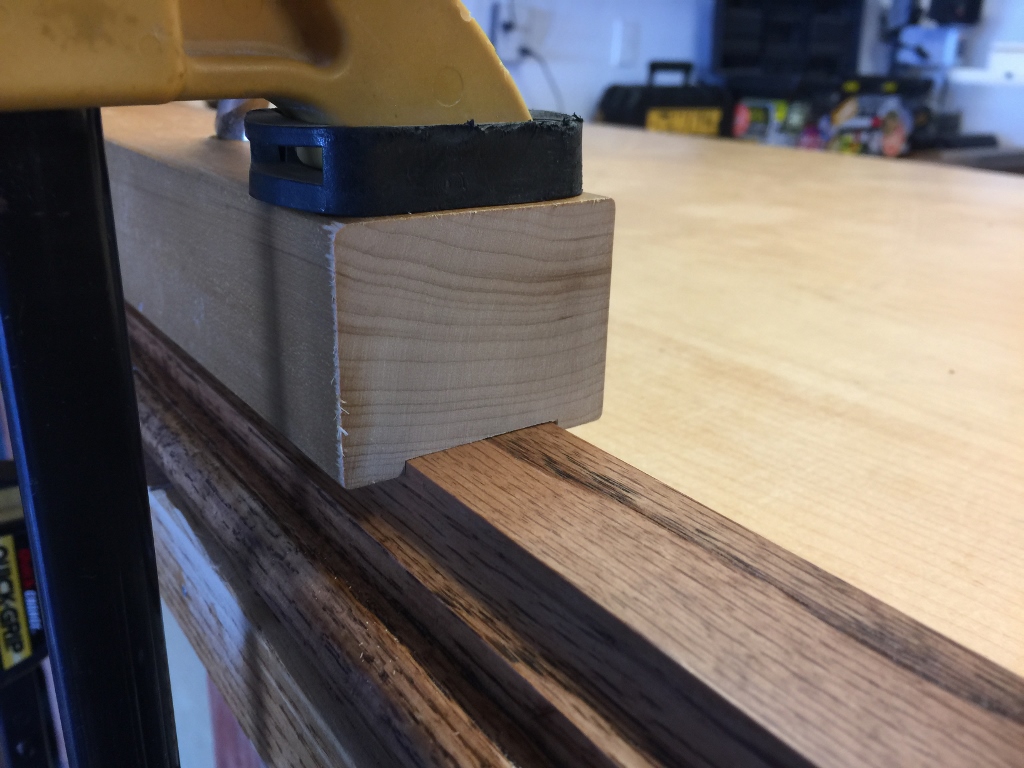
It took a little patience but I cut a wide groove in the bottom of the jig to keep is straight on the handrail. Worked well for me! Again, we are firmly in the realm of “I don’t know how it should be done, or how it’s supposed to be done, or how everyone else does it, I just know how I do it.”
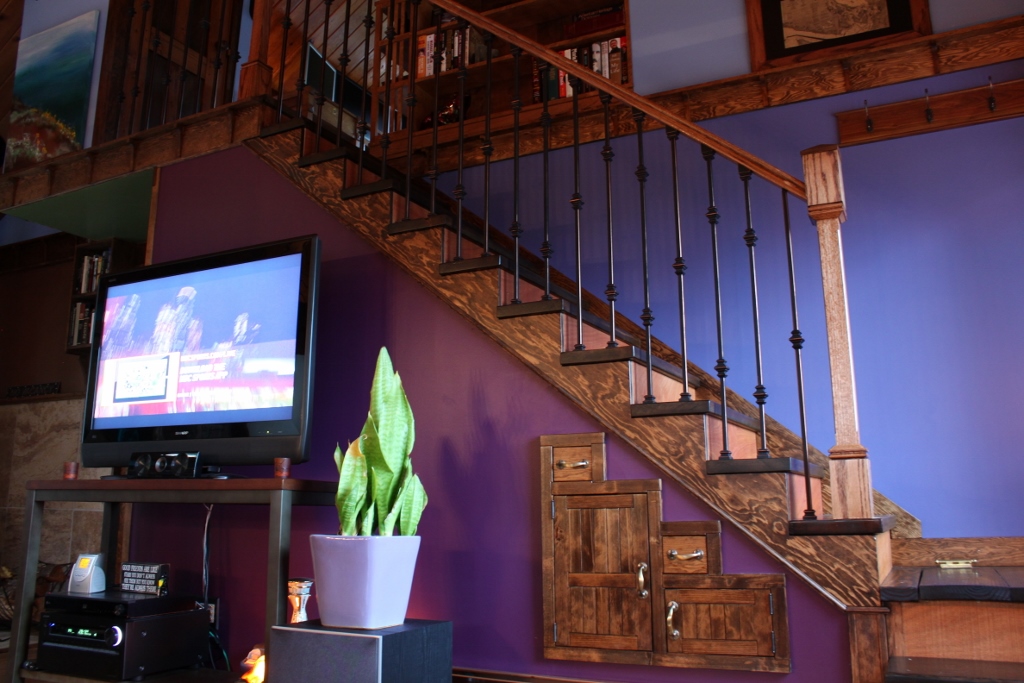
It looks a hundred times better than it used to.
The risers have a nice, coppery color to them. That’s T-111 paneling, so it’s rough cut cedar plywood, sanded a little smooth and drowned in about a pint of spar urethane. It still retains some of its rough texture, yet is smooth enough to be cleaned by a damp cloth if necessary, and hard enough to withstand scuffs and scratches.
The finish trim was the trickiest part. It’s just a crooked house, and it wasn’t exactly framed for drywall or nice stairs. It was The House That Was Not Allowed To Have Nice Things. Indeed, the finished stairs look so nice that they don’t seem to belong in this house.
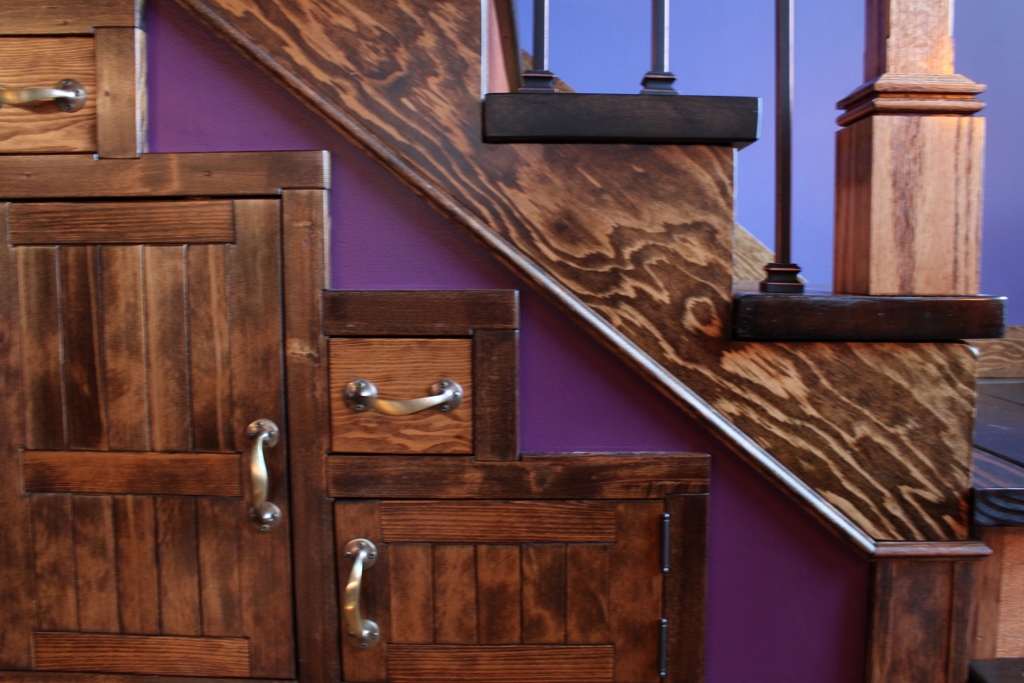
The cabinets came out … okay. I guess. (I love those brass handles!) I used trim hemlock, and it took the stain a little blotchy. But that’s okay. I’m thankful for the storage space. That big door on the left is where we put the vacuum. Yes, I built a vacuum chamber! Ha ha ha. Get it? Vacuum chamber… because it has a vacuum in it… ha ha ha, ha…. ah, bugger.
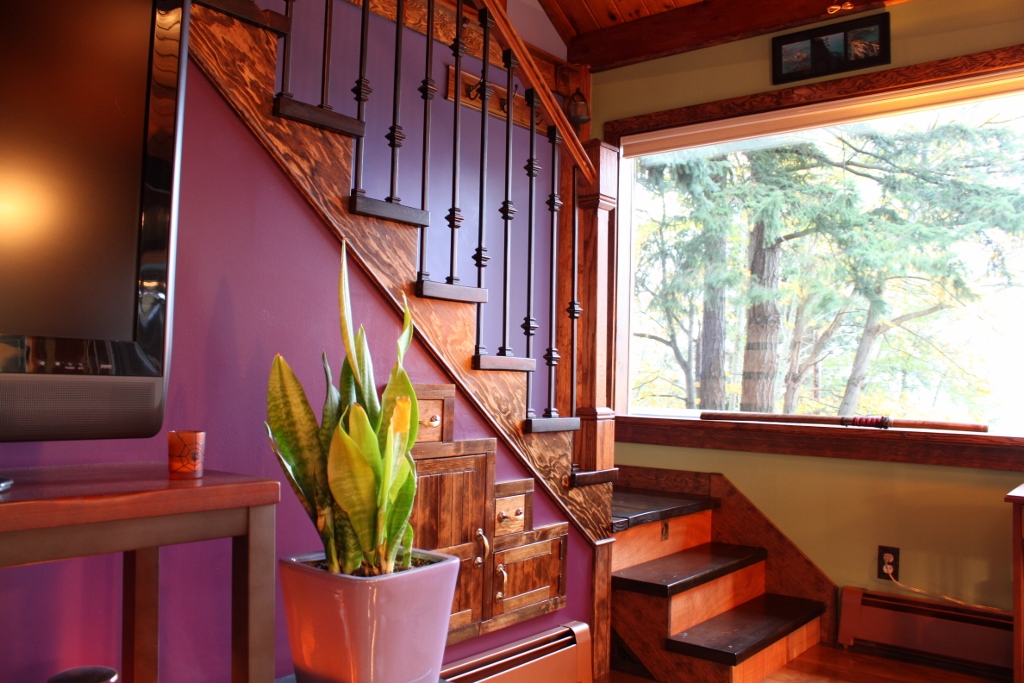
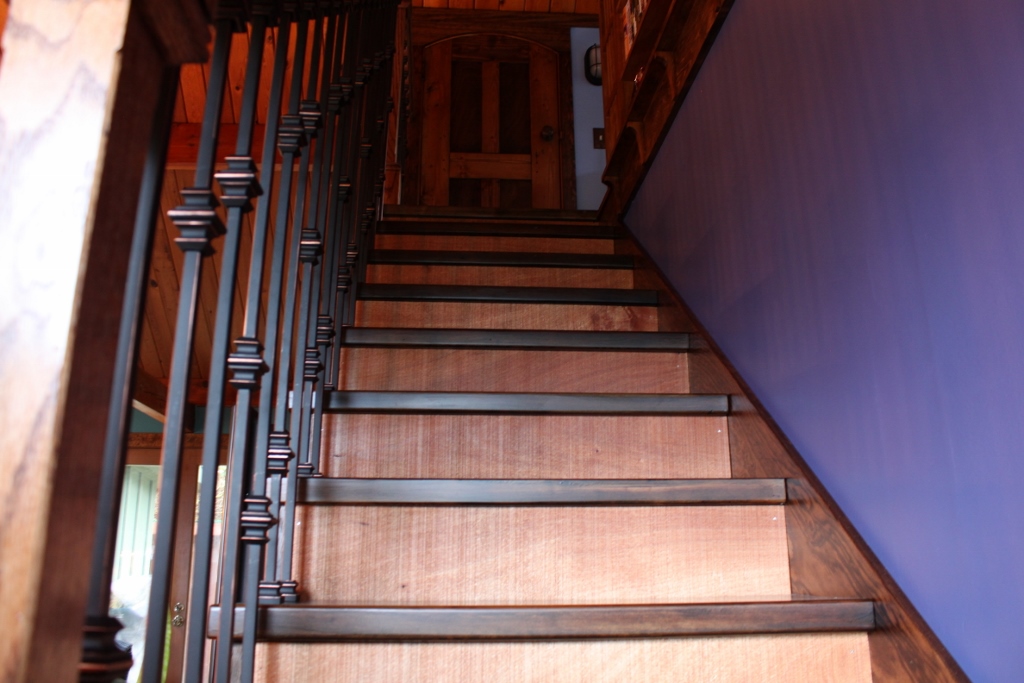
I stained the stair treads dark ebony, and the resulting color is beautiful, rich and varied. There are bands of orange and chocolate and even a little green and yellow in them. The grain was very tight and detailed. They were a real pain to restore but I’m glad I made the effort.

I did say almost finished, because when I ordered the stair balusters I was short one angled shoe. So I can’t finish the handrail install until I get that shoe, and then I have to take the handrail off, put the shoe on the baluster, put epoxy into the nineteen holes in the handrail, carefully reinstall the handrail and bolt it to the posts, and re-tighten all the shoes and fill the holes to conceal the bolts and re-sand and re-stain and drink copious amounts of beer and touch up polyurethane and spar urethane and drink more beer and touch up paint and put some clear caulk in a few joints and tighten the shims that got loosened with use and drink more beer. And then, maybe, this project will be done.