Blue tape. Scaffold. Rollers and brushes.

blue tape

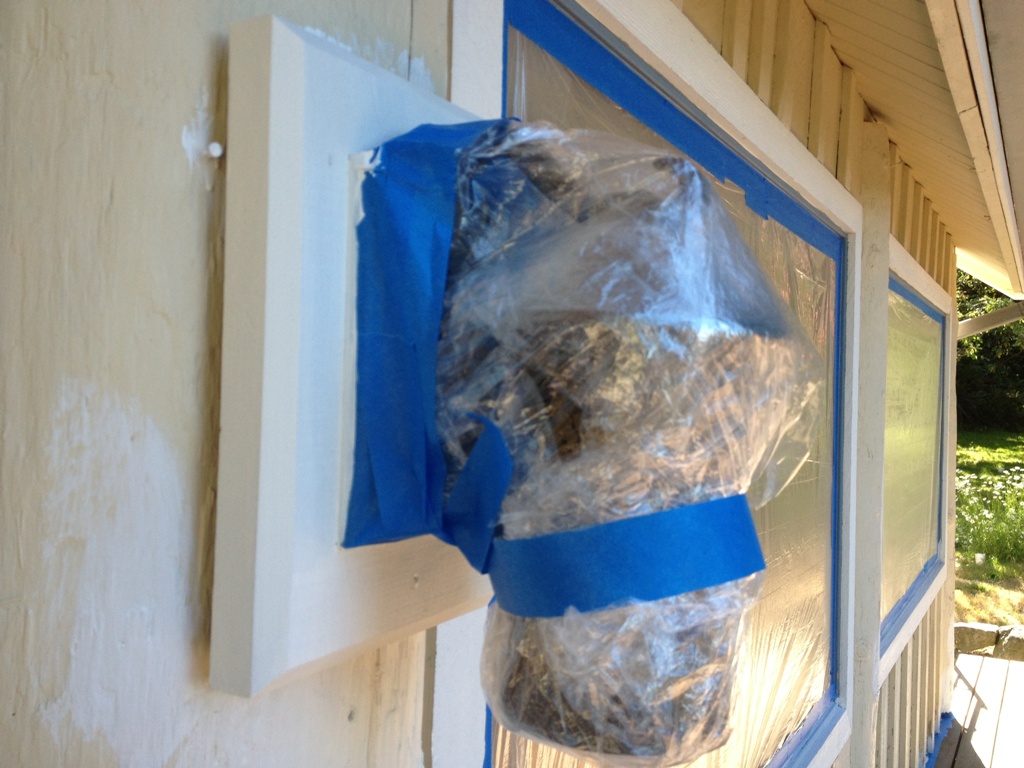
Yeah, when you see all that blue tape and plastic sheeting, it can only mean one thing.  Over the course of three weekends we painted the house.  That colorless layer of latex, peeling and flaking off in places, permanently dirt covered in others, was just getting on our nerves.  Pretty sure that was the only layer of paint the house had ever seen before we came along.

scaffold

Graffiti would have been an improvement, if we had any gangs or crews of taggers on our island.  Which we don’t.

LightWe used an airless paint sprayer, which means we spent about 9 hours taping everything off and then 20 minutes painting, per section.  A sprayer is really good at painting odd shaped objects, such as bat and board siding, but it does go through a lot of paint in a very short amount of time.

wet paintThis is a small house, but for some reason it’s still a bitch to paint.  Go figure.  And yes, I painted the rusty flagpole too.  How do you paint a flagpole?  Get some rustoleum and put it on a 4″ paint roller and put the roller on a telescoping pole.  The roller can reach about 10′ off the ground, or 20′ if you stand on top of a ladder.  My advice is to paint the top part of the flagpole first, so you can hold onto an unpainted section of the flagpole for balance.  Otherwise you just get wet paint all over your hand.

Unsafe scaffold

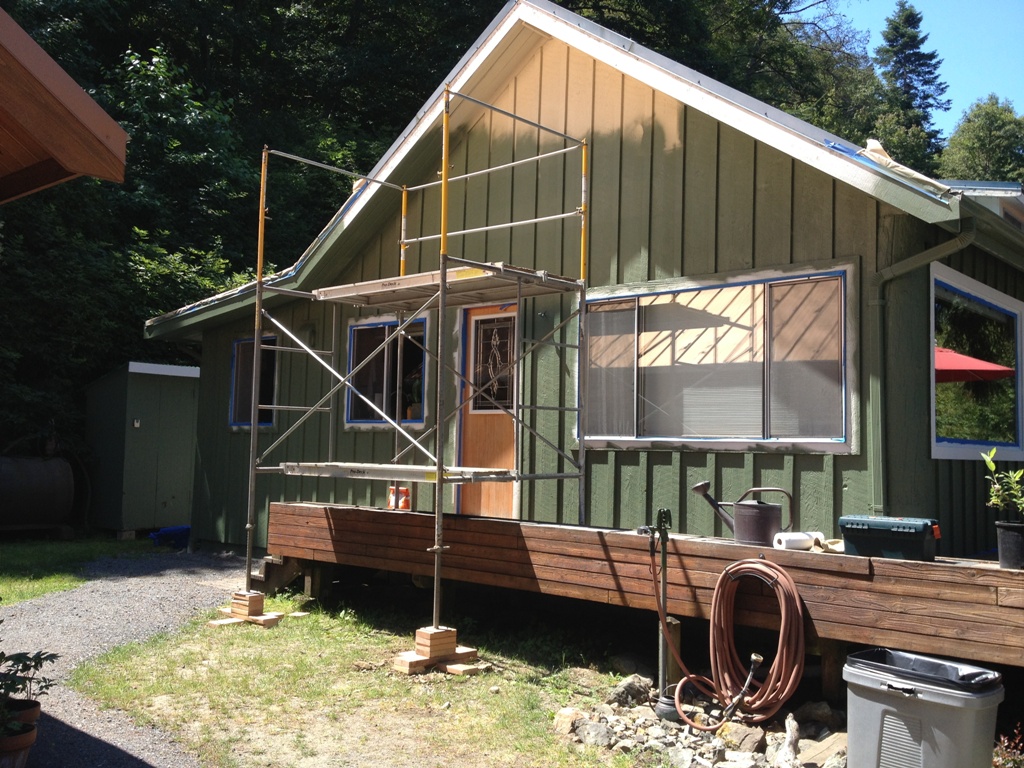
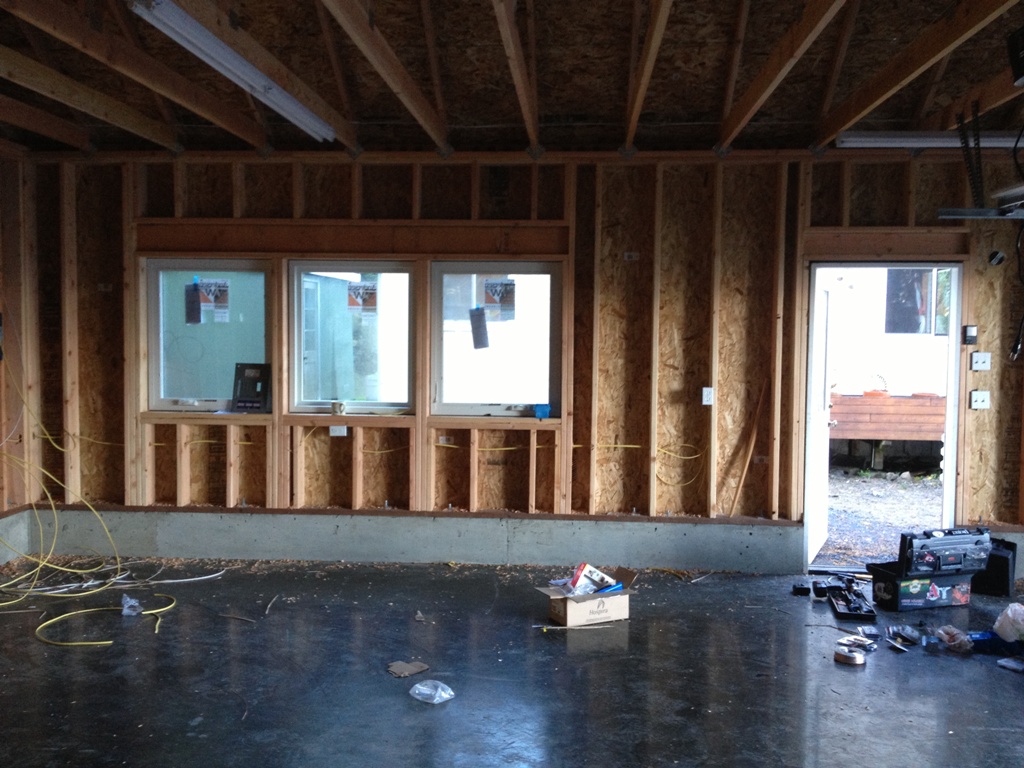
There’s the scaffold setup for the other side of the house.  Note that part of the scaffold had to rest on the deck.  The other part?  Well, I had to make those footers out of 2×6’s.  Fortunately I have about 900 board feet of 2×6’s leftover from the garage construction.  It was wobbly as hell but the wobbliness came from the two legs seated on the deck.  The footers I made were sturdy enough to support a Mack truck.

Scaffolding is fun.  Remember the jungle gyms we used to have on playgrounds?  (younger readers may not have these; they were probably replaced with something much safer)  Well, those things were training for your future on a scaffold painting your house someday.  When you’re trying to keep your balance on them, you use muscles you didn’t even know you had.  I’m not exactly afraid of heights but I’m not too fond of them either.

all finished


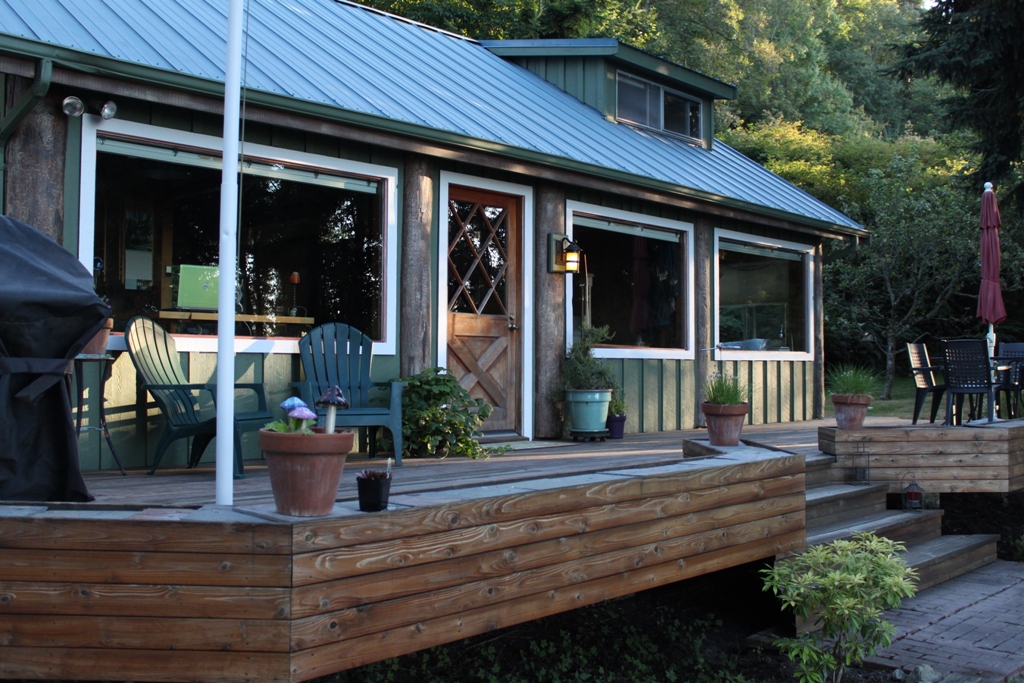
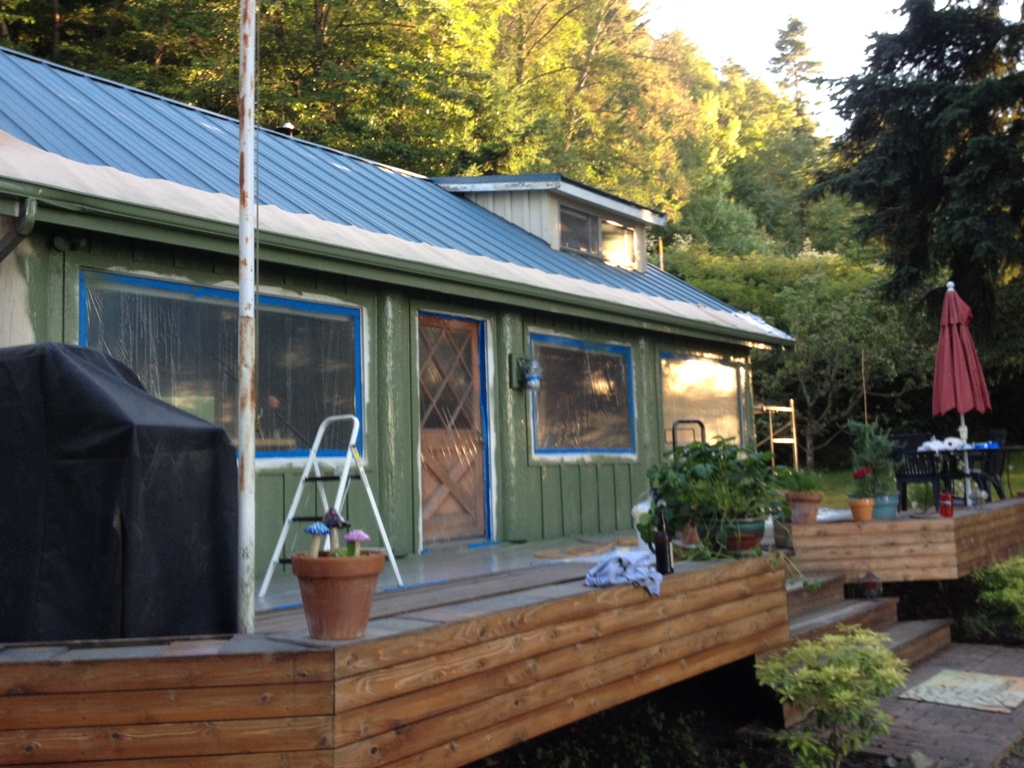
The trim around the windows we left white.  We weren’t terribly happy with it at the time but it’s grown on us.  The five logs adorning the front of our house were painted that same disgusting beige as the rest of the house so I painted them with varying shades of brown to make them look more like real logs.  At first they looked cartoonish, but after some dry brushing they acquired a bit of texture and now they either look really cheesy or they look like real logs.  Or both.  No one’s really had the honesty to tell us yet.

even side looks nice


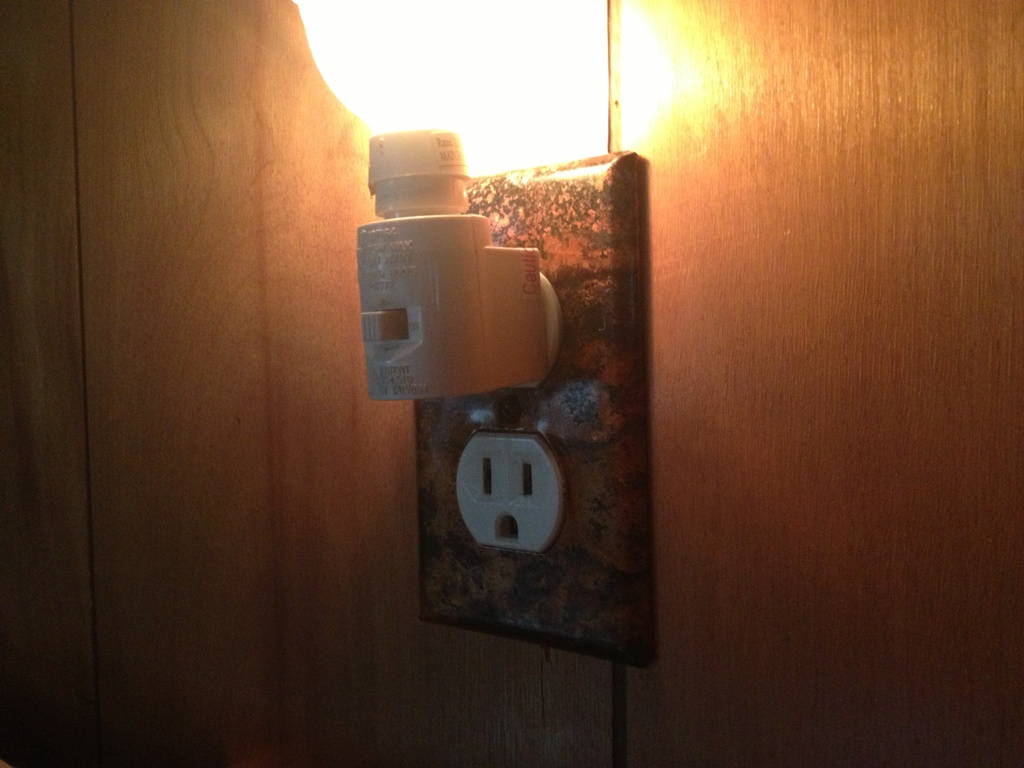
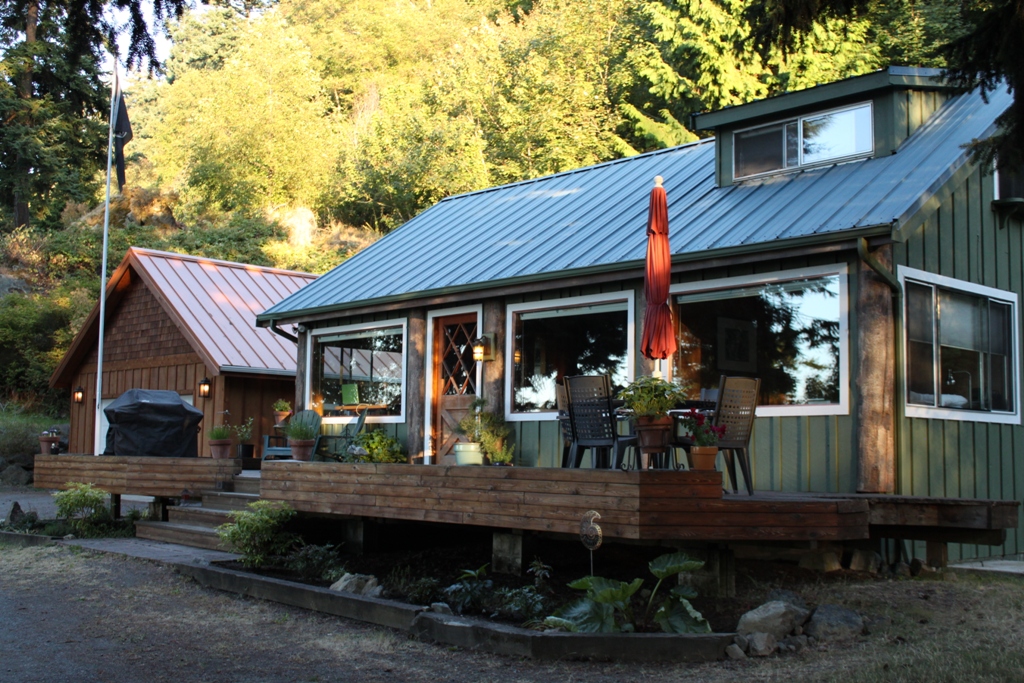
This is the ugly side of the house.  The side with the electrical connections and disfigured deck and crap.  The side people first see when they approach the house.  Anyway, it looks much better.  And I have plans for it.  Slowly, over time, it will improve to the point that people might actually look at it and say “ooh, nice house.”  We’re about a million miles away from that point (not to mention dollars) but someday it will come.

new lights too

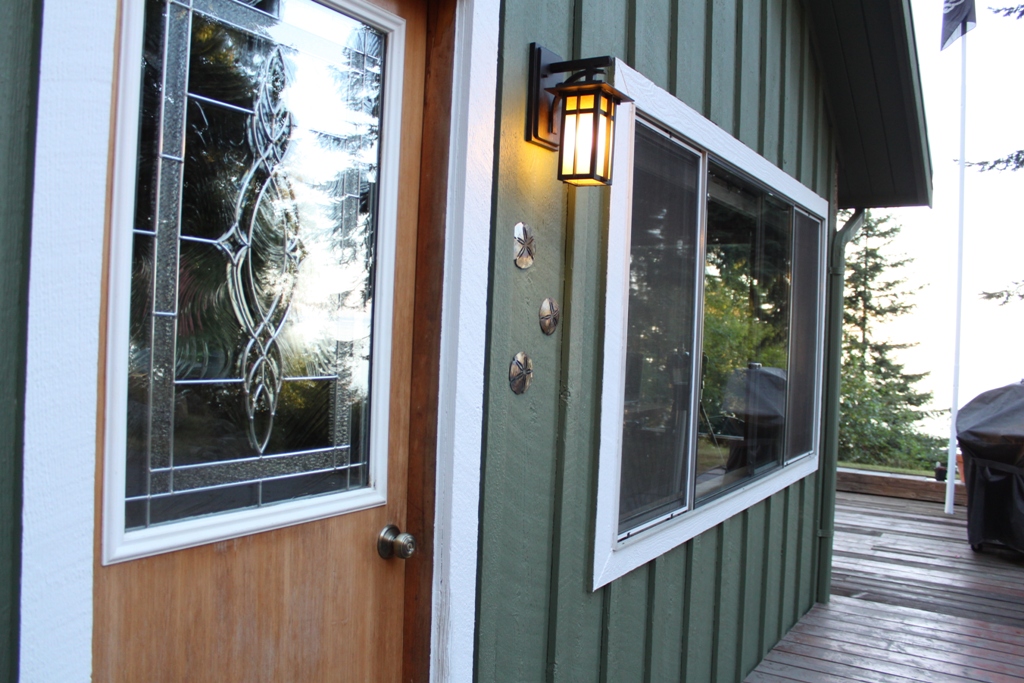
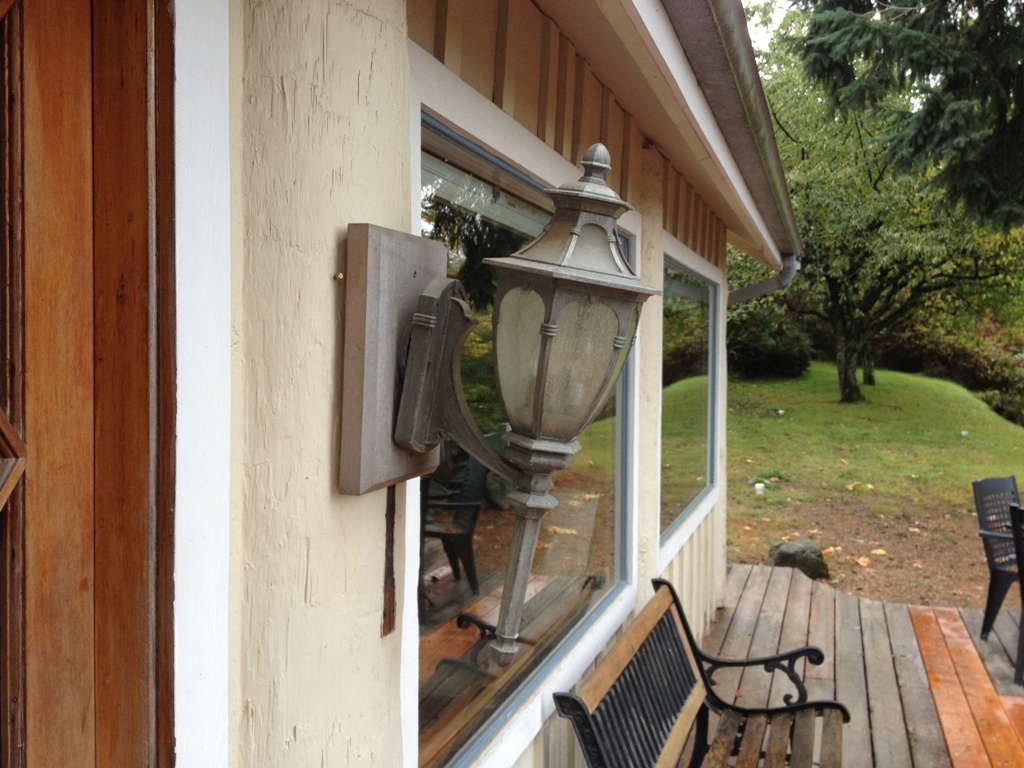
We got some new light fixtures for the side and the rear, and they look much better than the Ace Hardware clearance flood lights that used to be there.  Previously on the side, there were two flood lights set on a motion sensor.  Not a bad idea in theory, if you didn’t mind being blinded every time you walked up to the side door.  Pretty sure they caused brain damage in the short time I tolerated them.  They are now trash.  We don’t miss them.

nice place to relax

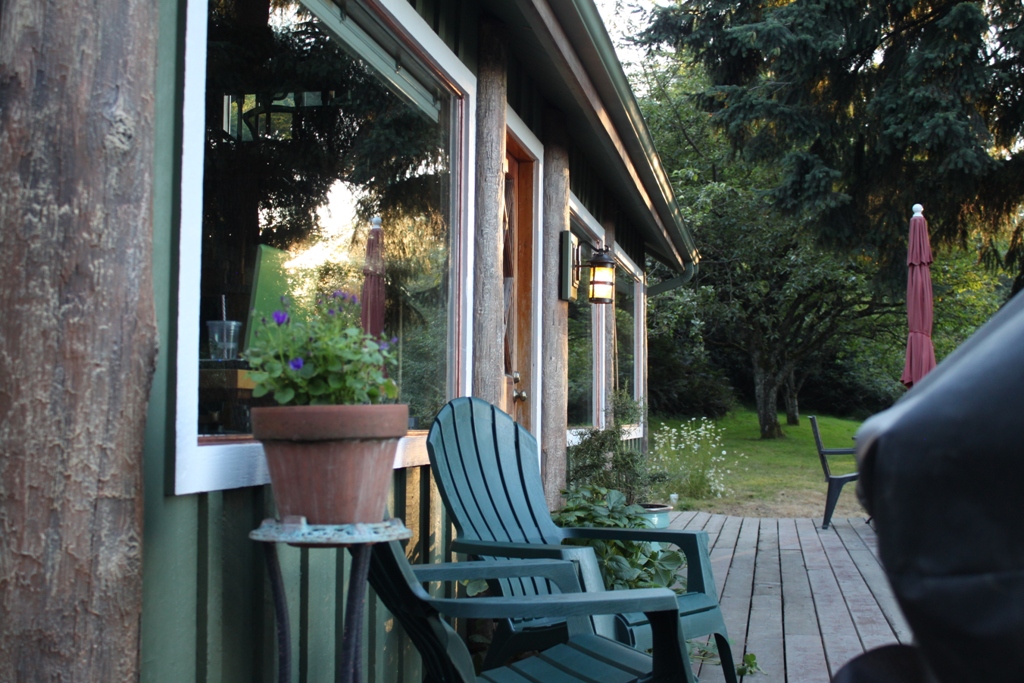
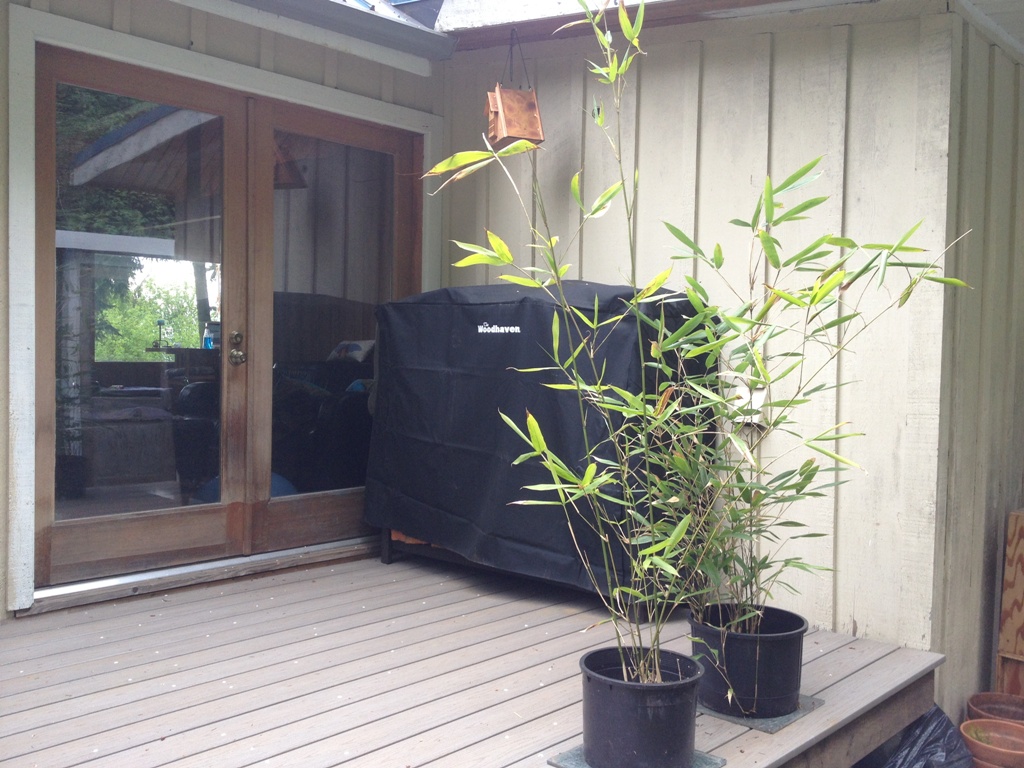
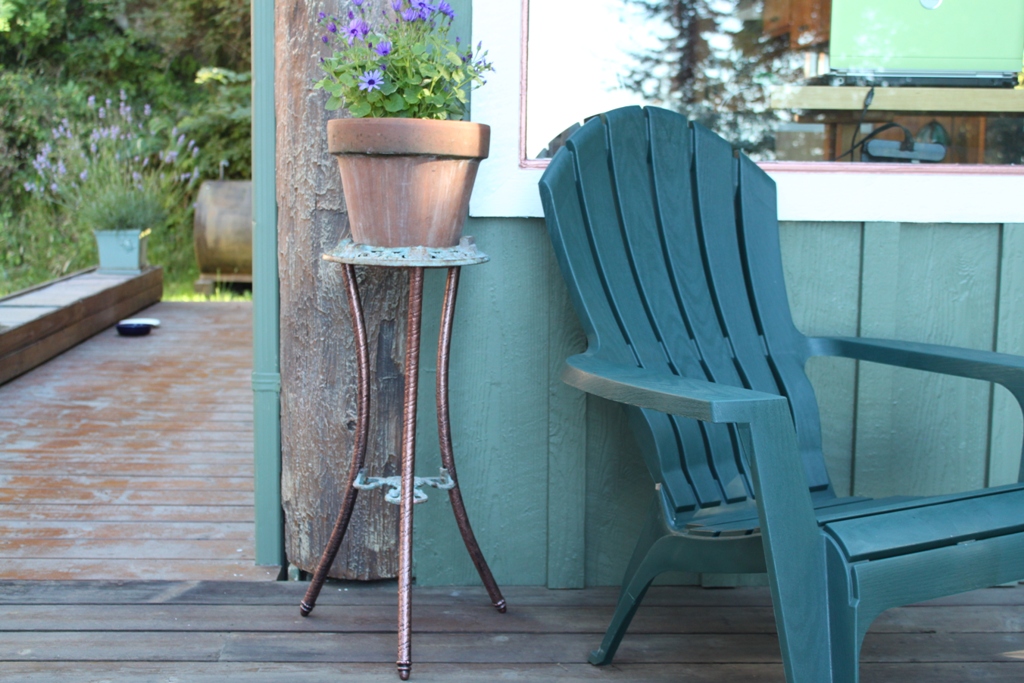
The front deck has now become a nice place to relax.  To sit and just stare at the sea.  Do I ever sit in those chairs?  Ha ha ha!  I own a house on Orcas Island.  I have things to do.  Sit in a chair, ha, that’s a good one.

chair
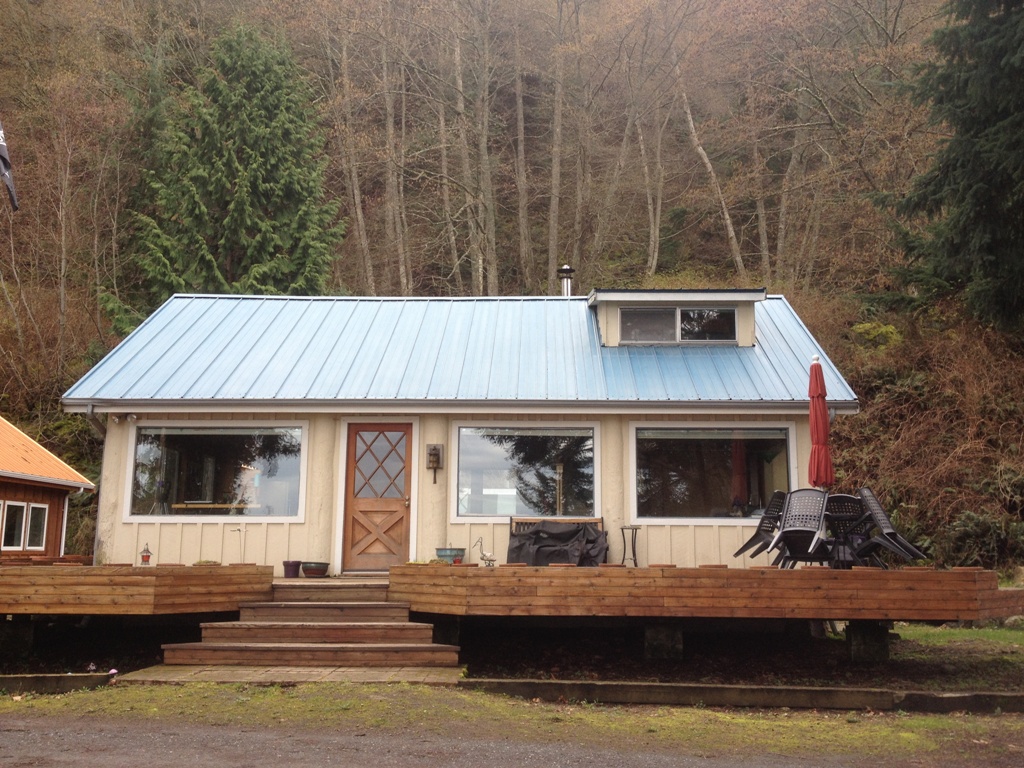
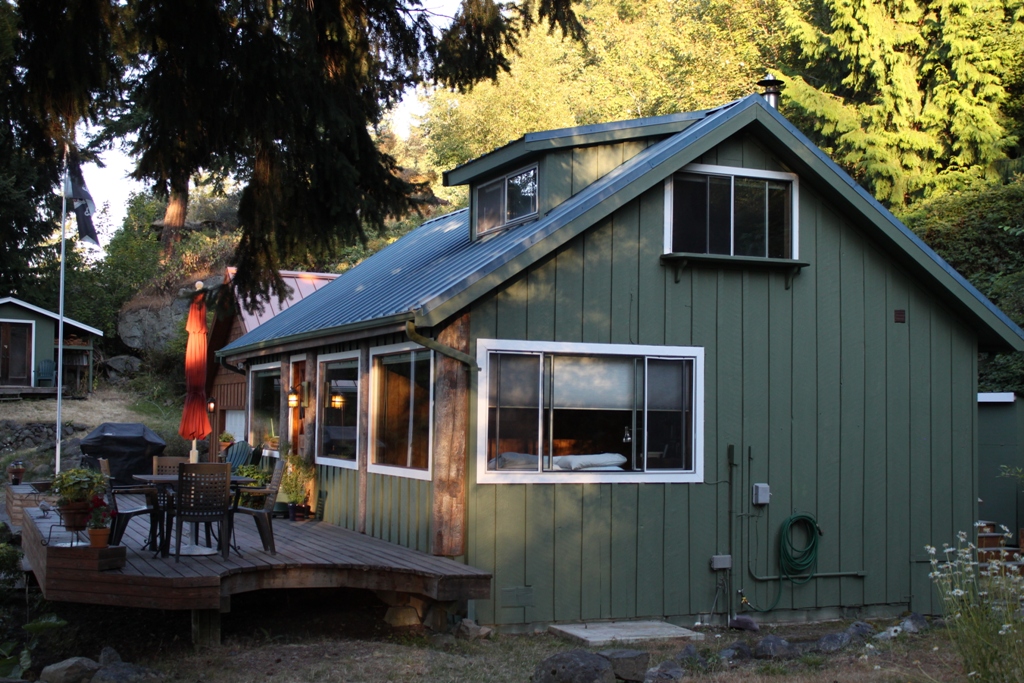
Painting the house was a real milestone.  Now that it’s done, we’re a lot less embarrassed when people have to come over or walk up from the road or simply see us out in front of the house working on some chore or another.  It used be like “yeah, we’re just contractors.  Migrant farmers.  Just passing through.  Live here?  Oh, ha.  Who would live in such a dump?  Of course we don’t live here.  Silly tourist.”  But now, finally, the place is starting to look like a nice little house, and we don’t hide our faces when the cars drive by.  Maybe someday I’ll actually sit in one of those chairs and just, well, sit there.

looks nice now

Yeah, it looks much better.  I really do enjoy painting, it’s fun and kind of soothing and there’s a huge sense of accomplishment at the end of it.  But as far as I’m concerned the next person who paints my house can be the executor of my estate.

Table Saw Restoration (part 2)

Snail PaceFigured I’d start off with a photograph that represents the pace at which this project is going.  I am happy to say, though, that the list of parts I still need is down to one sheet of paper, and I now know where to find most of them.  Just need to spend some time on the internet with my credit card in front of me and everything will be on its way.

The table extensions came in.  These were really hard to find on the Sears website because they don’t actually go with my model of saw.  According to them, they don’t fit and won’t work with my model and if I attempt to install them on my saw it will shred the warranty, condemn me to a lake of fire in my afterlife and every cut I make on the saw will be unsafe and inaccurate.  But in reality, these are the best table extensions out there, and they fit like a charm.

I didn’t even need to use shims along the sides.  It’s dead flat.

Saw BladeMy new sawblade came in also, and it’s a beauty.  Those of you who are woodworkers know how much those things cost.  Those of you who are not, you don’t want to know.  This is certainly not the most expensive blade out there but Forrest makes great saw blades and this model is excellent for both cross cuts and rip cuts.  I am far too lazy a woodworker to change out my saw blades for each cut.  I like to have one blade for everything.

Oil PlugI also started dismantling the motor today.  All I was going to do was put a new power cord on it but the further along I got the more I wanted to keep taking it apart and cleaning it.  I found the two oil plugs underneath about a centimeter of sawdustdirtgrease, a paste like mixture of sawdust, dirt and oil.  I’m sure the motor was happy to get some fresh oil on it in there.

Then I started painting it.  I figured, what the heck.  I got nothing better to do and I have a third of a can of red spray paint that I may as well use.  Make that motor housing shine and gleam in the light of my overhead fluorescent shop lights.  It would not have been wise to spray paint the motor itself so I painted it by hand.  Dismantle

I have an illness.  I know.  I’m well aware that no normal person would clean and paint an old motor that’s just going to get covered in sawdustdirtgrease.  It’s madness.  This is a lot like restoring an old antique.  Or getting it ready for a museum.  This isn’t necessarily the table saw I wanted to have, but by golly it’s going to be the best dang table saw I can make it into.

Besides, the paint may keep it from rusting.

Paint


I had more paint in that can than I thought I did so everything got about ten coats.

More Paint


The motor I painted black, to kind of go with the red.

FaceplateThe last thing I tried to tackle today was the faceplate.  The existing one is a little cheesy looking and I wanted to make something with a smaller aperture where the tilt indicator comes out. A lot of sawdust leaks through that big slot and I want to kind of close that up on the final make.  Also, you can’t really see it in the picture but it’s coated with this layer of crackling plastic that is simultaneously peeling off and difficult to remove.  I thought I would just make a new faceplate out of 1/4″ laminate paneling, but once I got it cut and in place  ….

Hate thisI hate it.  I absolutely hate the way it looks.  I know Hate is a strong word, and that’s why I chose it.  It looks really tacky and I don’t think it will hold up well.  I’m going to seek out a small sheet of metal that I can work with.  Maybe brass or copper.  Heck, how about gold foil?  Platinum sheeting.  Apparently no effort is too great and no expense is too much for my table saw so I may as well go all out.

Hoping to have this thing up and running in about two weeks but it really depends on how fast things gets shipped out here.  It’s tourist season and I am in no mood to brave the lines at the ferry landing just for a trip to sears and home depot.

Fancy Switchplates


Here’s a really quick and easy project to make some decorative switchplates and power outlet covers.  It’s very simple and not terribly expensive, and can give you an eclectic look in your home.

Our home, like many old houses, came with a plethora of those cheap, crappy plastic switchplates.  You know the kind.  Loosely fitted with stripped and mismatched screws, shattered with tiny little cracks, splotched with paint, so dirty that you couldn’t clean it with sandpaper.  I really hate those things.  You can replace them, of course, either by buying the same crappy plastic plates for about 19 cents each, or you can get them from the high end restoration websites and spend about 19 dollars each.  Or anything in between.  You get what you pay for.  The expensive ones are really nice, but when you have 64 plates in your house it really adds up.

Copper SamplesWell, we were looking for copper sheets for a completely different purpose and we ordered a sample pack to see what the colors were like.  We got a variety of 36 gauge copper sheeting, each one with a decorative finish on it.  It’s like malleable foil, soft but durable.  The samples cost money so I considered them mine to do with whatever I pleased.  I decided to use them to cover some switchplates around the house.

My only real concern was that the switchplates would look just as cheesy and stupid as the ones people cover with wallpaper.  Well, they don’t look quite that cheesy.  Copper sheeting is way cooler than wallpaper.  Okay, I admit the final product does have a bit of cheese factor in it, but it sure beats the craptastic plastic ones I replaced.

Cut to SizeLike any good handyman, I have a small collection of existing switchplate covers of various sizes and materials.  It’s a good idea to use metal ones for this purpose.  You’re going to form the copper foil around them and plastic just won’t take the beating.  The cheap metal ones retail for about a dollar or two so it’s not like some huge expense.  Anyway, use metal ones for the backbone.

WrappedOnce you wrap it around, you can press it down to kind of see the outline of the holes you must cut.  This copper foil cut really easy; scissors cut through it like paper and all it took to punch out the holes was a dull x-acto knife.  Don’t use your pocket knife; the copper will dull it very quick and you’ll be sharpening it for two hours to get the blade right again.

Cut out holesJust follow the edge and saw your way around and it should look great.  Again, this is why you use a metal backbone.

You don’t need to use an adhesive, but it’s not a bad idea.  I did one without any adhesive and the copper wrapped around sufficiently to hold together, but over time it might fail, and I wasn’t very happy with it.  A spray adhesive would probably work best but that’s messy and I was all out of spray adhesive so I used some double sided tape that I bought two years ago and never found a use for.  That’s why I buy things like that.  It may take two years but you never know when you’ll need it and if you have it when you need it you’ll be glad.

TapeThe only drawback is the tape is thick enough, believe it or not, that its contour will show through the foil if you look at it from a certain angle.  Had I known, I probably would have run to the store to buy some spray on adhesive.  Yeah, I’m kind of a perfectionist.  But I’m also a realist.  I’m making really cool switchplate covers for about $3 each instead of spending $19 each at some fancy pants restoration store.

FinishedThe final product looked great.  I mean, not nearly as cheesy as wallpaper covered switchplates and a vast improvement over the shoddy plastic ones I had.  One of the covers I replaced was this resin bas-relief of a moose and a tree that looked like it was a rejected prop from the Red Green Show.  I’d post a photo but it’s too embarrassing.  I didn’t have enough to do all the switchplates in the house but I got most of the visible ones.

SwitchplateSadly, they make the paneling look even worse.  But the paneling is not long for this world. Never fear, it will soon come down, replaced by sensible drywall and real woodwork.

NightlightAnyway, I thought that was a good use of the samples we bought.  Adios, amigos.  Until next time!

Yarr


Scrap Wood Project: Planter Box

Scrap WoodEvery woodworker has a surplus of scrap wood.  It just piles up, faster than you know.  I purged a lot of my scrap wood on the move out here but I did keep a few choice pieces.  But after the garage was built, I inherited a small pile of lumber, mostly construction grade stuff.  Lots of 2×6’s and a few nice 2×12’s, and quite a few pieces of cedar trim.

When you live on this island, you don’t let a lot of things go to waste.  I get that, and I’m totally down with that concept, but at the same time I don’t want to be a hoarder.  Not only do I not have the storage space, but the tenets of my religion forbid it.  Thou shalt not be a freaking hoarder.  Don’t own stuff you don’t need, don’t keep stuff you won’t use.

WoodAnyway, that’s a long way of explaining why I feel compelled to periodically make a woodworking project entirely out of scrap wood.  In my case, I have a crapton of 2×6’s, most of which are marked to make a deck or a shed or something but I can spare a few.

BambooThe back door of the house is a double door with these big glass panes that let the light through.  They’re lovely.  And they afford the entire living room a direct view of the ugliest shed in the San Juans (click here if you think I’m joking).  So we figured we’d get some bamboo for screening and put it in a big planter box so we can look at the bamboo and not the shed.  We’re pretty smart, huh?

Carpenter AntThe wood, I discovered, was being guarded by a small army of carpenter ants.  I’d ask them to work for me since I have a myriad of carpentry jobs to get done but they’re union and I’d have to pay out the wazoo.  Well, the rule of ants is that where there’s one, there’s a million, so I had to make sure the wood I took from the wood pile was ant free.

More woodThe planter box would be pretty simple, I hoped.  I’d just cut notches in the ends of each piece and stack them all together.  I’d like to thank my mother for buying me Lincoln Logs for Christmas in 1972.  They taught me a lot about how to build things.

Lincoln LogsI was actually hoping to not have to use fasteners or nails of any sort but I decided to toe it together with some tenpenny nails just to make sure it didn’t fall apart.  Since I don’t own a nail gun, that involved me hammering nails at an angle into corners and hard to reach places.  Yeah, there was a lot of colorful language coming out of the garage in that particular hour.

Eagle2The bottom was a piece of scrap plywood that had been sitting outside in the rain for about eight months so I figure it’s already acclimated to being moist and moldy.  I did line the inside with some thick plastic, just to help the thing live longer.  This planter box should age well.  I expect within a year it will be gray and pitted and have moss growing on it, which is the intended look I’m going for.  A bald eagle stopped by and gave my planter a little nod of approval, and I took that to be a sign of good fortune.

Planter

So there you have it.  Nothing but a few 2×6 beams and a sheet of plywood screwed to the bottom with like twenty decking screws just to make sure it stays affixed for as long as possible.  I didn’t even treat the wood with anything, I’m just leaving it outside to rot.  In a good way.  It should weather well out here, and should look great for many years.  When it’s finally ready to be put out to pasture, literally, it can be simply taken and set in a field where the planter and whatever’s growing in it can just become part of the earth.  It happens faster than you think out here.

Better View

It sure beats staring at that ticking time bomb boiler in the crappy shed.

I fully expect that bamboo to take off like a weed on steroids.  There’s actually two species of bamboo in the planter, both known for their aggressive growth and screening properties.  If the whole thing gets overtaken by bamboo growing out the sides and bottom, I’ll be happy.


Cat


Extremely Blue

Here is a Before Picture of our lovely roof.

Mold colored roof


It was kind of mold colored, covered with years of dirt, bug parts and fungus.  Well, we had it pressure washed and who knew how blue it was underneath.

BlueExtremely blue.  Swiss Miss blue.  It’s going to be interesting when we go to paint the house.


Laundry Room Plans

sIMG_0332Yeah, it’s just the laundry room.  Nothing exciting.  It’s currently 72 poorly arranged square feet that are working way harder than they should be.  In fact, this room does so much that we’ve decided to start the renovation here.

Currently, the washer and dryer are arranged perpendicular to the existing cabinets, which wastes a lot of space.  There’s an entire corner that we can’t even get to.  We just kind of drop things down into the hole, bulky storage items that we don’t have to retrieve often.

Speaking of the existing cabinets, we’re pretty sure they were born in someone else’s house.  Then, when they were taken to the dump and thrown away, someone saw them and said ‘hey, I bet those would fit in my laundry room.’  Now they’re here.  They’re very poorly built; when you open one door it kind of twists the whole frame of it so all the doors open simultaneously.  I hate them.  When I get rid of them, I will burn them to the ground so there’s no risk of them ever being used again.

sIMG_0363Oh, and check out these wonderful shelves.  Those steel racks only found at places like ace hardware, that can transform any old, rotted, trashy slab of wood and turn it into a beautiful, efficient, adjustable shelving system.  These too shall burn.  The steel shall sink to the bottom of the sea, I swear it.

This tiny little 5 x 10 room has a lot of functions.  In addition to laundry, it’s got to have a place for a cat litter box, the microwave and coffee pot, cat food, and quite a bit of miscellaneous utility storage.  It needs to have a hanging wardrobe of sorts, a place to hang clothes fresh out of the dryer, have hooks for mops and brooms and crossbows and whatever else needs to be hung up.

sIMG_0362One reason we’re somewhat motivated to tackle this room first is that there’s a bank of cabinets in the kitchen that is going to get taken down.  These are good cabinets, actually, and they’ll be a nice fit and give us a ton of storage in there.  Once those cabinets are down, we get to knock out a wall and open the kitchen up a little bit.  Looking forward to that.

Construction and demolition may not start for a while.  Still deciding on things like flooring and how to make the new cabinets.  But I’m hoping to get this finished before summer, because then I’ll be outside doing landscaping.

Light

Sometime between 1992 and late last week, someone paid money for this light fixture, and then they attached it to what is now our house.

Did they buy it because the original one fell off its last rusty screw and shattered into pieces?  Or did they spot this gunmetal contraption at Island Hardware The Exchange abandoned on the side of a dirt road road and just absolutely fall in LOVE with it?  Either way, I’ll give them the benefit of the doubt and assume it was straight when they installed it, and it was only a matter of time and gravity that gave it the leaning tower look.

Anyway, it had to come down.  Ships were running aground when we kept it lit for too long.

We got something a little more to the scale of the house.  With a few shims and spacers it installed upright.  Came with one of those fancy high efficiency light bulbs that will function for 300 years before it burns out.

So we’re slowly adding things to update the place and give it a little more visual appeal from the outside.  It still looks pretty crappy of course but these things take time.  Meanwhile, we’ll just enjoy the view that goes the other direction.


Saying goodbye to the old kitchen faucet.

It was an emotional weekend.  The lovely kitchen faucet, the one that came free with the house, finally decided it was time to go.  Yes, the poor thing just refused to turn off, letting water leak out and drip unless you wiggled the tired handle just right.  You could hear the flakes of oxidized metal scraping off every time you went to pull on that lever.  I tried to save it, but in the end, there was no hope for it.

It was a fighter, too.  Every nut and bolt was sealed in place by years of corroded metal, calcite deposits and the petrified remains of plumber’s putty.  But in the end, hammers and saws and some brute force were able to gently pull this old fossil out of the sink.

My choices for new faucets were limited to exactly two.  There was the $179 model and the $219 model.  They were otherwise identical.  I went for the one that didn’t look like the box had been opened and scavenged for parts.  It won’t be the same as the old one.  Nothing will ever drop flakes of calcite onto our dishes like that old faucet.  I just keep telling myself that it was meant to be.

Also this weekend I got the garage wired for surround sound.  I don’t care about the sound so much as I just like having the speakers set up in the wall, which means they don’t take up shelf space. Plus, surround sound kinda rocks.

Got rid of the front light fixture (I may smash its top off with an axe and stick it in the ground and plant crap inside it, kinda like that cute little chair we saw in town) (lookit the pics – you’ll see what I mean).  When I went to install the new light fixture I opened the box and realized we were delivered the wrong one.  So now there’s just a couple live wires sticking out of a pole next to the front door.  Home, crap home.

You might be a redneck if…

…you mount your bookshelf on the wall with 2×4’s.

Part of the challenge in this house is that most of the walls have these baseboard heat registers on them and you can’t really put furniture in front of them if you want heat.  Solution?  Prop up your furniture on stilts, of course!  Just use 2x4s.  They’ll hold that bookshelf when it’s all full of books, no problem.  It may not look fancy, but it sure looks sturdy.

I pinned the sides of the bookshelves to 2×4 studs using these super jumbo 2d10 galvanized nails that Jamie bought.  Those nails could tow a small barge.  They should be good enough to keep the bookshelf from falling on our houseguests sitting on the couch.  But no promises.


Of course, putting the bookshelf over the heat register gives a whole new meaning to the phrase “cook the books.”  Ha ha, get it?  Cook the books?  Hee hee.