Doing Things The Hard Way

The MasterI have become the master of doing things the hard way.  I can take any simple task and stretch it out to a two weekend ordeal.  I can make a bathroom renovation last longer than it takes to have a baby.  I over-think solutions to make the greatest use of the smallest space, over-engineer things so they serve the greatest number of purposes possible.  It’s an illness I have.  Some kind of obsessive compulsive disorder.  I don’t fight it, there’s no point in that.  I just gotta run with it.

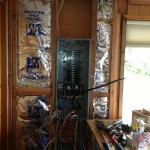
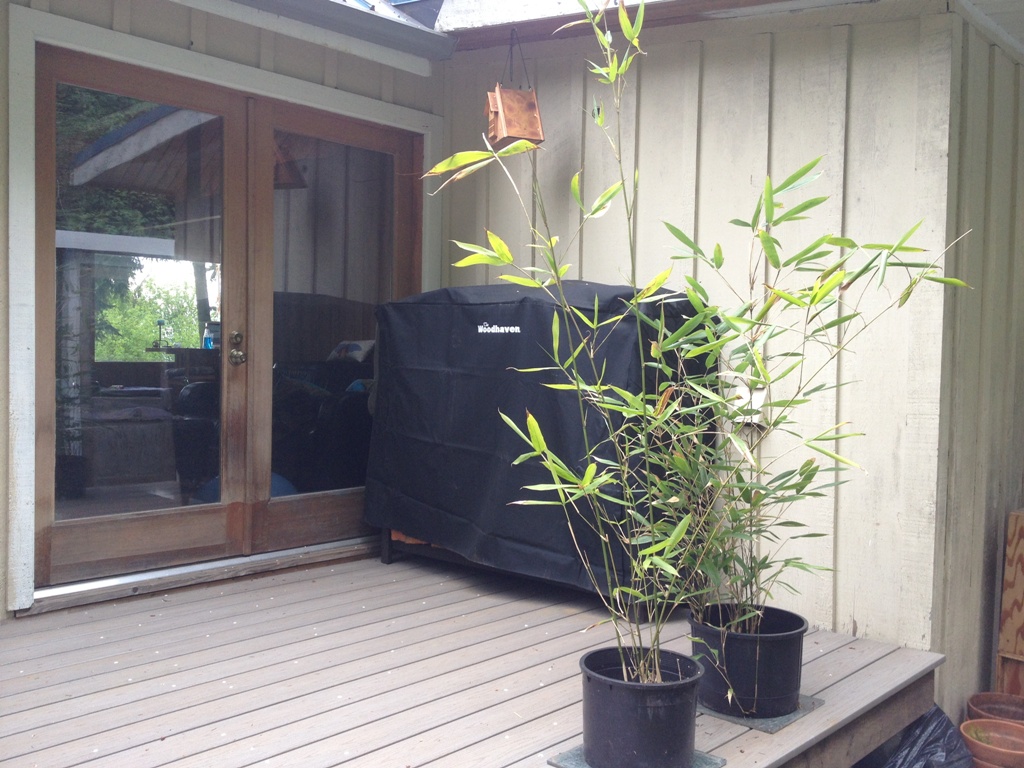
So, woodworkers and handymen alike usually have a small collection of 4′ x 8′ sheets of things.  Everything comes in 4×8 now.  Drywall, cement board, plywood, roofing material, everything.  My collection of 4×8 was sitting in the corner of my garage like an oversized deck of cards, resting against a wall because there was nowhere else to put it.  It was obstructing an electrical outlet, which offended me but I felt helpless to do anything about it.  Until I learn wizardry and am able to just levitate them off the ground, there they will rest, held firm by gravity, forever obstructing a perfectly good 120 volt GFCI on the wall next to the punching bag.

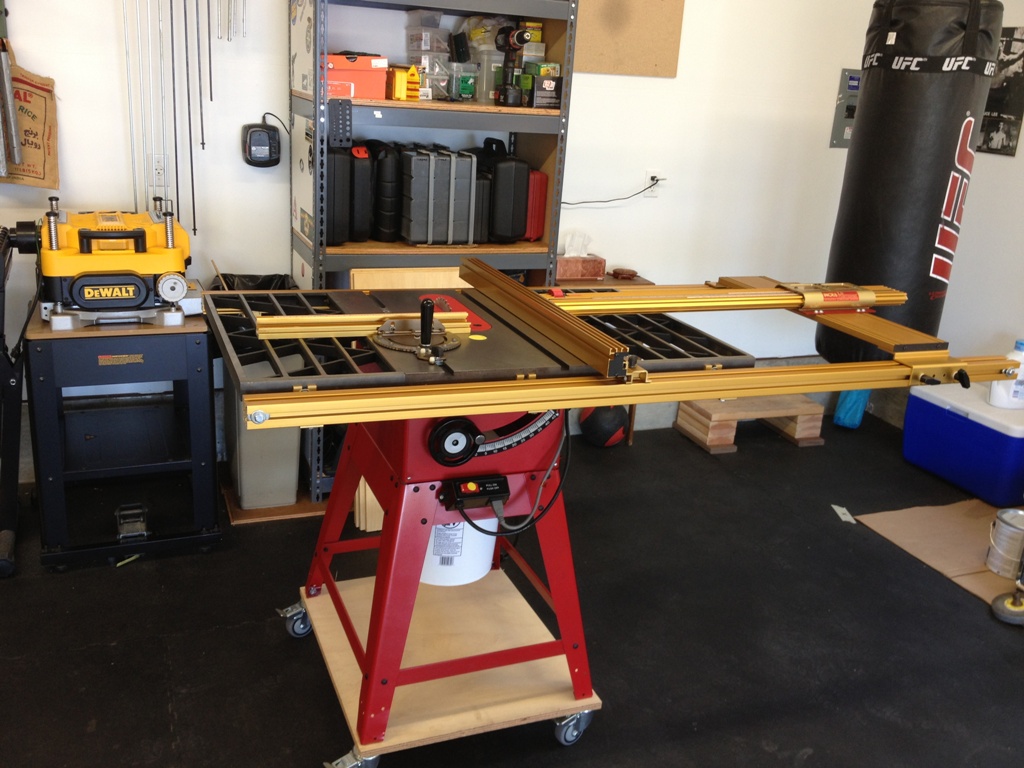
Well, no longer!  How about I put them in the opposite corner of the garage, where there is more space!  I don’t need to access these sheets frequently, so they can go sit in the corner and collect mouse poop.  Then I can use the nearby corner for a dedicated cross cut countertop with my Festool radial arm saw.  Woo hoo!

Like a puzzleI started making a rack immediately.  I could have just leaned them up against the wall but no, not me.  I need to make a rack for them.  Why?  Because it’s harder to make a rack than it is to just lean them up against the wall!  And I want them up off the floor because when we pull our wet vehicles in the garage floor gets wet and I don’t want my plywood getting wet.  Ergo, a rack.

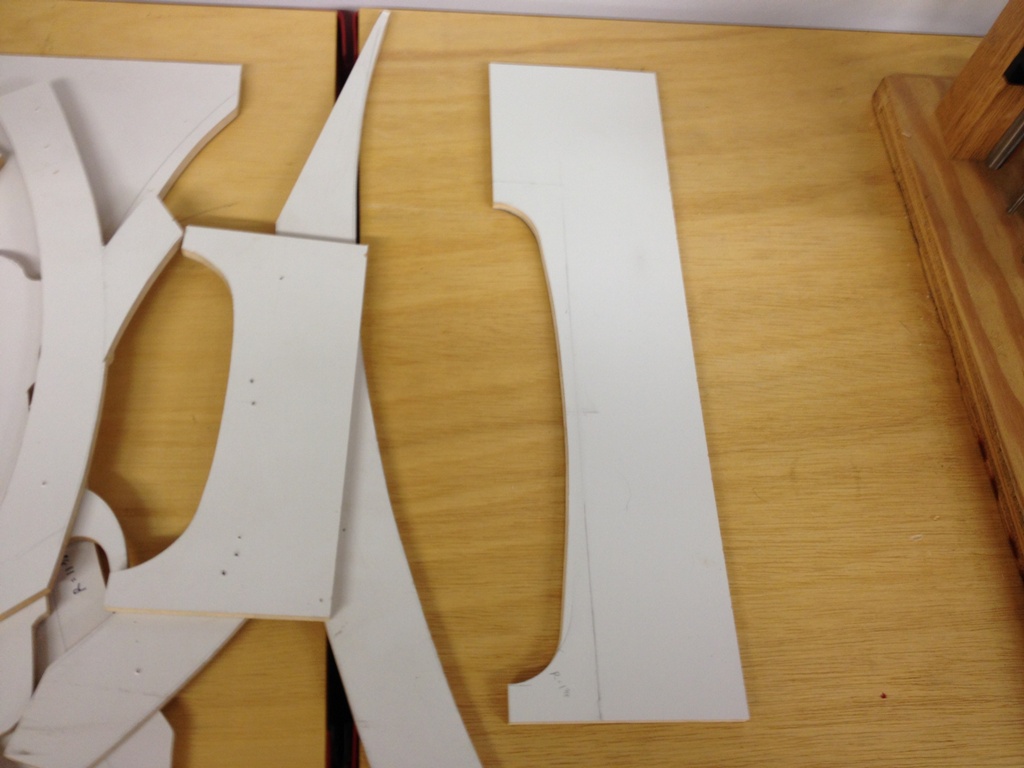
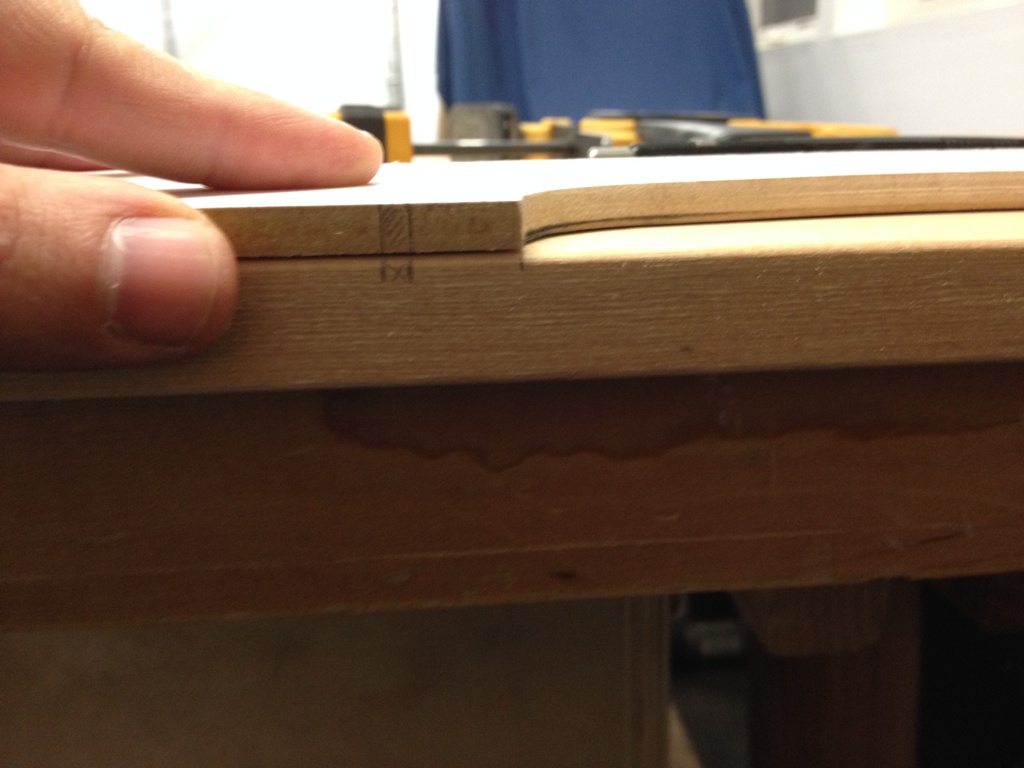
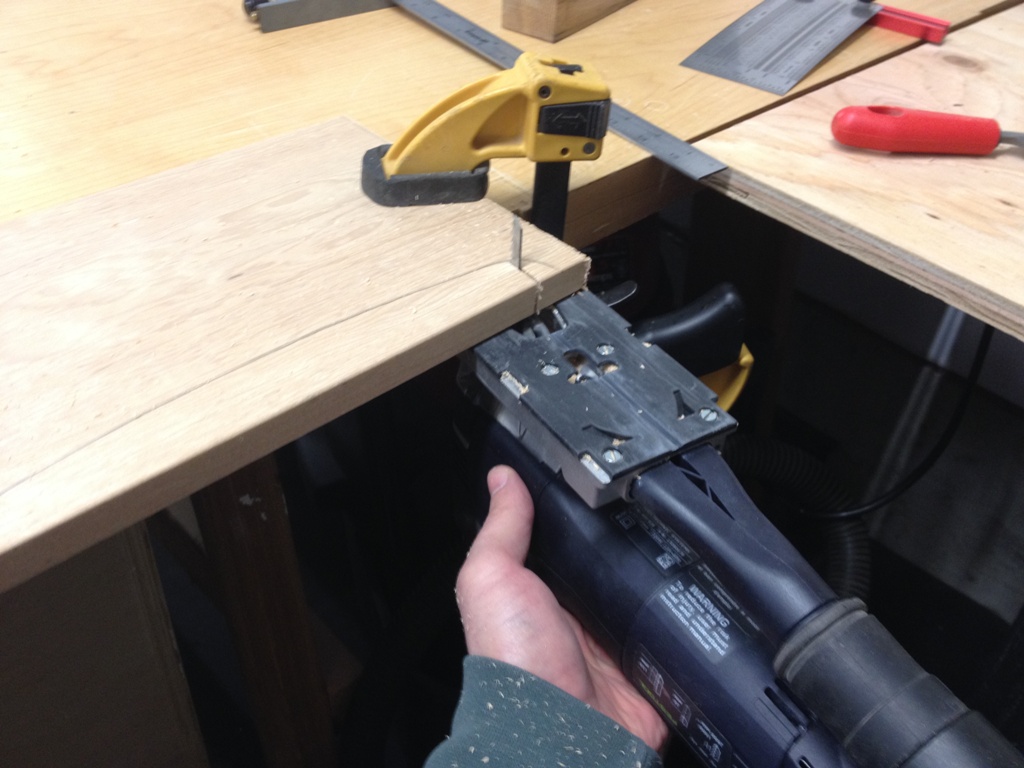
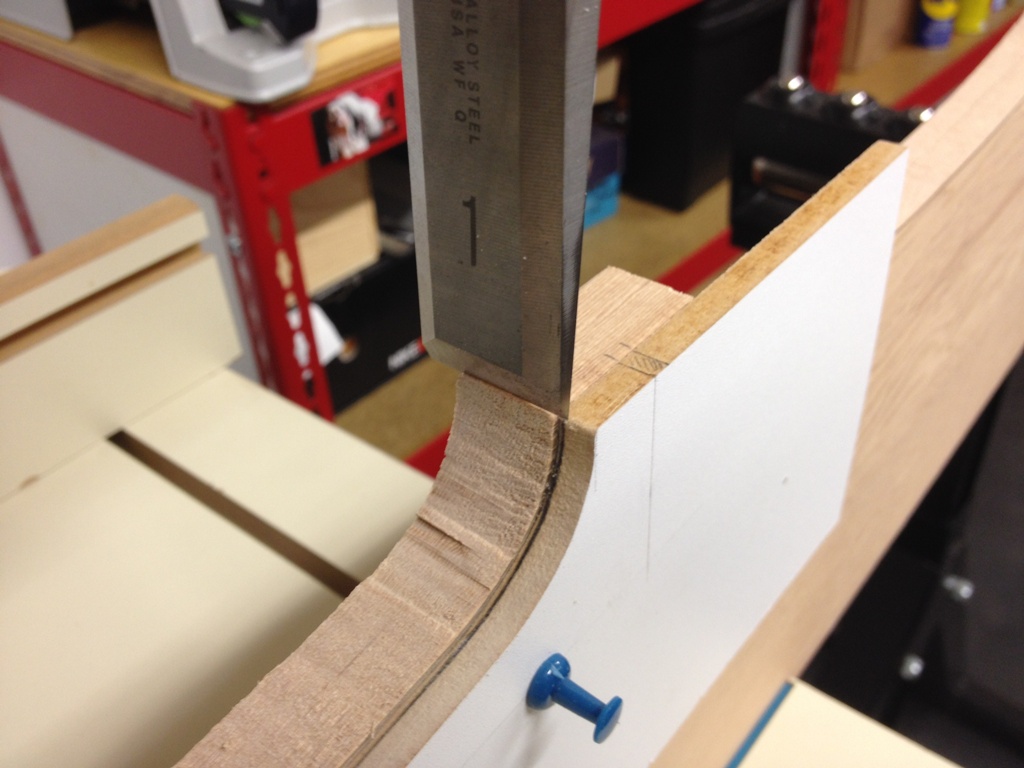
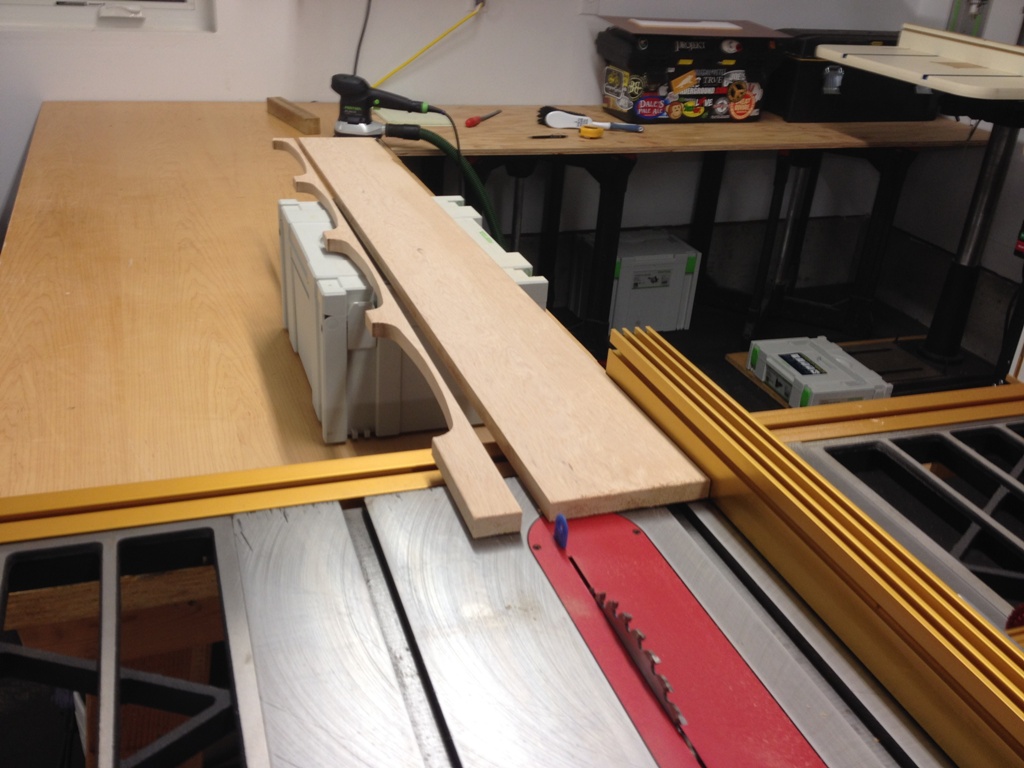
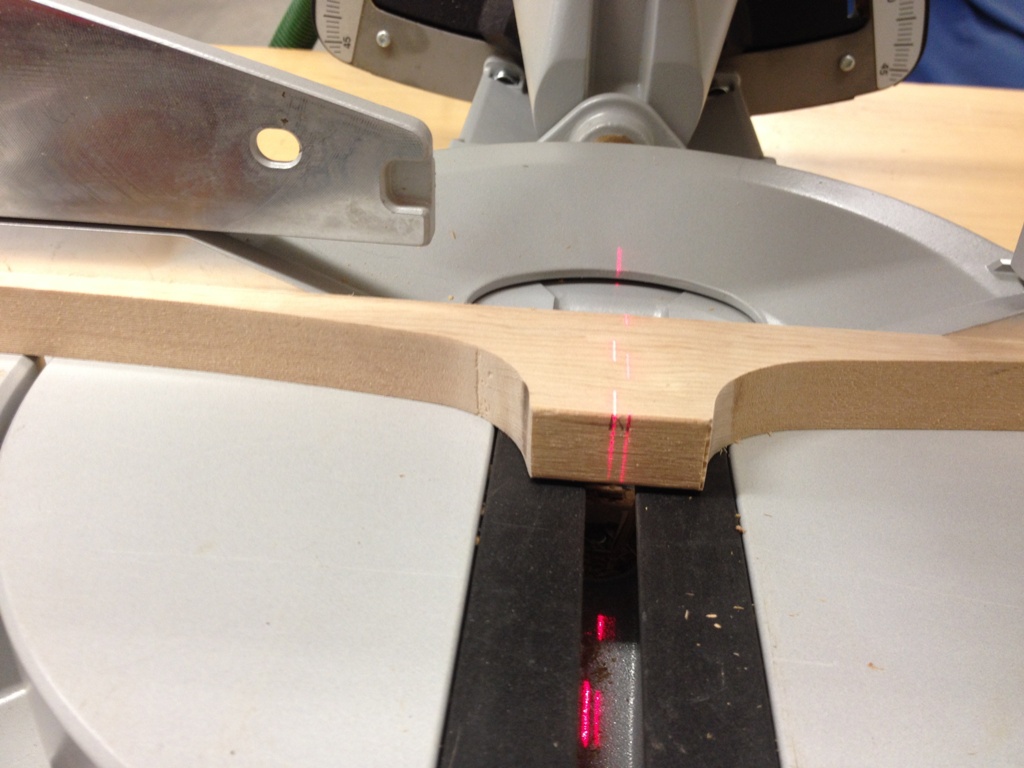
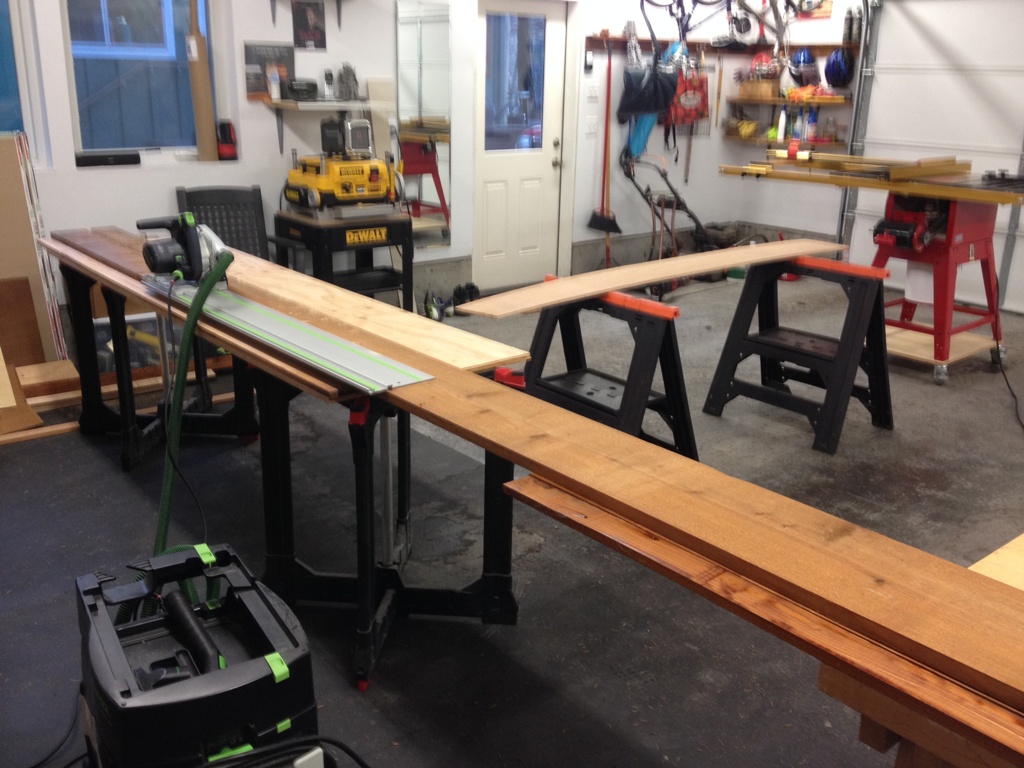
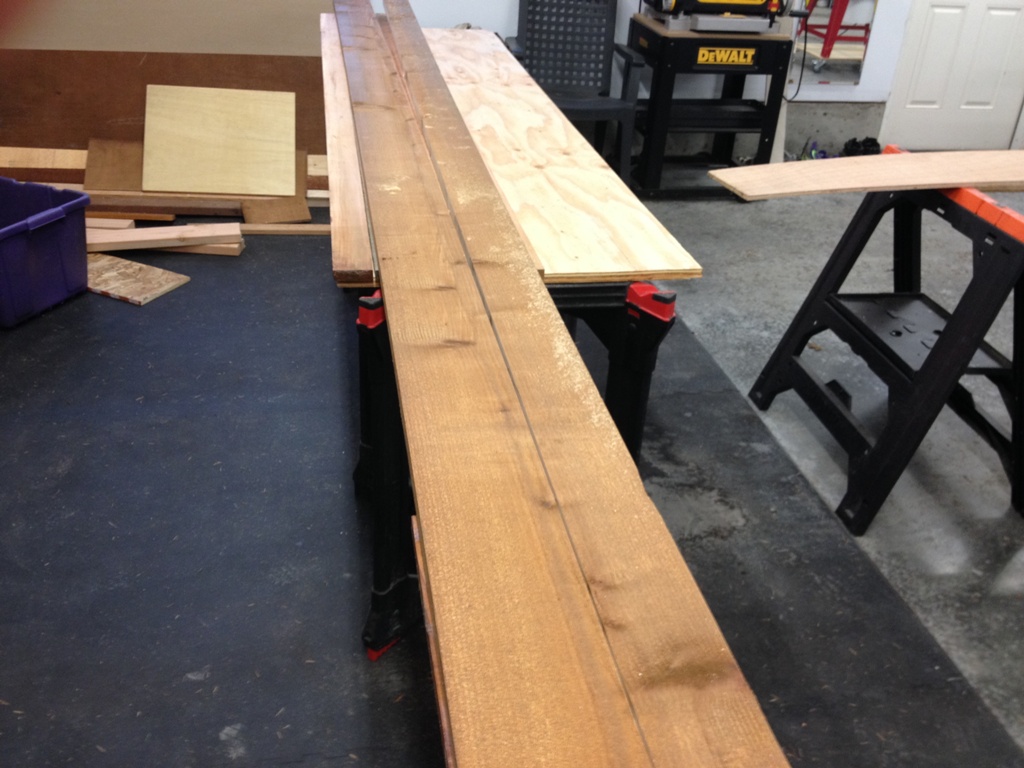
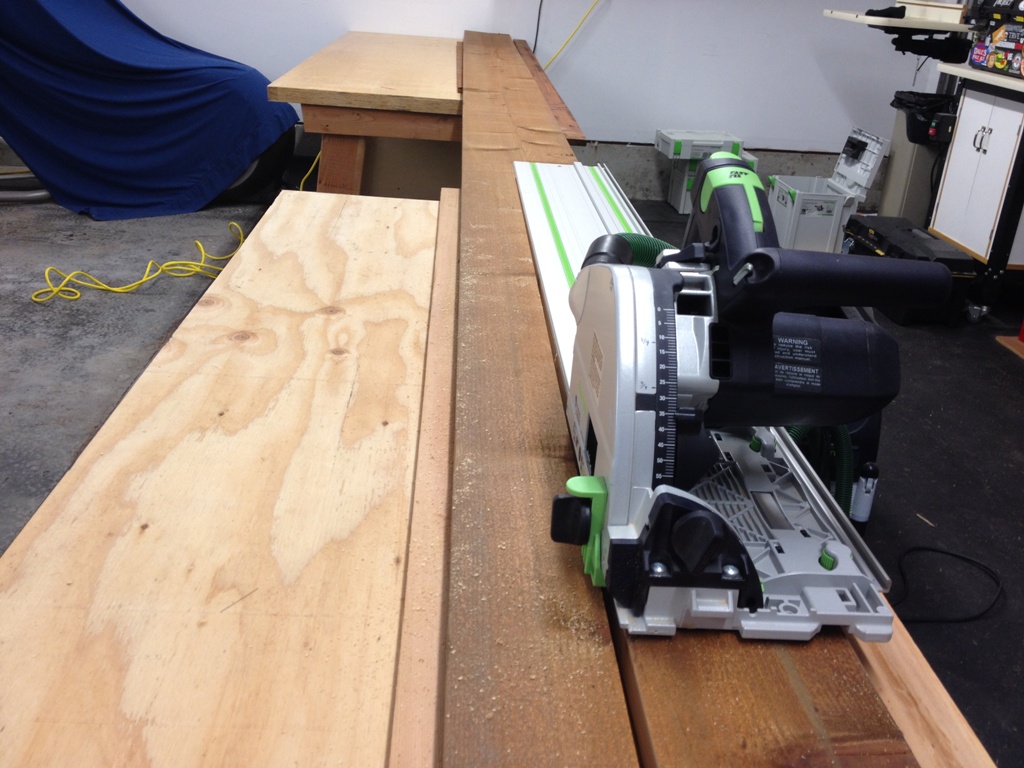
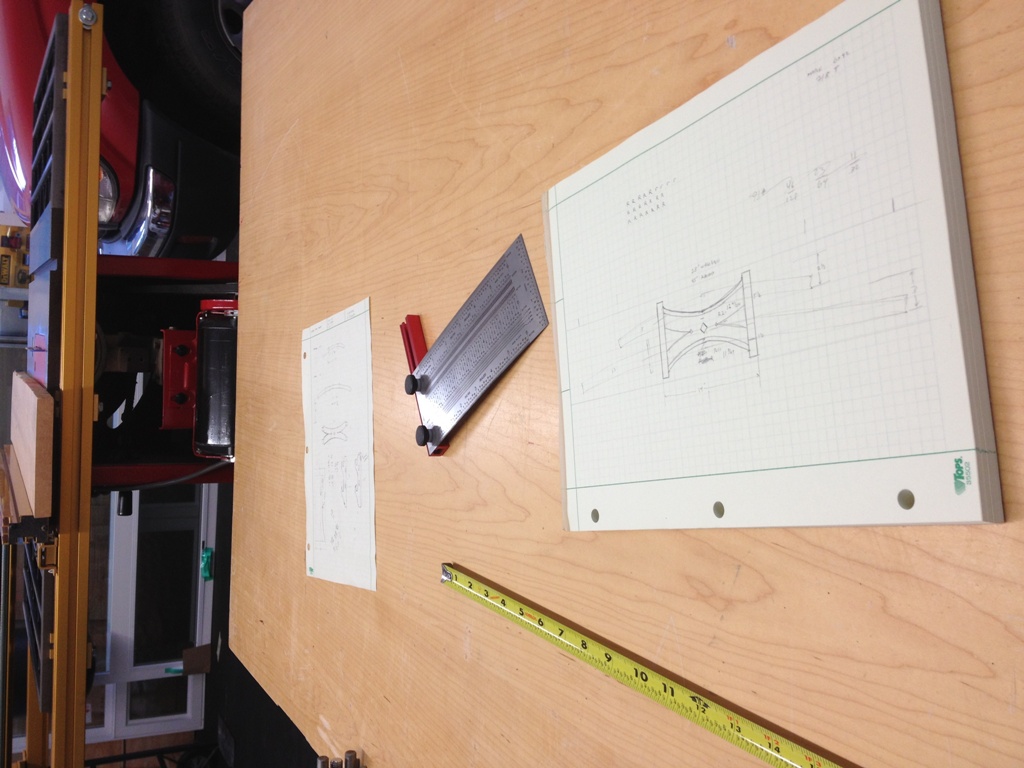
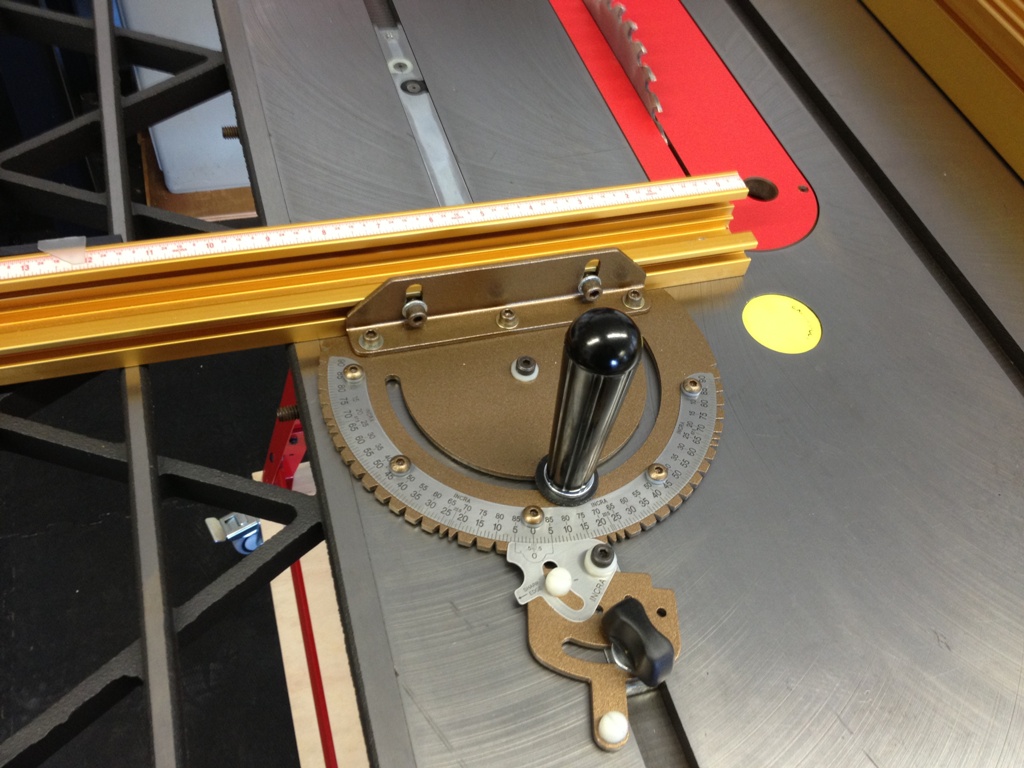
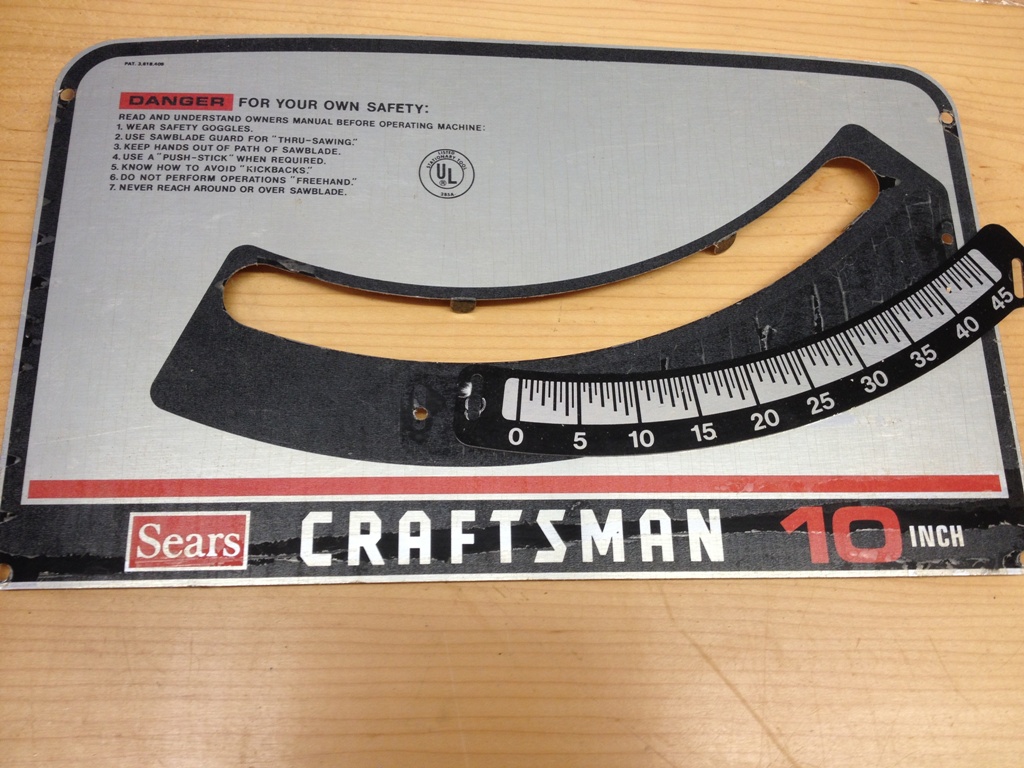
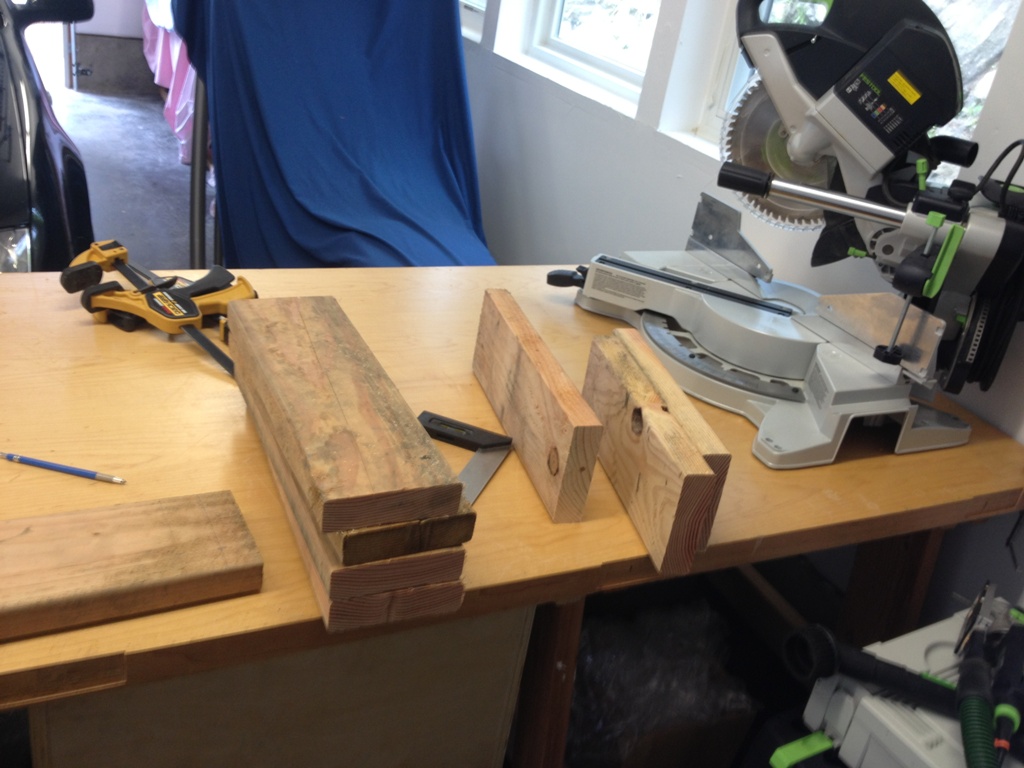
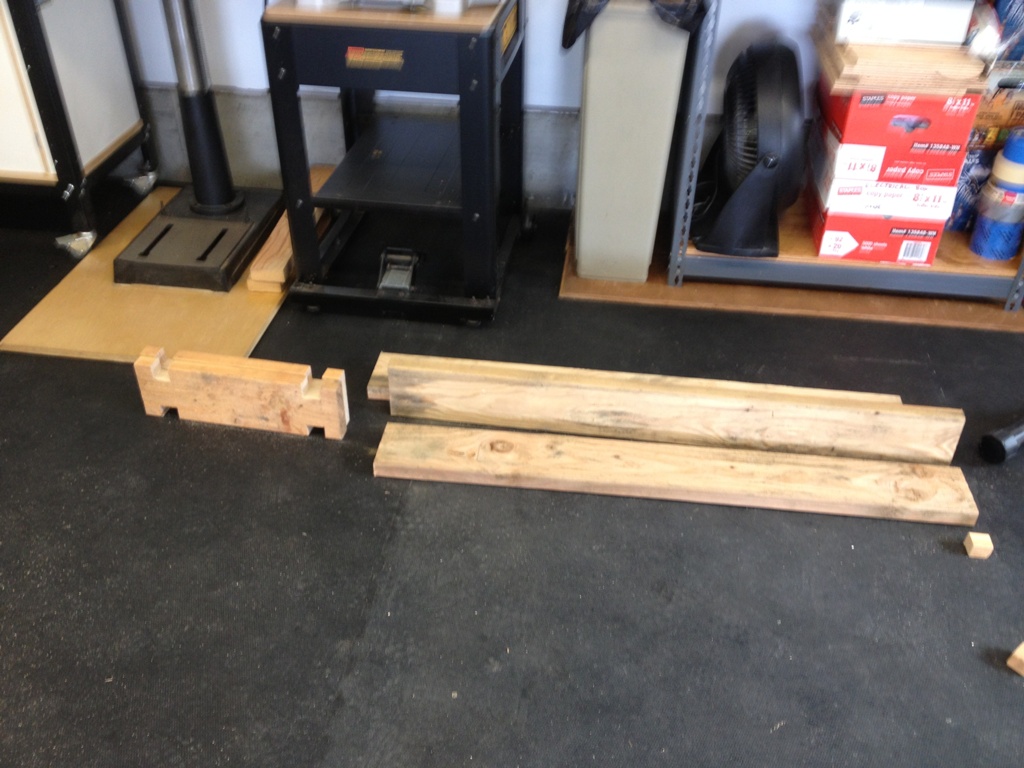
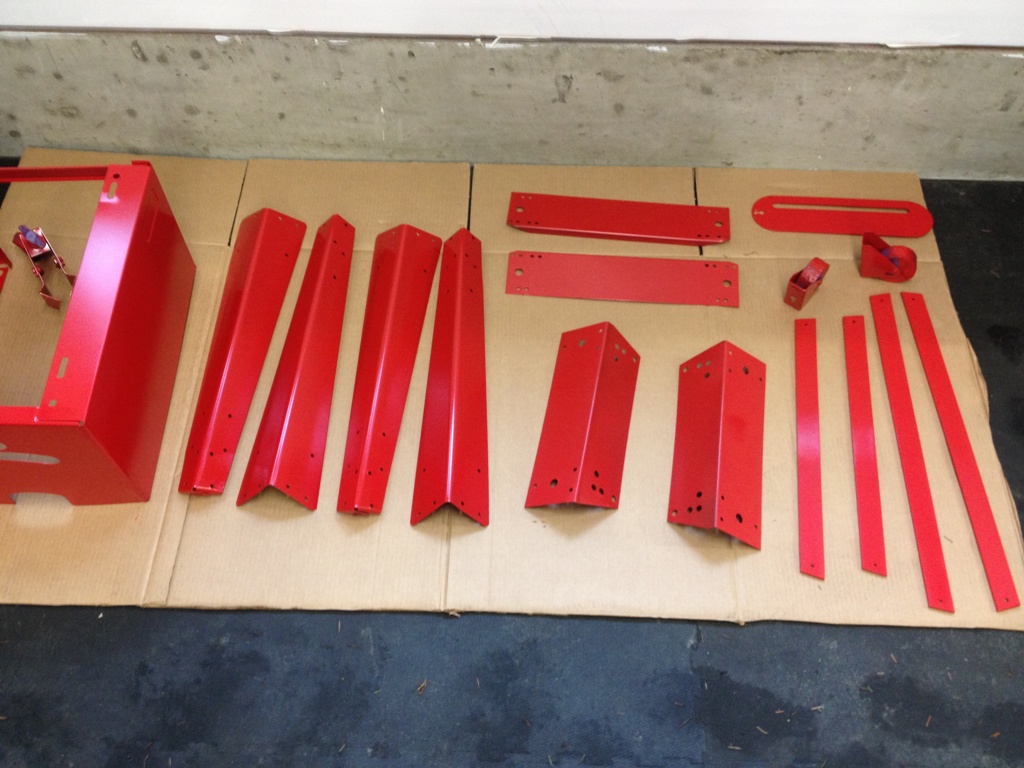
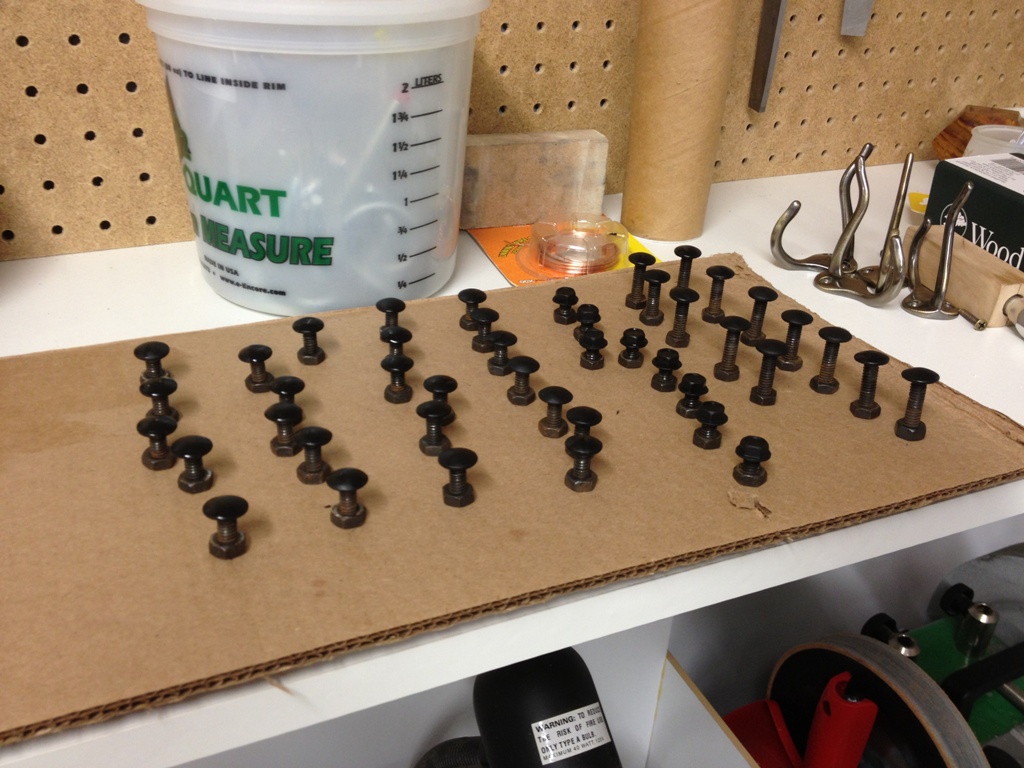
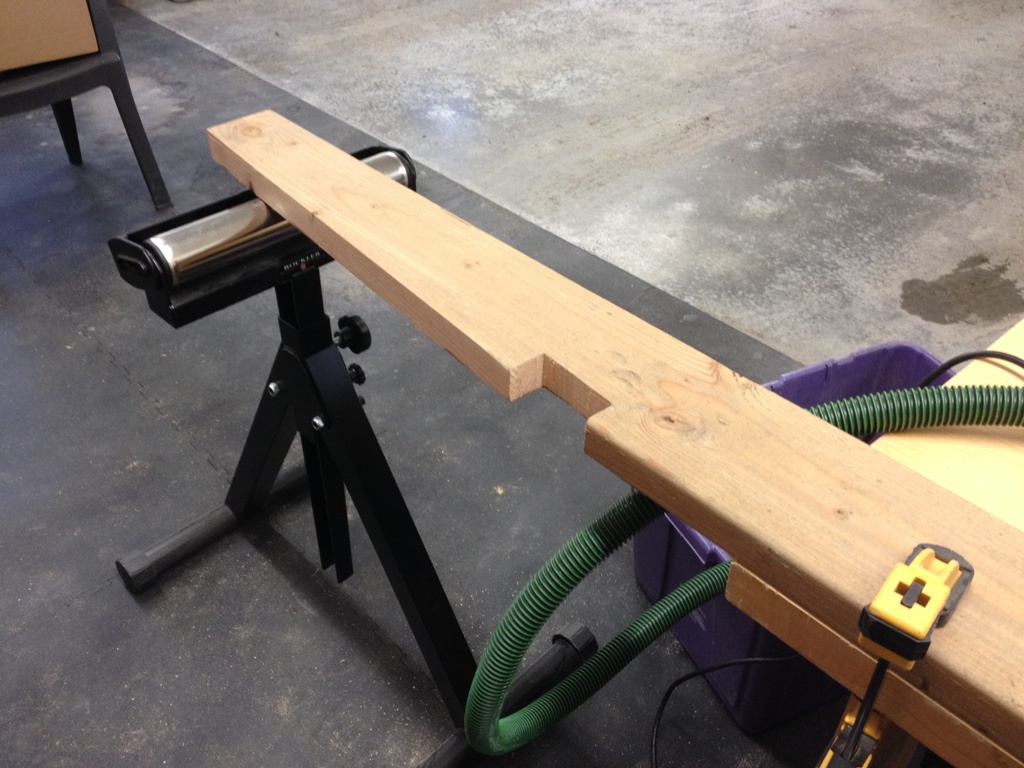
And the rack should be affixed to the wall.  Oh yes.  I can use 2×8 lumber, I got a ton of those things.  They’re dirty and moldy but they’ll do.  Obviously I have to taper them so they lean against the wall at a slight angle, so the sheets can rest without falling over.  Tapering them requires careful measurement and cutting but what the heck, this is a YOLO moment if there ever was one.  Oh, and hey, I can sand them and stain them and coat them with layers of polyurethane too!   (Yes, this insane thought seriously went through my head.  I even sanded a few pieces before I stopped to realize how stupid that was.)

Rack Assembly

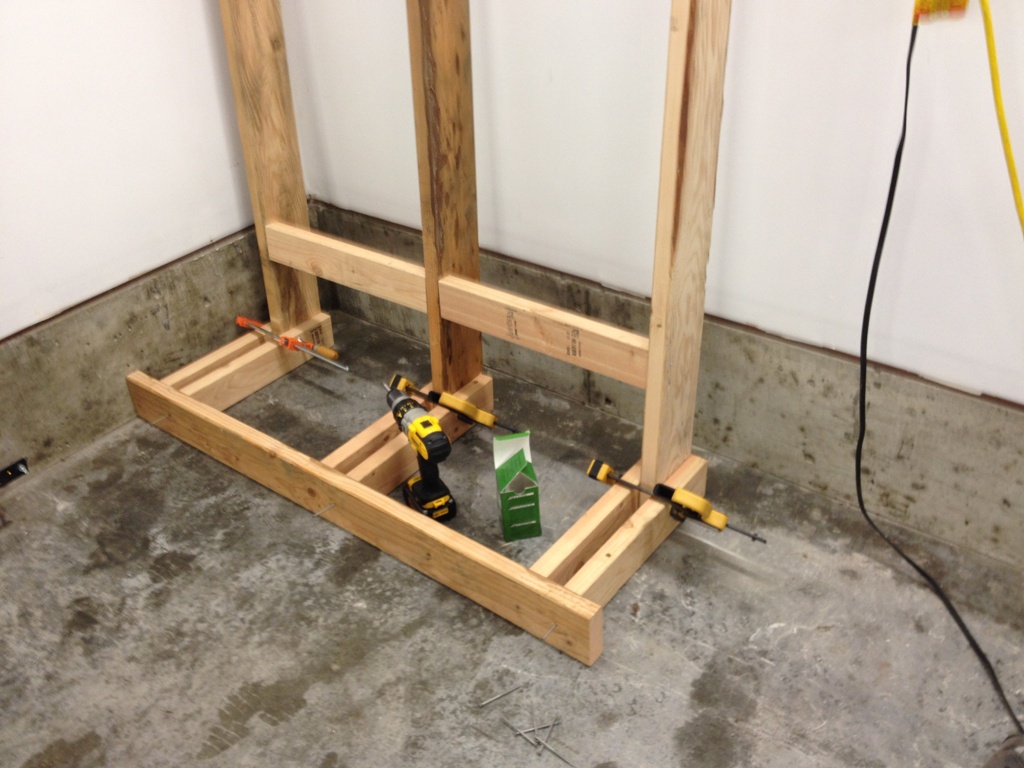
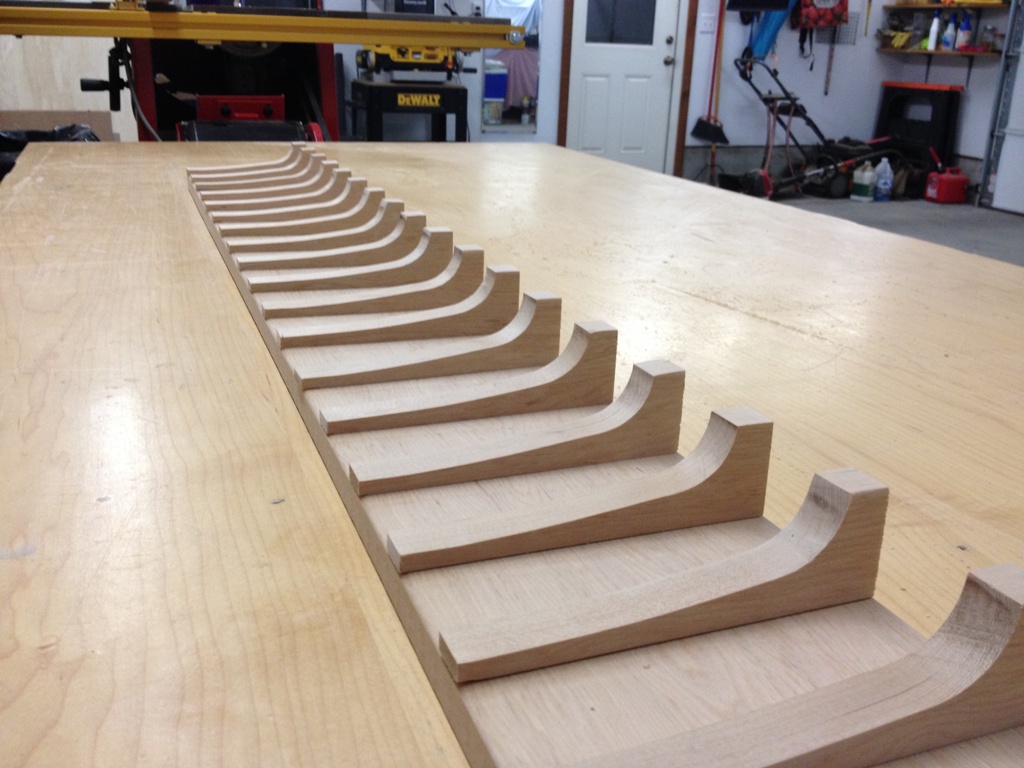
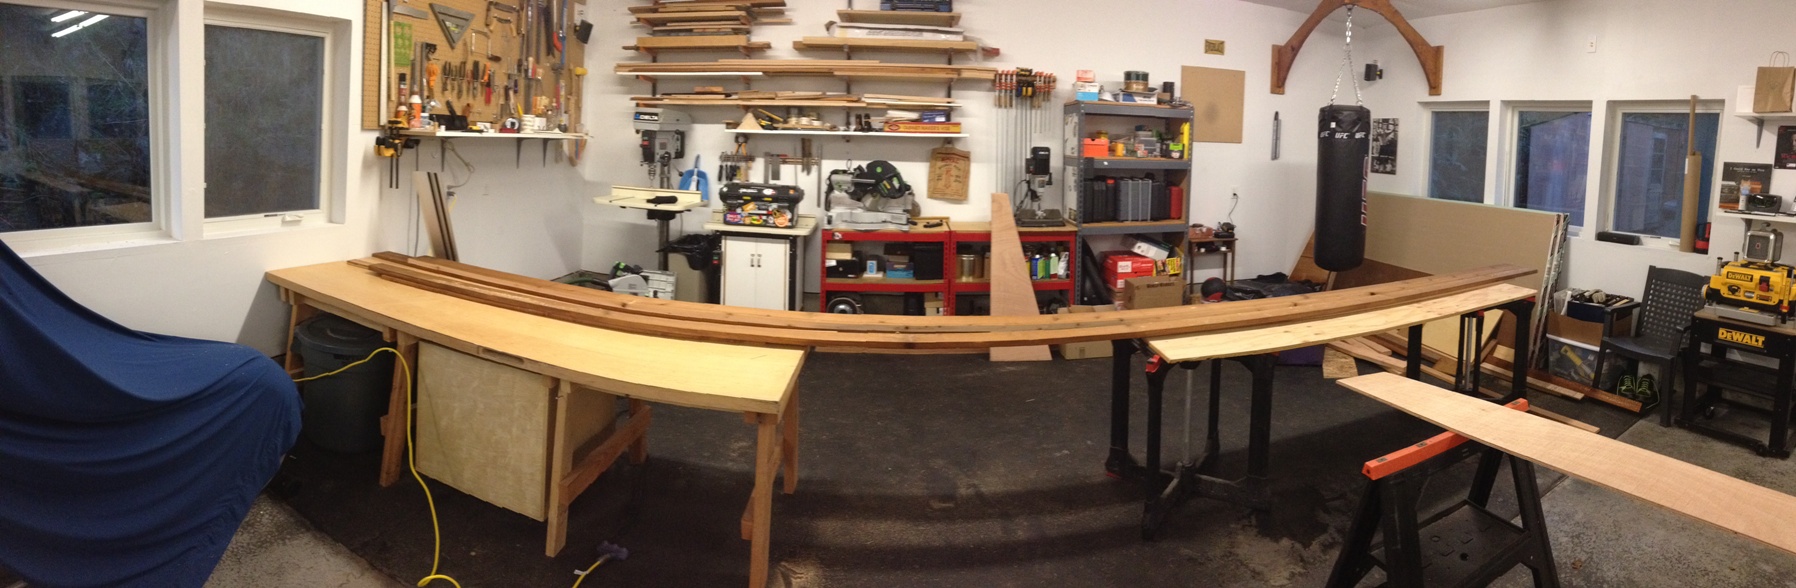
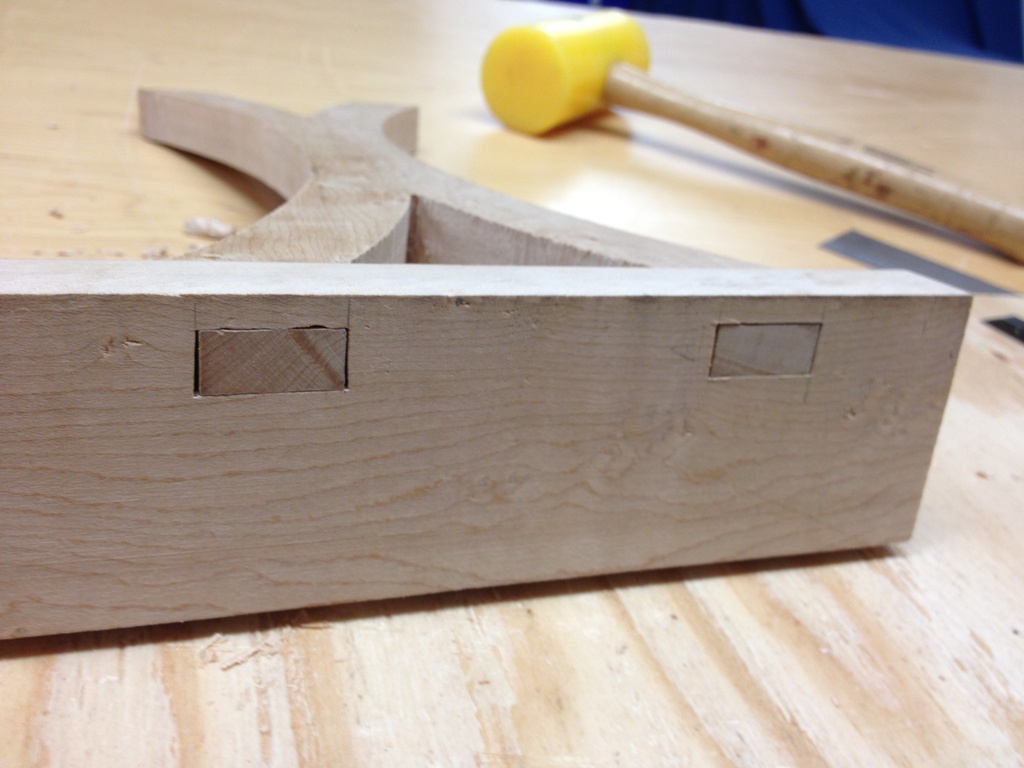
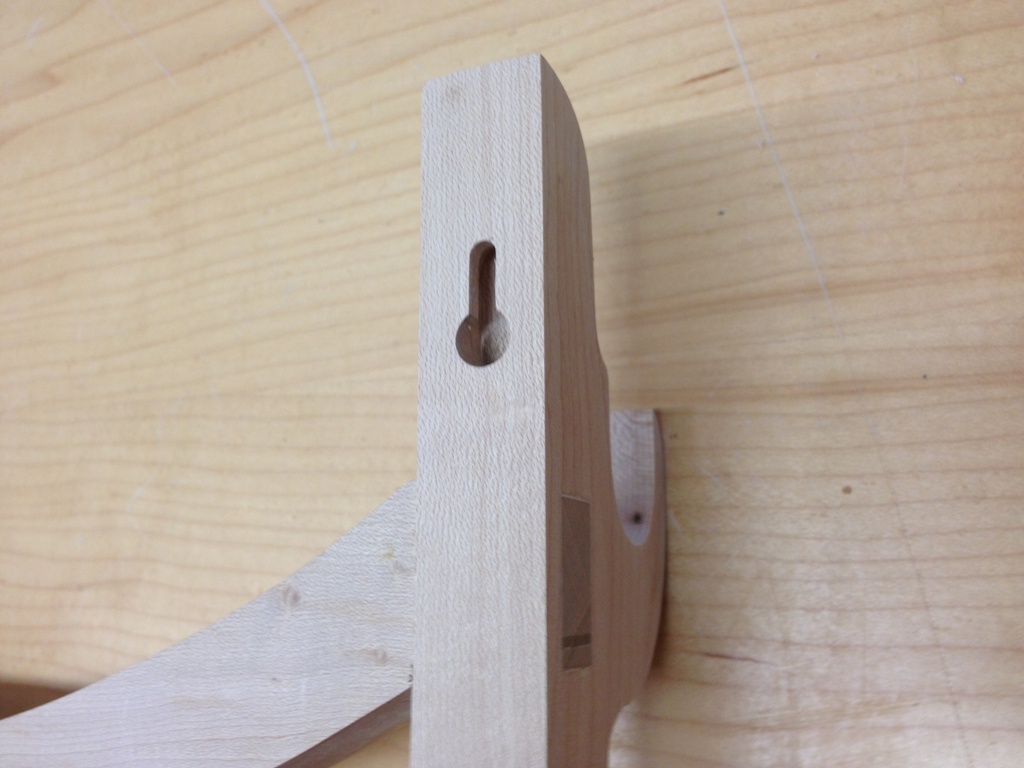
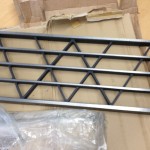
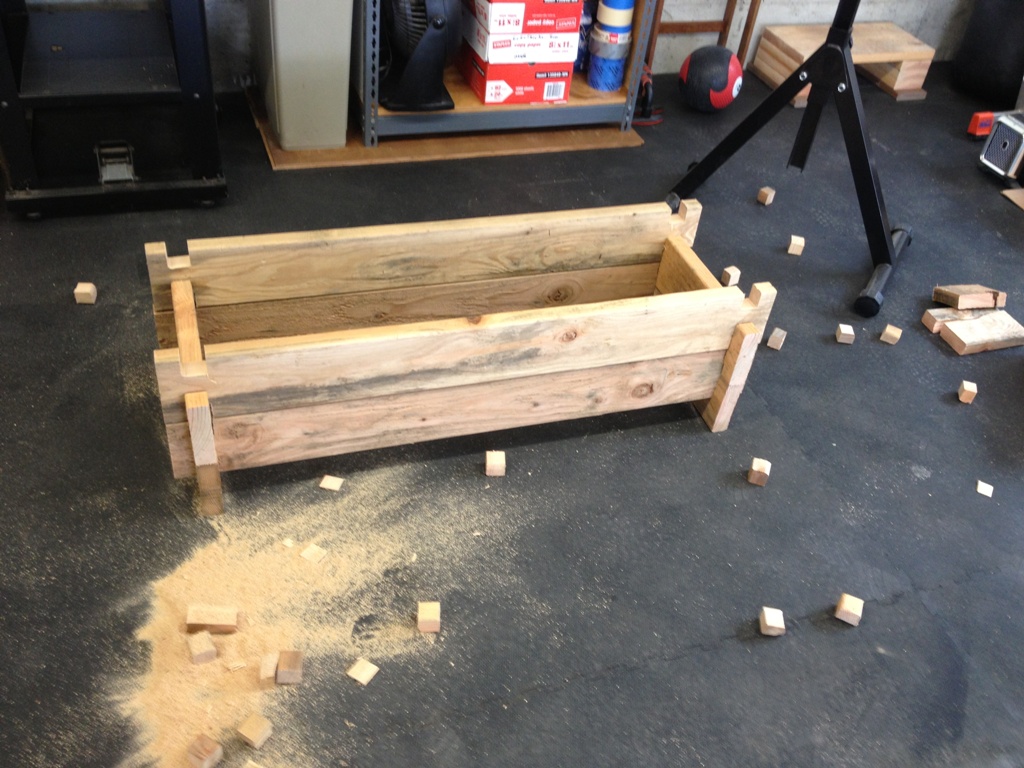
The rack will have double joists spaced about 20 inches apart, as can be seen above.  It will easily support about 42,700 pounds of 4×8 sheets, which is some 41,700 pounds more than I’ll ever have.

Rack Assembly Too
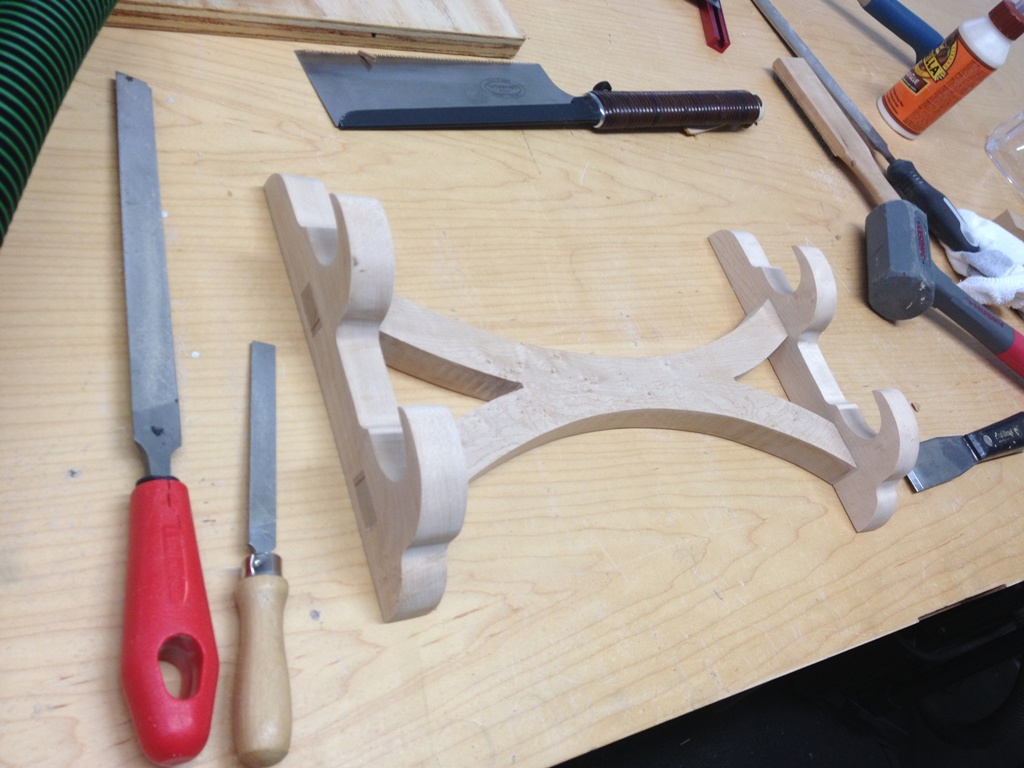
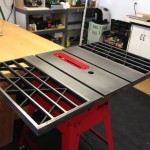
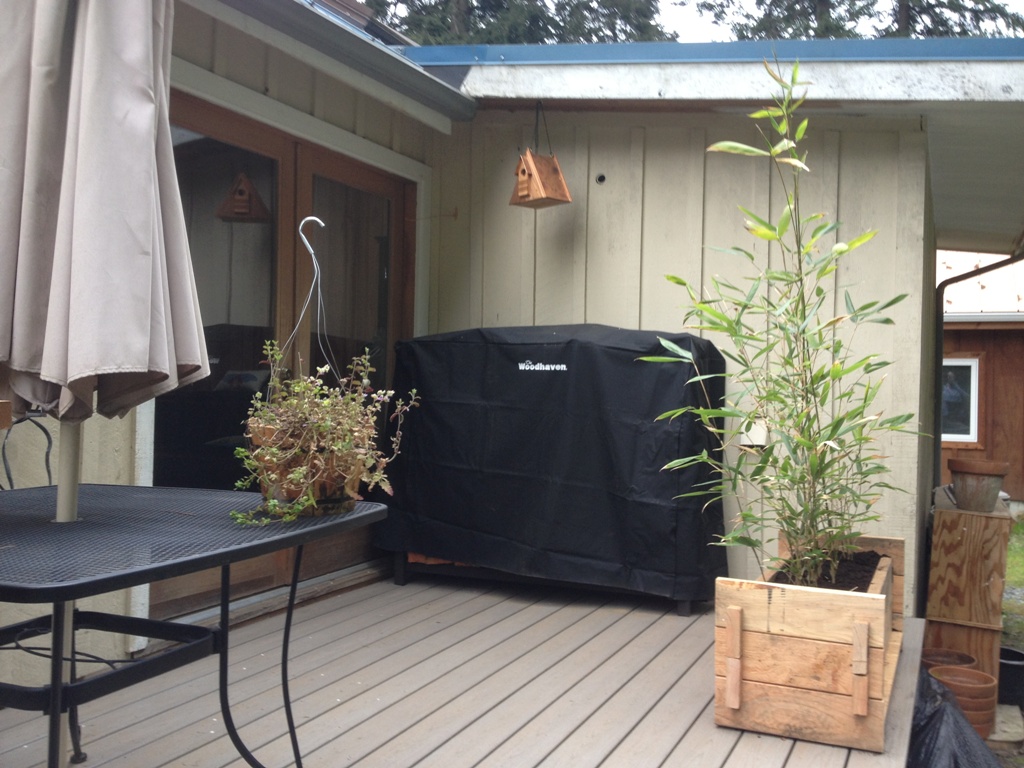
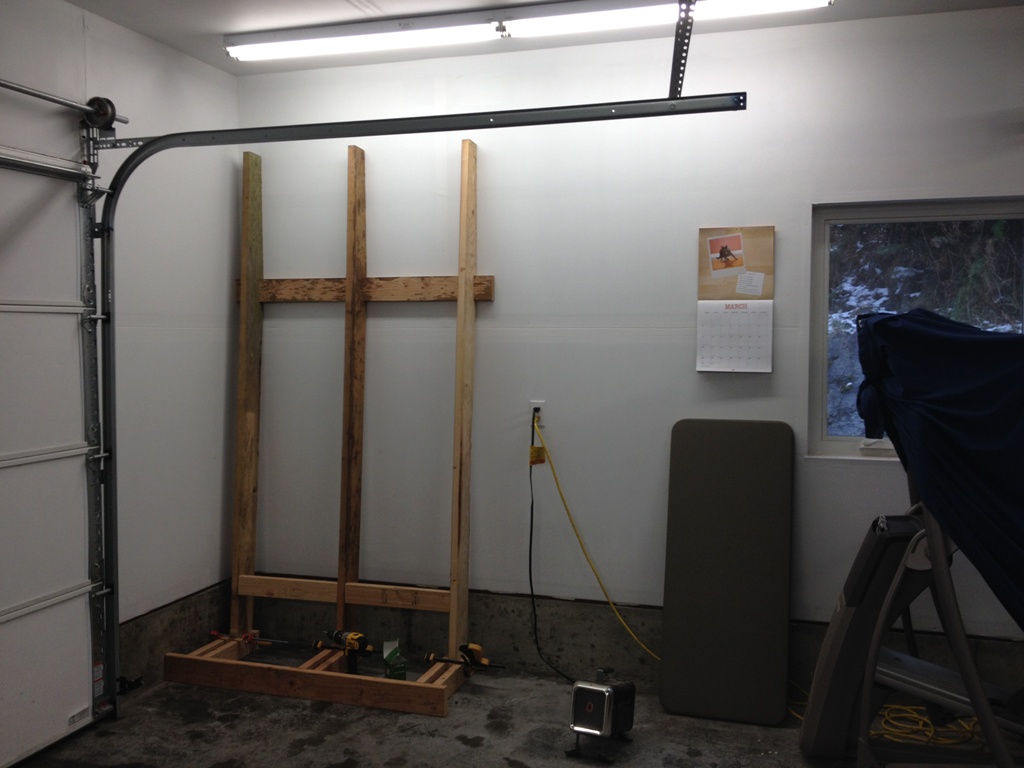
Here the rack is almost fully assembled.  I decided to rest them vertically against the wall to save space.  I have nine foot ceiling height in the garage so may as well take advantage of that.  And that way, I can access that electrical outlet pretty easily.  Those things are important.  Will the garage door rail get in the way when I’m trying to put away and retrieve my 4×8 sheets?  Of course it will!  I did that on purpose, so I can do things the hard way.

The Rack In Action

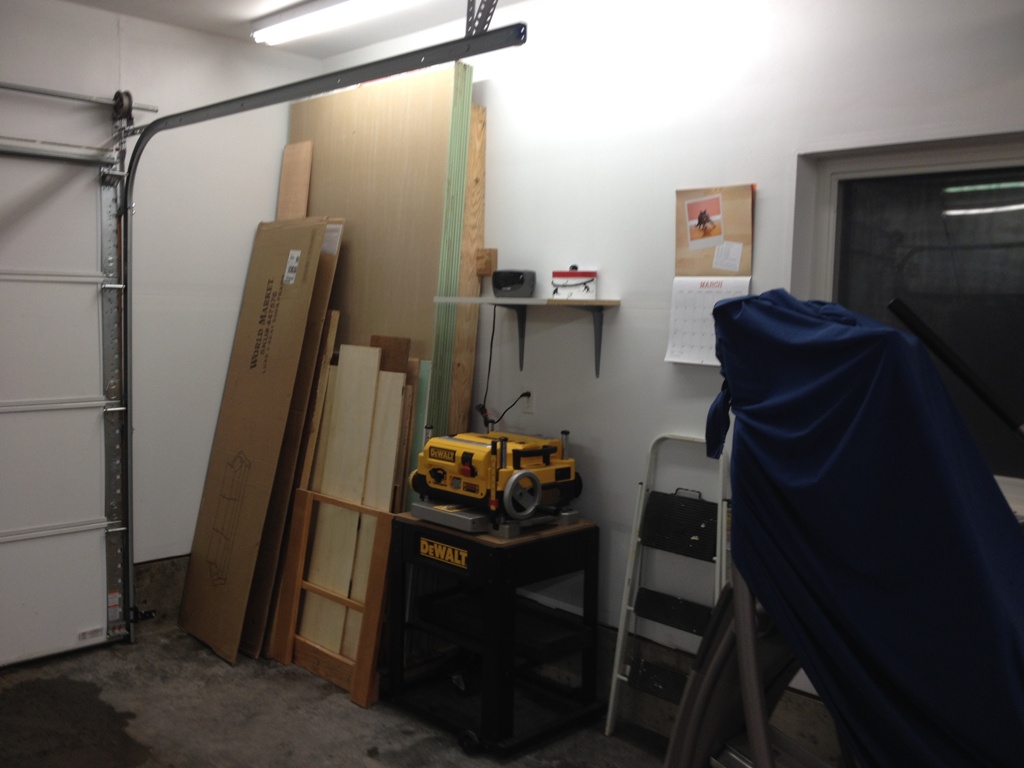
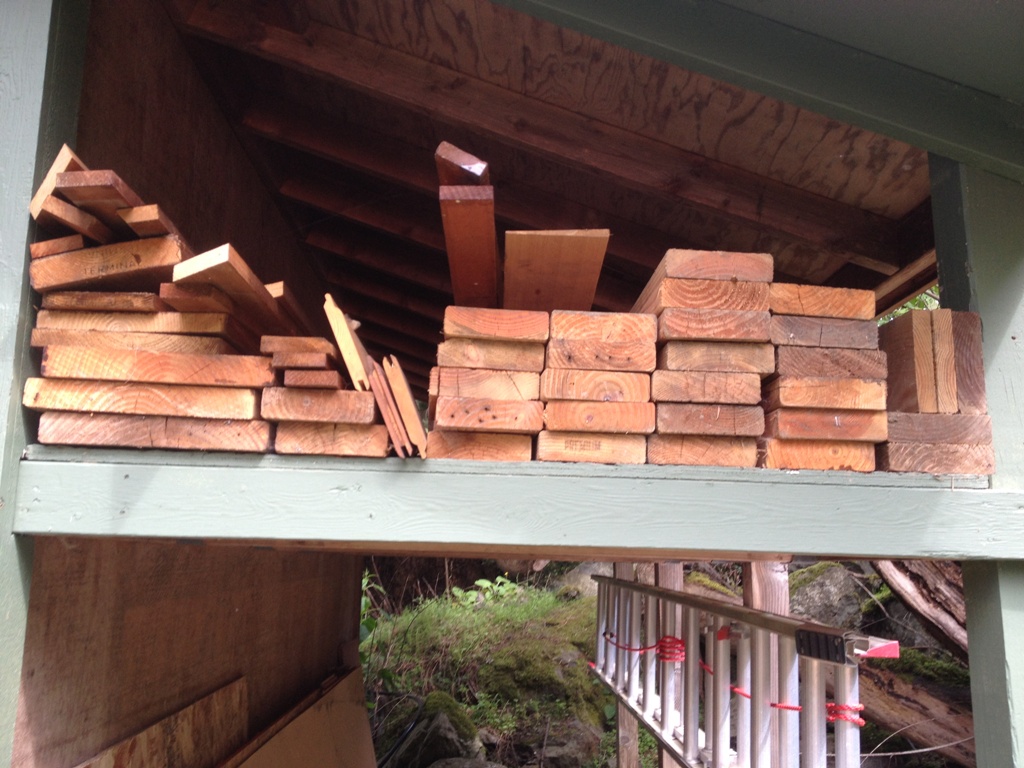
And here’s the rack all filled up.  My garage abhors a vacuum.  All that joinery and engineering can’t even be seen behind the drywall and plywood and scraps of cardboard that I’m keeping because I just know they’ll come in handy someday.

And there it will sit, until the day comes I get a better idea of where and how to store 4 x 8 sheets.  Tomorrow?  Ten years from now?  No one knows.


How To Make (lots of) Curved Brackets


I use brackets a lot in my projects.  I like the look of little brackets spaced at intervals along a band of wood, like you see in old craftsman houses.  They add structure as well as charm.  As I’m re-doing all the trim pieces in the house, the new trim is going to have plenty of these little curved brackets for added support, as well as architectural style.

Here’s an example of ones I did in a past project:

example

So they run along a band of wood with a little shelf on top, which makes for a convenent place to put your beer, collect D&D lead figures, or simply accumulate dust.  But I think it adds some character.  Anyway, in this house, I’ll probably need about 100 to 200 of these brackets.  When you need that many, you need to find a way to make lots of them and all the same size and shape.

I start by making a template.  I use 1/4″ laminated MDF.  It’s very easy to work with and retains its shape well as long as it’s not abused.  I’ve got a growing collection of templates for various brackets and curves that I’ve done.  I first make a rough cut with a coping saw, then file it smooth, then sand it even smoother, checking the final shape for symmetry and correct geometry.  The one on the right is the one I’ll be using.

FormsUsing the template, I scribe out the line I need to cut on the wood.  I make a fine line right along the edge, then use a bolder pencil to line out where I’m going to cut with the jigsaw.  The idea is that the rough cut is not going to go all the way to the line, it’ll leave about 1 or 2 mm of wood left to shave off.  See, I’m so freaking close to Canada that I’m starting to use metric units.

Marking


Each piece is very carefully marked.  That little hatched area is the area the saw will cut away.

Cutting


With this jigsaw, I like to cut from underneath the piece.  This way you see exactly where the blade is cutting.  The trick is to keep the jigsaw plate square to the wood.  If it’s not square, or if there’s some movement or vibration in the wood, you run into trouble.  Press firm.  Watch the blade carefully.  Cutting freehand along a scribed line is not something I’m particularly good at, so I need to take my time with this step.Festool Jigsaw

Again, Festool makes short work of the project.

Kindling


The nice thing about being a woodworker and owning a wood burning stove is that every project I work on makes my house warmer.  As I type this blog post, those little pieces of wood are on fire and heating my home.  We don’t let much go to waste out here.

Next thing I do is affix that template to the work piece and give it a few passes on the router.  Using a nice smoothing bit, it cuts right along the template edge, and gives me an exact cut that’s going to be the same shape every time and typically I don’t even need to sand it.

Router Work


I attach the template to the board using push pins.  Yes, push pins.  I used to have push pins made entirely of steel but they are now lost and I have no idea where they are.  They went to push pin heaven or something.  Now all I have is a dwindling number of plastic push pins that tend to break when I push them into the wood.

Now if you plan this appropriately, you can drive the pin through a section of the wood that’s going to get sawn off.  Therefore there’s no need to fill or repair the hole it made.  But I’ll be honest here.  I’ve made a lot of brackets and the vast majority of them have little pin holes in them where the template attached, and I made no attempt to repair them.  And no one ever notices.  Anyway, these particular brackets will have the hole marks sawn off.

Tearout

Now there is a problem with tear out when you do it this way.  That’s when the router bit tears the wood at the corner, like in the pic above.  Sometimes it’s pretty minor, sometimes it ruins the piece.  There’s a few ways to avoid tearout but the method I prefer is to cut the wood with a chisel right where the router bit is going to tear.

Chisel


It’s a pain in the butt to do it for every single bracket, but you really want that point to look neat and clean.  It’s going to be the most prominent point on the bracket, very visible.  So I take the time to do it right and ensure a clean look.

Once each bracket is hollowed out, it’s time to rip it down to the correct width.

Ripping


The table saw made this cut flawlessly and effortlessly.  Which is pretty much the only thing that has gone flawless and effortless since I moved to this island and started working on projects.  So immediately my guard was up, waiting for the next thing to go wrong.

I cut out the individual brackets on the chop saw.  I don’t like cutting small pieces on the table saw, as small things have a tendency to want to go flying and poke someone’s eye out.

Final Cuts


My template pre-marked where the saw needs to cut to make each bracket symmetrical.  After cutting this way, it looks like I have a stack of ribs, ready to make a boat or something.

Ribs


Ha ha!  A boat.  That would imply I have time for recreational activities.  Ha ha ha.  I’m so funny.

Back to reality.  One more cut and they finally look like brackets.

Brackets


Just some final sanding needed now to get rid of those stubborn burn marks.  A nice drum or spindle sander should get rid of those marks pretty easily (problem:  I don’t own a drum or spindle sander).

This is a good technique to make any number of curved pieces with repeatable accuracy.  These brackets are going to be along a band and shelf that goes around most of the interior of the house so it’s important they all look uniform.  They don’t need to be down to the tenth of a millimeter or anything, but they have to look the same when viewed with the eye.


How To Cut a 20 Foot Long Piece Of Lumber

Rip Cut

So I have this piece of rough hewn cedar leftover from the garage construction.  It’s about 1″ thick and 10″ wide, and 20 feet long.  Yes, 20 feet long.  Hell, until I moved to Orcas I didn’t even know they made trees that high.  I can’t imagine what it cost.  I held onto it, of course.  You see, woodworkers are also wood collectors, and the more active ones can accumulate 35 pounds of scrap wood per month.  We keep it all.  You never know when you’ll need a piece of wood just that size.

twenty feet long

Well, it turns out I did need this 20′ monster beam for some trim work, but it needed to be 5 1/2 inches wide.  All I’d need to do is run a saw blade in a straight line all down it’s full length.  That’s called a rip cut, when you cut along the length of a beam of wood.  I was going to do this on the table saw and I even set everything up and then decided that was absurdly unsafe.  It would have gone down as one of the top ten stupidest things I’ve ever done.  That’s a tough list to get on, believe me.

Wood is normally solid and strong, but at that length it’s like a heavy, floppy piece of rubber with the added benefit of generating skin-boring splinters.  One dry run over the table saw (with the blade down and the saw unplugged) and I could see right away there was no way the wood would remain straight and flat on the table surface.  It would bow, twist, bend, and just generally be a turkey.  The table saw blade could bind and shoot the lumber into the air like a 20′ bullet, or pieces could splinter off in an exploding grenade fashion, or it could simply catch fire from the friction.  Yeah, dumb idea.

Festool Rocks

So, Festool to the rescue.  Their tools have a good combination of safety, accuracy and comfort.  Their plunge saw is pretty good and I have a little rail system that keeps it in a straight line and puts the saw blade exactly where you want it to go.  Just to be safe I first cut halfway through the lumber, then made a second pass all the way through.  The rails ensured each cut was in exactly the same place.  The final cut was seamless, with nary a saw mark along its length.

Because my rail is about 1/6 of the length of the lumber, it took a few passes to get through the whole thing.  And fortunately the beam didn’t want to pinch together when it was cut apart.  Wood sometimes does that, since wood fibers are like a series of little springs.  This particular board spread apart when cut.  That was lovely.  Sometimes it wants to pinch together, and you have to use little wedges and spacers as you cut it apart.  Otherwise it will pinch the saw blade, causing it to bind and creating a very unsafe place to be.

Panoramic Shop

There’s a panoramic pic of the whole thing (click on it to see full size).  It ran the entire length of the back of my shop.  I know you non-woodworkers are shrugging your shoulders like it’s no big thing, but to me this is one of those milestones, like bench pressing 365 pounds, or making homemade tamales for the first time.  It’s a woodworking thing.  You wouldn’t understand.

I dont understand

Sword Rack

fogIf you’re like me, you have a large number of Japanese swords cluttering up your house.  All manner of Nihon-to, katana, bokken and shinsakuto edged weapons just leaning against walls or lying on the floor like a trip hazard. I really needed to do something about this.  Storage space is hard to come by in this house so I thought my best bet was to design a wall mounted sword rack.

The PlansThere’s not much wall space in the house either, but there’s a few spots I can mount at least one or two of my better blades as long as I keep the mount a little compact.  I didn’t want a traditional Japanese design either, and I came up with my own, something a little more modern.  Simple, though.  Fit and function are a lot more important than looks.

When designing something small, it can be helpful to make a full scale drawing of what you’re trying to make.  Drawing it out full scale really helps you see exactly what you have to cut out of wood.

More PlansI used a slab of 7/8″ burled rock maple.  It is not easy to saw and not very forgiving, but it is bulletproof.  The prongs that hold the sword tend to be the weak point of any sword rack – if the sword twists against that prong, it can easily snap.  This is why I like to use a really hard wood.  When you draw it out life size, you start to realize there are things you may not be able to do, and you adjust your design accordingly.

fit


I have a mortising machine that cuts square holes like that, but it broke on the first mortise.  Haven’t used it in over a year and I guess it was mad at me.  So I had to cut all four mortises by hand with chisels I haven’t sharpened in over a year.  I probably should have stopped and sharpened them but I know me, that would have taken all day.  I wanted to get this project done before moving on to another project.

village of toolsIt takes a village of tools to do even a small project like this, especially the smoothing, shaping and sanding.  I cut out a lot of that with a jigsaw (don’t own a scroll saw, and I’m not sure how a scroll saw likes an inch of rock maple anyway) and it was very rough after cutting.  I smoothed it out with rasps and files and a nice straight router bit where I could get it to fit.

wedgesWhen I have exposed tenons like that, I like to put a wedge in there for some added stability.  I don’t need them for structure, it’s only got to hold about 5 pounds of swords.  Could have made this out of cardboard and still had enough structure.  But wedged tenons not only look great but really make a strong joint that should never fail for the life of the piece.  Last time I made wedges, I needed about 84 of them for my desk, and I cut them all by hand.  Thankfully, the zero tolerance insert on my table saw lets me cut them on the saw.  The wedge goes flying once it’s cut out, but it’s small enough that it doesn’t hurt anybody.

keyholeI’ve never cut a keyhole like this before but it seemed like the best way to mount it to the wall (and saved me a trip to town looking for hanging brackets that would fit). It’s not a difficult cut to make on a router table.  The holes came out perfect and are actually stronger than I thought they would be.


finishedAnyway, all finished.  Two less swords to trip on now.  The top one is a crappy replica but it’s okay to train with.  The bottom one is a very real wakizashi, folded steel, and extremely sharp.  I’m going to re-do the handles on both of them and probably do some more work to that wakisashi at some point.  Another project for another day.


What’s been happening lately?

Lots going on but not a lot of finished projects yet.  Some hints below:

That spider is big enough to pull a cart.  I’m going to have to start charging him rent.

Measure fifteen times, cut once

Measure and MarkI’m making a jigsaw puzzle out of tongue and groove boards.  But first I have to cut the boards and make the tongues and grooves.  Some pieces have both tongue and groove on both sides, others have just tongues, others have just grooves.  If I mis-cut one piece, I won’t have enough left over to complete the project correctly.


Table Saw Restoration (part 3)

It is finishedAt long last, this beast is done.  Well, as done as it’s going to be for now.  There’s a few modifications I’ll eventually make to it – I’d like to button up the dust collection a little tighter and install a splitter or riving knife and get some kind of kickback preventer thing attached but for right now it works and it works great.

scratch and dentYeah, that’s the legendary Incra LS32-TS high precision fence attached to it.  Yes, I’m well aware that’s like putting a BMW steering wheel in a Plymouth Duster.  I can explain.  You see, my old table saw, also a Craftsman, came with this crappy, wobbly, tilted table saw fence.  Craftsman makes great tools, but their table saw fences are awful.  The thing never got the same distance twice.  It was never parallel to the blade.  It was not at a 90 degree angle to the table top.  It was a piece of crap and I hated it and lived with it for years.  With its help, I made dozens of lopsided pieces.  Every cabinet, every fireplace surround, every desk and table has at least ten flaws thanks to that effing thing.  I told myself this time I was going to treat myself to a nice fence, and my dart landed on that one.

I haven’t used the LS32-TS enough to write an informed opinion on it, but I am very pleased with it, even though I think they over-engineered the thing quite a bit.  And it is very difficult to calibrate.  Nonetheless, I look forward to many years of swearing at it enjoying its use.

miter gaugeAnd here’s a pic of the Incra miter gauge I had from my last table saw.  It sat disused in a corner until the thing rusted out on me, and I had to sand it down and paint it and restore it to usefulness once again.  That took me about two days but it’s better than spending the cash for a new one.  When you live on an island, you really go to great lengths to not waste anything.

nice bucketYou can laugh at my dust collection system all you want, but that 5 gallon bucket will catch a lot of sawdust that would normally just collect inside the thing.  I’ve tried putting a hose and a vacuum on my saw before but it was about as effective as a one legged man in a butt kicking contest.  The bucket is tightly sealed (by means of four bent nails; really high tech stuff!) to a cut piece of 1/4″ laminate on the bottom so there’s no gaps for the dust to get through.  The inside of the saw housing is sealed with enough duck tape to make Red Green proud.  Sawdust can still come out the back end and until I make a housing for it that will continue to happen.  But that bucket catches a surprising amount of debris, and it’s a handy container too.

motor rotation

Yeah, here in this pic you can see the bucket and maybe even some duck tape if you look closely enough.  I had a lot of fun painting and restoring the parts.  Even if the final product looks like a frankenstein saw (yes, it does, I won’t be offended if you say it) it was cool making everything fresh and new.

I put Kreg dual locking casters on the bottom so it can roll around.  Attached directly to the stand, the weight of this beast bent the metal legs (yes, I was very sad and frustrated when I saw it) and made it a little crooked, so I put a sheet of plywood down on the base and damn is that thing sturdy now.  Doesn’t budge at all when I lock all four casters and make cuts.  That thing rolls so smoothly that I just push it around the shop and ride on top of it shouting “Whee!” the whole way.

In the end, this was not unlike restoring an old car.  In fact, my knuckles are about as badly beat up from this project as they ever were from a ’72 beetle.  But unlike an old car, it’s not for show.  This workhorse is going to make a lot of sawdust over the next few years.  I have cabinets to make, and tables, and shelves, and wardrobes, and boxes and drawers and doors and even tools.  It’s been over a year since I’ve had access to a table saw in my wood shop, and I am anxious to crank out some projects.

cadillac of table saws


Table Saw Restoration (part 2)

Snail PaceFigured I’d start off with a photograph that represents the pace at which this project is going.  I am happy to say, though, that the list of parts I still need is down to one sheet of paper, and I now know where to find most of them.  Just need to spend some time on the internet with my credit card in front of me and everything will be on its way.

The table extensions came in.  These were really hard to find on the Sears website because they don’t actually go with my model of saw.  According to them, they don’t fit and won’t work with my model and if I attempt to install them on my saw it will shred the warranty, condemn me to a lake of fire in my afterlife and every cut I make on the saw will be unsafe and inaccurate.  But in reality, these are the best table extensions out there, and they fit like a charm.

I didn’t even need to use shims along the sides.  It’s dead flat.

Saw BladeMy new sawblade came in also, and it’s a beauty.  Those of you who are woodworkers know how much those things cost.  Those of you who are not, you don’t want to know.  This is certainly not the most expensive blade out there but Forrest makes great saw blades and this model is excellent for both cross cuts and rip cuts.  I am far too lazy a woodworker to change out my saw blades for each cut.  I like to have one blade for everything.

Oil PlugI also started dismantling the motor today.  All I was going to do was put a new power cord on it but the further along I got the more I wanted to keep taking it apart and cleaning it.  I found the two oil plugs underneath about a centimeter of sawdustdirtgrease, a paste like mixture of sawdust, dirt and oil.  I’m sure the motor was happy to get some fresh oil on it in there.

Then I started painting it.  I figured, what the heck.  I got nothing better to do and I have a third of a can of red spray paint that I may as well use.  Make that motor housing shine and gleam in the light of my overhead fluorescent shop lights.  It would not have been wise to spray paint the motor itself so I painted it by hand.  Dismantle

I have an illness.  I know.  I’m well aware that no normal person would clean and paint an old motor that’s just going to get covered in sawdustdirtgrease.  It’s madness.  This is a lot like restoring an old antique.  Or getting it ready for a museum.  This isn’t necessarily the table saw I wanted to have, but by golly it’s going to be the best dang table saw I can make it into.

Besides, the paint may keep it from rusting.

Paint


I had more paint in that can than I thought I did so everything got about ten coats.

More Paint


The motor I painted black, to kind of go with the red.

FaceplateThe last thing I tried to tackle today was the faceplate.  The existing one is a little cheesy looking and I wanted to make something with a smaller aperture where the tilt indicator comes out. A lot of sawdust leaks through that big slot and I want to kind of close that up on the final make.  Also, you can’t really see it in the picture but it’s coated with this layer of crackling plastic that is simultaneously peeling off and difficult to remove.  I thought I would just make a new faceplate out of 1/4″ laminate paneling, but once I got it cut and in place  ….

Hate thisI hate it.  I absolutely hate the way it looks.  I know Hate is a strong word, and that’s why I chose it.  It looks really tacky and I don’t think it will hold up well.  I’m going to seek out a small sheet of metal that I can work with.  Maybe brass or copper.  Heck, how about gold foil?  Platinum sheeting.  Apparently no effort is too great and no expense is too much for my table saw so I may as well go all out.

Hoping to have this thing up and running in about two weeks but it really depends on how fast things gets shipped out here.  It’s tourist season and I am in no mood to brave the lines at the ferry landing just for a trip to sears and home depot.

Scrap Wood Project: Planter Box

Scrap WoodEvery woodworker has a surplus of scrap wood.  It just piles up, faster than you know.  I purged a lot of my scrap wood on the move out here but I did keep a few choice pieces.  But after the garage was built, I inherited a small pile of lumber, mostly construction grade stuff.  Lots of 2×6’s and a few nice 2×12’s, and quite a few pieces of cedar trim.

When you live on this island, you don’t let a lot of things go to waste.  I get that, and I’m totally down with that concept, but at the same time I don’t want to be a hoarder.  Not only do I not have the storage space, but the tenets of my religion forbid it.  Thou shalt not be a freaking hoarder.  Don’t own stuff you don’t need, don’t keep stuff you won’t use.

WoodAnyway, that’s a long way of explaining why I feel compelled to periodically make a woodworking project entirely out of scrap wood.  In my case, I have a crapton of 2×6’s, most of which are marked to make a deck or a shed or something but I can spare a few.

BambooThe back door of the house is a double door with these big glass panes that let the light through.  They’re lovely.  And they afford the entire living room a direct view of the ugliest shed in the San Juans (click here if you think I’m joking).  So we figured we’d get some bamboo for screening and put it in a big planter box so we can look at the bamboo and not the shed.  We’re pretty smart, huh?

Carpenter AntThe wood, I discovered, was being guarded by a small army of carpenter ants.  I’d ask them to work for me since I have a myriad of carpentry jobs to get done but they’re union and I’d have to pay out the wazoo.  Well, the rule of ants is that where there’s one, there’s a million, so I had to make sure the wood I took from the wood pile was ant free.

More woodThe planter box would be pretty simple, I hoped.  I’d just cut notches in the ends of each piece and stack them all together.  I’d like to thank my mother for buying me Lincoln Logs for Christmas in 1972.  They taught me a lot about how to build things.

Lincoln LogsI was actually hoping to not have to use fasteners or nails of any sort but I decided to toe it together with some tenpenny nails just to make sure it didn’t fall apart.  Since I don’t own a nail gun, that involved me hammering nails at an angle into corners and hard to reach places.  Yeah, there was a lot of colorful language coming out of the garage in that particular hour.

Eagle2The bottom was a piece of scrap plywood that had been sitting outside in the rain for about eight months so I figure it’s already acclimated to being moist and moldy.  I did line the inside with some thick plastic, just to help the thing live longer.  This planter box should age well.  I expect within a year it will be gray and pitted and have moss growing on it, which is the intended look I’m going for.  A bald eagle stopped by and gave my planter a little nod of approval, and I took that to be a sign of good fortune.

Planter

So there you have it.  Nothing but a few 2×6 beams and a sheet of plywood screwed to the bottom with like twenty decking screws just to make sure it stays affixed for as long as possible.  I didn’t even treat the wood with anything, I’m just leaving it outside to rot.  In a good way.  It should weather well out here, and should look great for many years.  When it’s finally ready to be put out to pasture, literally, it can be simply taken and set in a field where the planter and whatever’s growing in it can just become part of the earth.  It happens faster than you think out here.

Better View

It sure beats staring at that ticking time bomb boiler in the crappy shed.

I fully expect that bamboo to take off like a weed on steroids.  There’s actually two species of bamboo in the planter, both known for their aggressive growth and screening properties.  If the whole thing gets overtaken by bamboo growing out the sides and bottom, I’ll be happy.


Cat


Table Saw Restoration (part 1)


Exploded ViewSo I was visiting with father in law the other weekend and I mentioned that I was looking for a table saw.  He said, and I quote, “well, your prayers have been answered.”  If by prayers he meant nightmares then I think he was spot on.

He was willing to part with his old table saw, a Craftsman model, probably from the Reagan administration.  It had been around the block more than a few times, ridden hard, hung up wet, and thrown from the back of a moving vehicle at a busy intersection (true story).  But like all things craftsman, it is a workhorse.

I was torn.  I really wanted to save up for a nice cabinet saw with tolerances that have a lot of zeroes in them.  But of course, they have price tags that also have a few zeroes, so after much deliberation I figured I’d do my best to restore this Craftsman and see what I could do with it.

Needs HelpThis thing was a mess and it needed help.  It was rusted, dented, gouged and beat up.  I started making a list of the parts it would need, then crossing off the things they no longer sold.  This started to turn into something like restoring an antique.  It’s the kind of thing I better enjoy doing, because it’s a lot more cost effective to just go and buy a new one.  Still, like many things, they don’t make them like they used to.  When I started taking this thing apart (and believe me, I dismantled it down to the last rusted lock washer), I saw that the parts were a little more solid than what you find in many new saws.  They cut corners these days.  The metal is a little thinner, the bolts are a little softer.

PaintedFirst thing I did was give it all a fresh coat of paint.  Several coats, in fact, of rust resistant enamel.  It came with what looked like after-market wheels on the base that I wasn’t sure would make it to the final build but I painted them just in case.  Father in law had mentioned those wheels were kind of crappy anyway.  NutsI even sanded, cleaned and hand painted the bolts that came with it.  Why would anyone waste time on such a ridiculous endeavor when you can buy perfectly good bolts at the hardware store for 10 cents each?  Well, these were pretty good bolts, all made out of hardened steel that you don’t always find at the hardware store.  And more importantly, they were the right size.  So it took two hours of my life to clean them and paint them, but the saw will fit together correctly.

ForeverNow the base and frame were a little dented but nothing a sledgehammer couldn’t smooth out.  The table top, though, was in really bad shape.  Rusted, dented, gouged, pitted – it looked like it had been dragged behind a car for a few miles and left for dead behind a liquor store.  I started in with the 80 grit sandpaper and quickly realized that sanding it smooth was going to take forever.  And you don’t want to sand to much because you don’t want to destroy the flatness of it.  At least not too much.  At the end of the day, I burned through about 40 discs of sandpaper just to get the rust spots off.

ImprovementAt last, after sanding it so much I blew a fuse, I deemed the surface to be adequate and ready for service.  Some of those deeper gouges I’ll never get out but at least wood will glide smoothly over it now.

It’s far from done.  I got the stand assembled and the top generally put together (I just got the bolts hand tight as I’ll want to calibrate it when I get a new saw blade) just so it’s not in two dozen pieces strewn about the shop.  Got enough going on in that shop to have to contend with that.

It still needs so many things.  I’d like some extension wings to make the surfaceShiny Feet a little bigger but so far I can’t find the right size.  Not even on the internet.  I think this thing is so old they stopped making parts for it.  I may have to make my own.  It needs a riving knife, a good fence, one of those fancy zero-clearance things for the blade, some kind of dust collection set up, and the motor needs a little electrical help (just gotta replace the melted power cable, nothing major).  But it’s almost there.  Just a few more hundred dollar bills and it’ll be a good little saw for the shop.

Assembled