A little kitchen makeover

You want a ‘before’ picture?  Well, if you insist …

Before


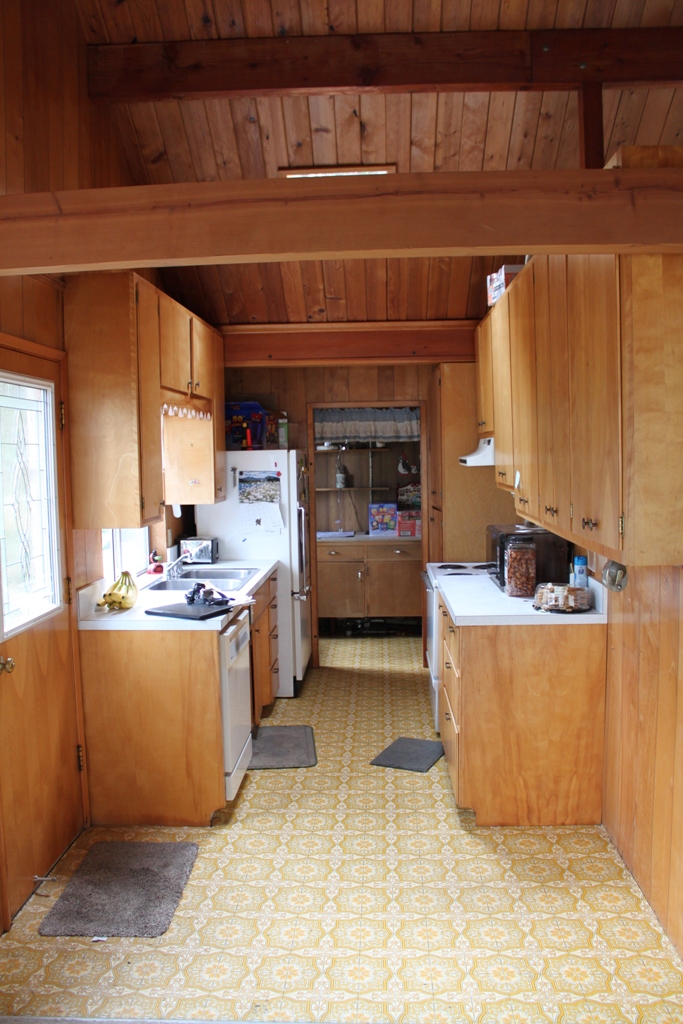
Yeah, lovely.  I know you think the floor is abhorrent but honestly it’s my favorite feature.  Even with all the cigarette burns and places where it’s peeling up, you just really can’t hurt that old linoleum.

Okay, fast forward.  We decided to spend our tax return money on new kitchen appliances.  I planned on waiting until I made cabinets and was ready to put in flooring but honestly, we just could not wait.  The dishwasher sounded like a dinosaur eating a helicopter, the stove had fewer and fewer knobs that actually worked, and the fridge is actually a good fridge but that big swinging door completely blocks off the laundry room when opened.

None ever workedNone of these grease-coated knobs worked.

We don’t have fast food on the island.  We cook every day.  We run the dishwasher every other day.  New appliances became a priority.

Cardboard Flooring

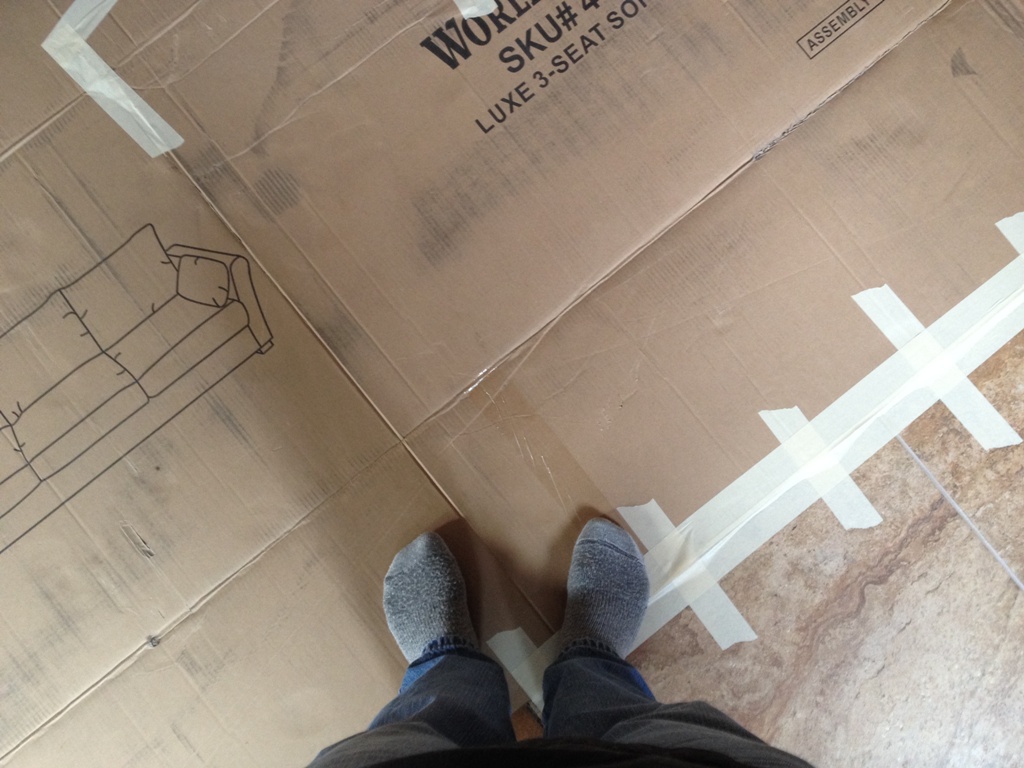
Well, as cool as linoleum floors are, cardboard flooring is completely awesome.  You can trounce on them all you want and you don’t hurt the shiny hardwood floors underneath!  Cardboard is soft on the feet, fairly non-slip, and takes a furniture dolly very well.

War Zone

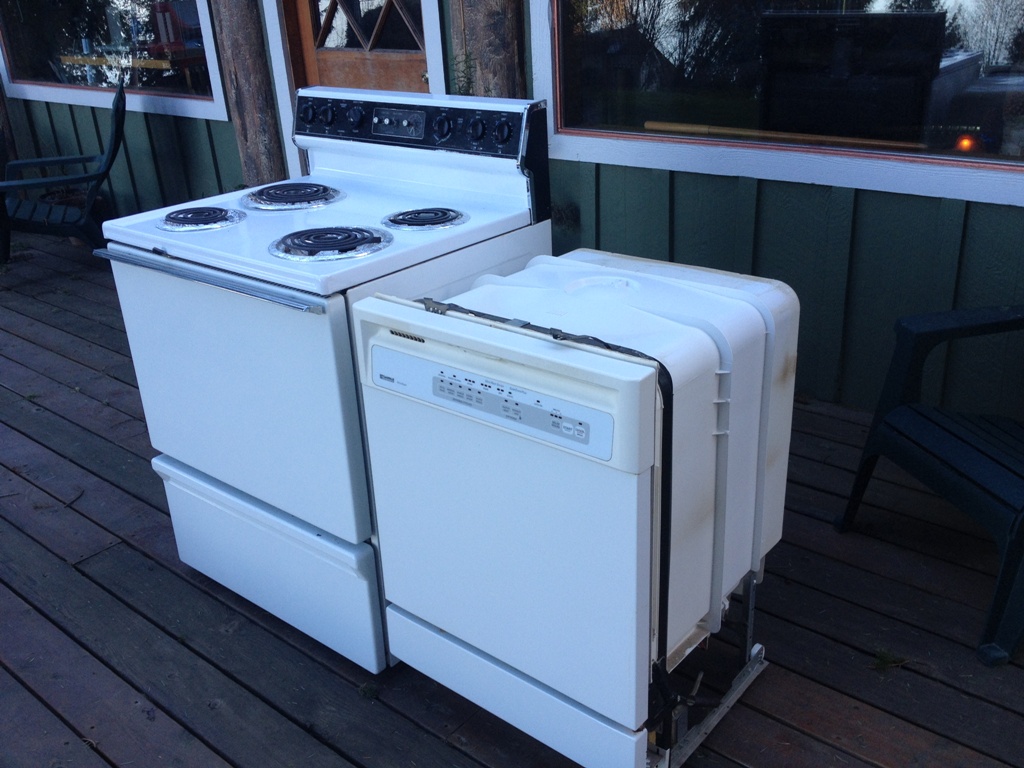
Delivery day was relatively painless.  I got the fridge out to the garage (yes, I moved it myself ) (yes, it was a big pain in the butt) with all our food, and put the stove and the dishwasher on the front porch so the deliverymen could take them to appliance heaven.  If you’re on a diet, consider moving your fridge out to the garage.  It really makes you think about that snack you want to get.  Especially if it’s raining.

Last Sunset
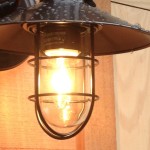
In addition to new appliances, we decided to make a few simple changes and fixes to the kitchen.  A new light fixture to replace the 48″ fluorescent tubes over the sink.  Ships at sea would complain about that light diverting them off course.  Well, now it’s gone.  Your shipments from overseas should start arriving on time now.

Absurd

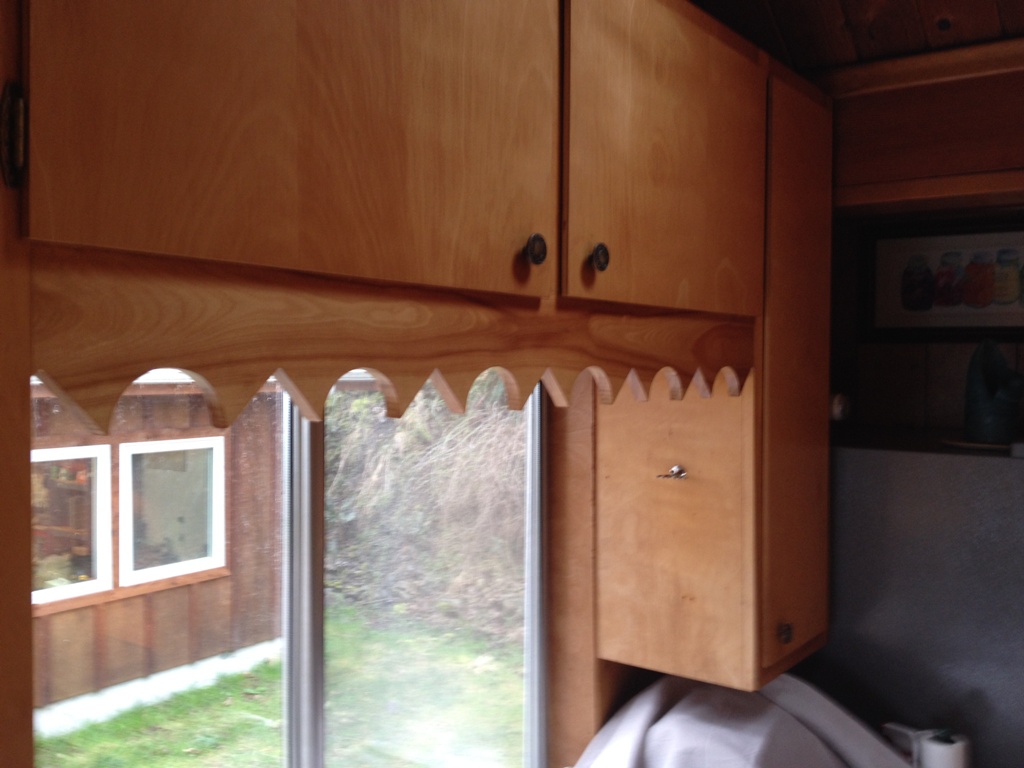
And that absurd cut-out in front of the light?  I took a machete and whacked it until it was straight.  That stupid arrangement of half-circles and triangles made me grimace every time I saw it.  We had something similar in our house in Denver, and we lived with it for ten years.  Not this time.  It’s gone.

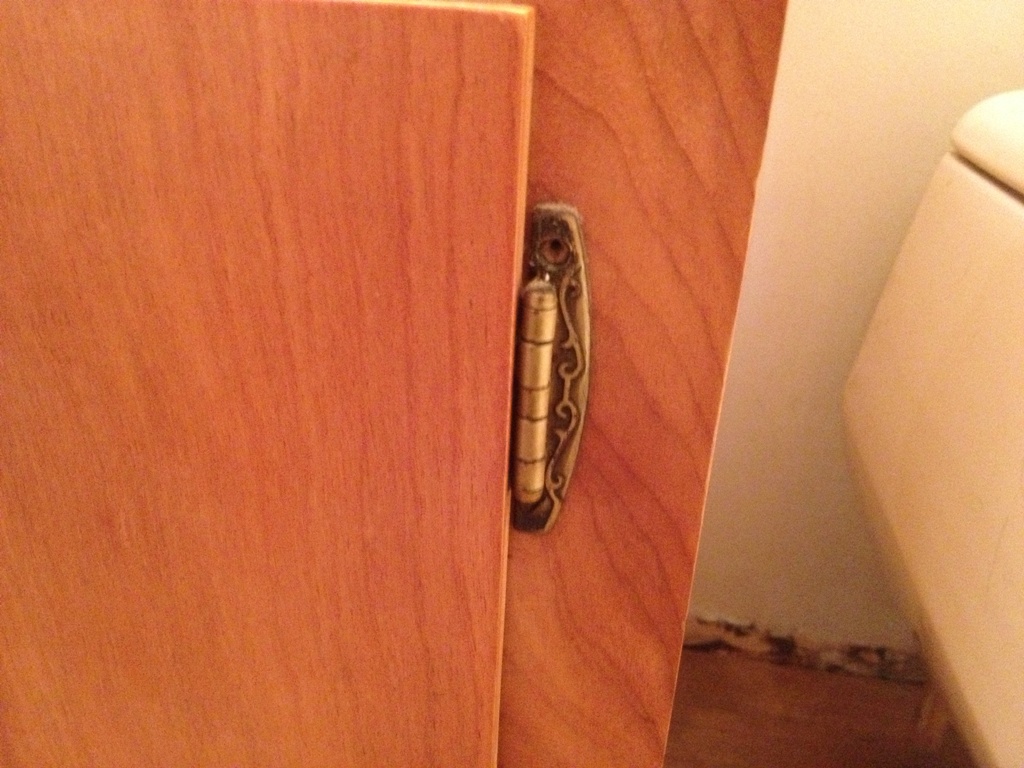
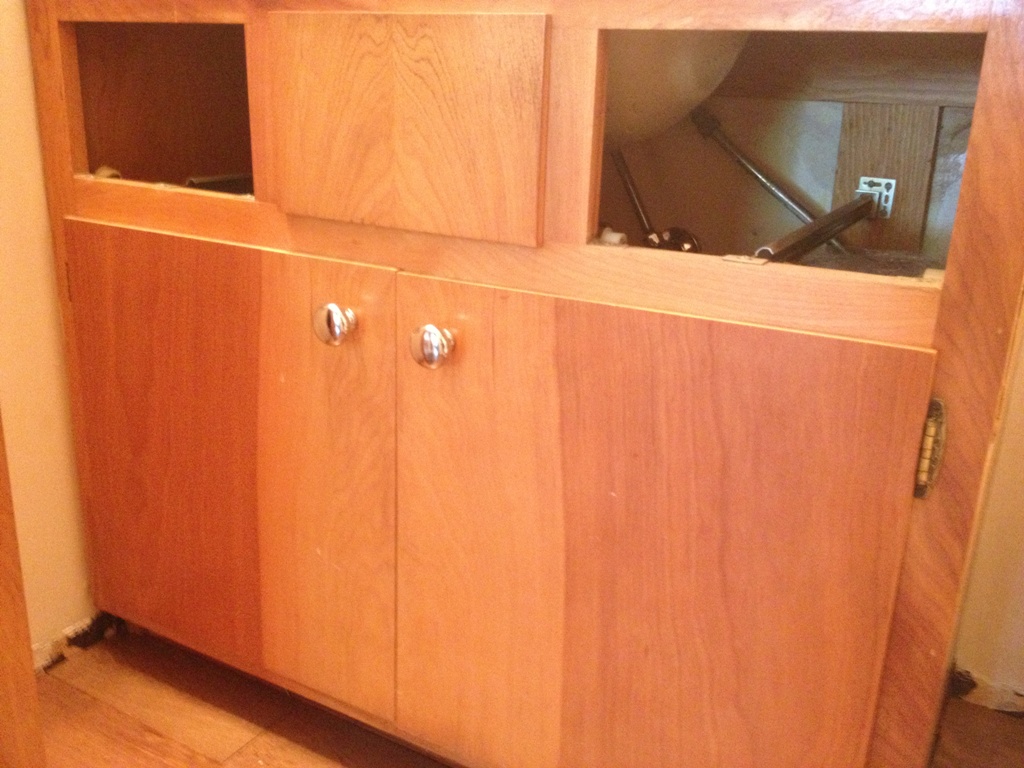
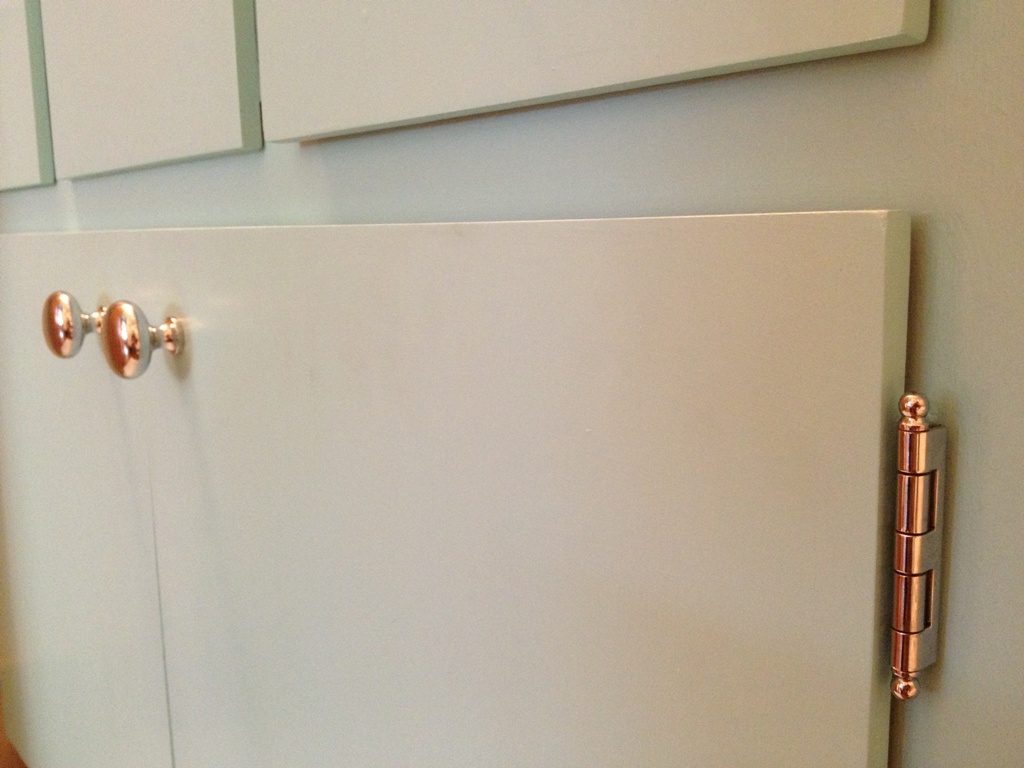
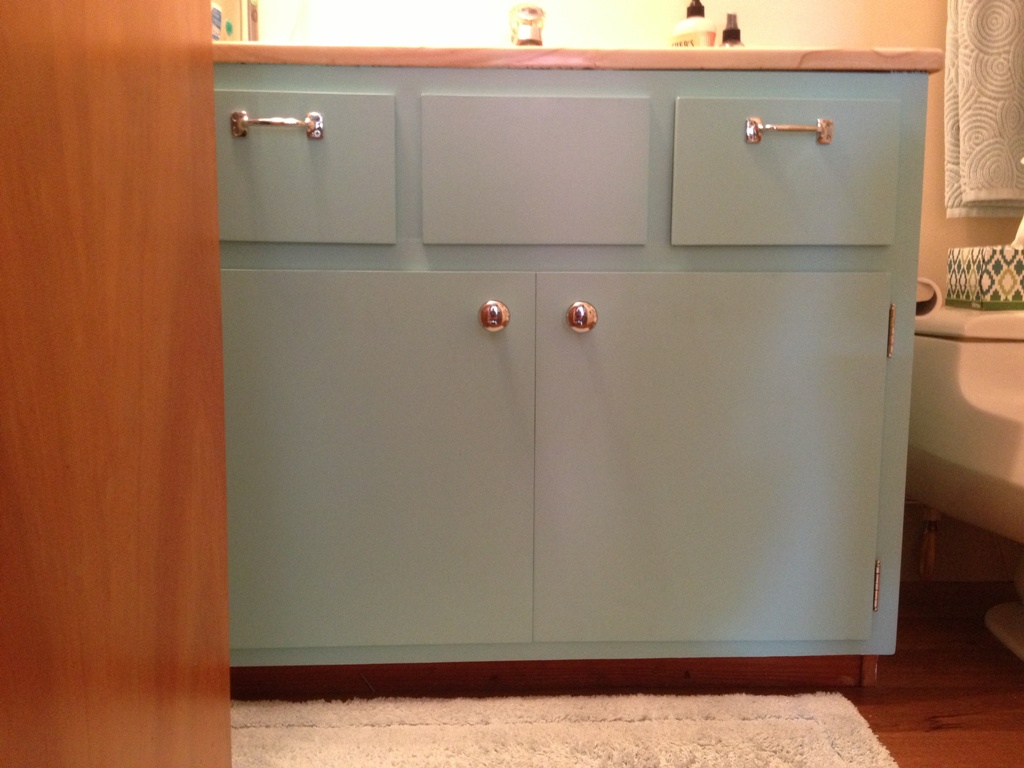
And we decided to replace the old knobs and drawer pulls too.  What was wrong with the old ones, you ask?  Everything.

Old Knobs


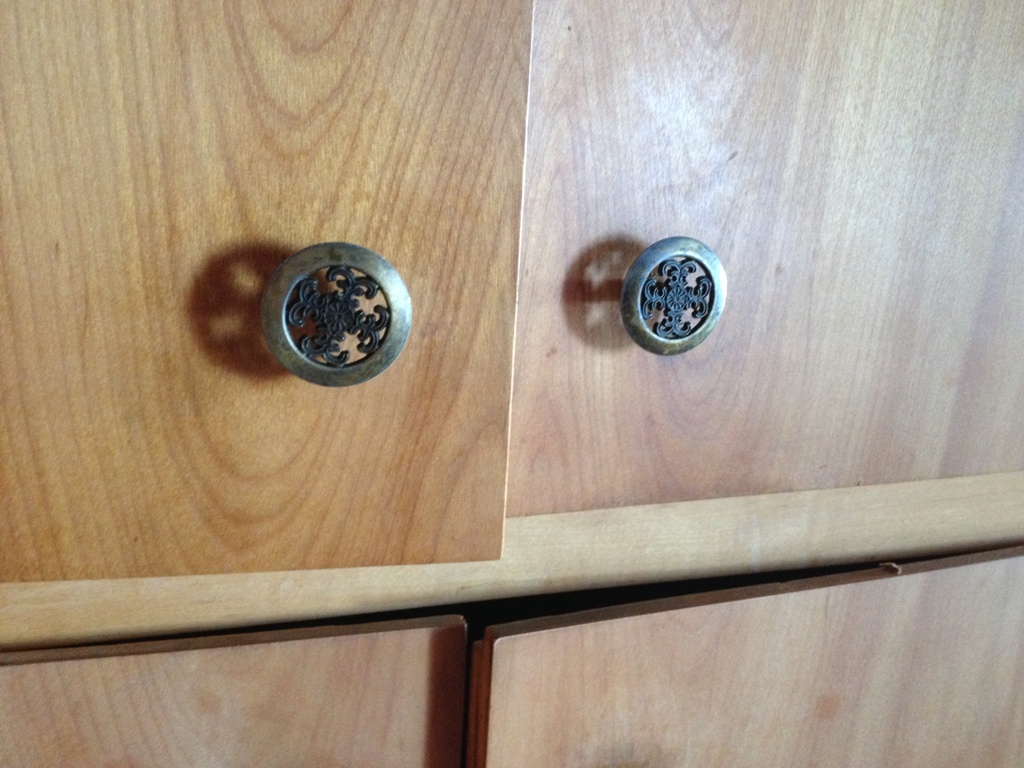
Ignore the fact that the cabinets are now lopsided because they were so cheaply built, but the knobs themselves just exude tastelessness.  Fun fact:  they still sell that exact same model of knob at the hardware stores here (both of them!) for about $1.29 a pop.

Old Pulls


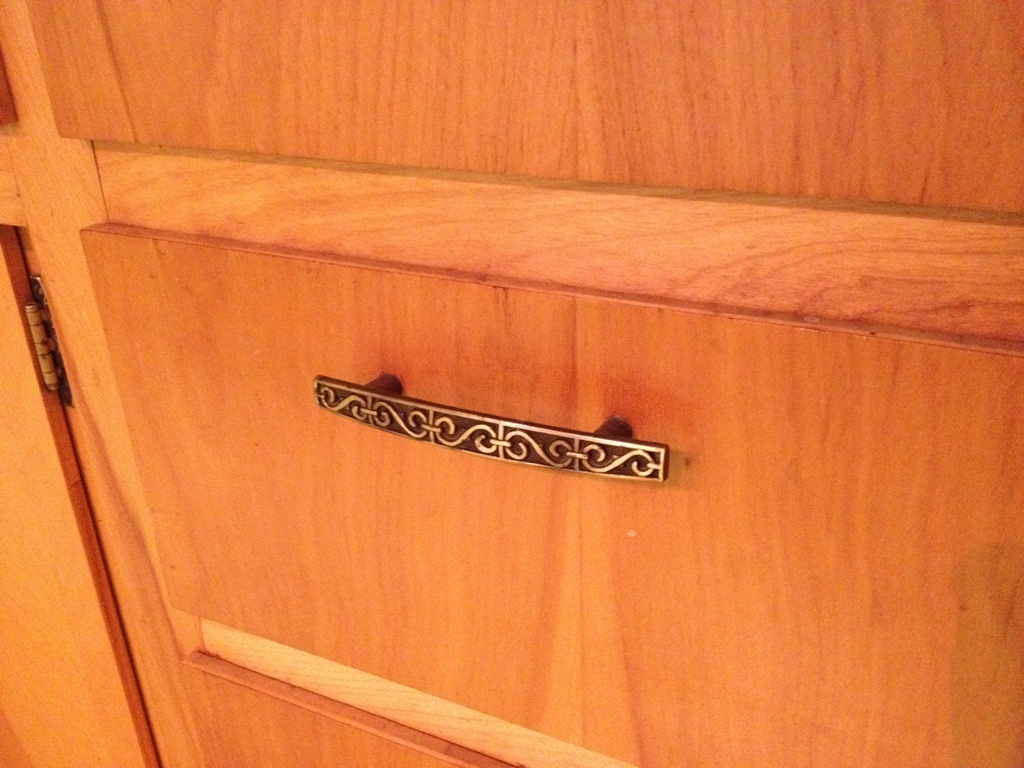
And here’s the old drawer pulls.  My chief complaint was that the sides acted like grapnel hooks, and they snagged my jeans, my sweats, any article of clothing they could.  When I’d try to back away from the cabinet, my pants would get pulled off me and the cabinet drawer would simultaneously open.  It was as if the house was clawing at me with its very fangs.

New Hardware


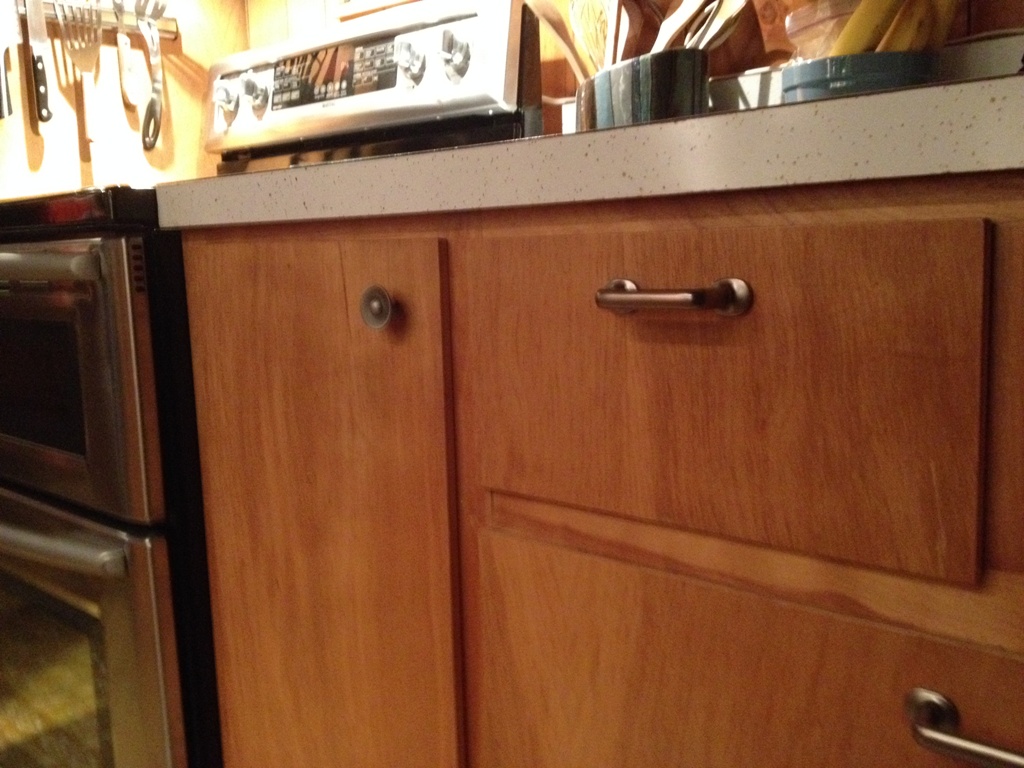
Screw you, house.  Sometimes the squeaky wheel gets the grease, and sometimes it gets replaced.  Above are the more anatomically friendly knobs and pulls that don’t claw at me like the fricking creature from the black lagoon.

New Appliances
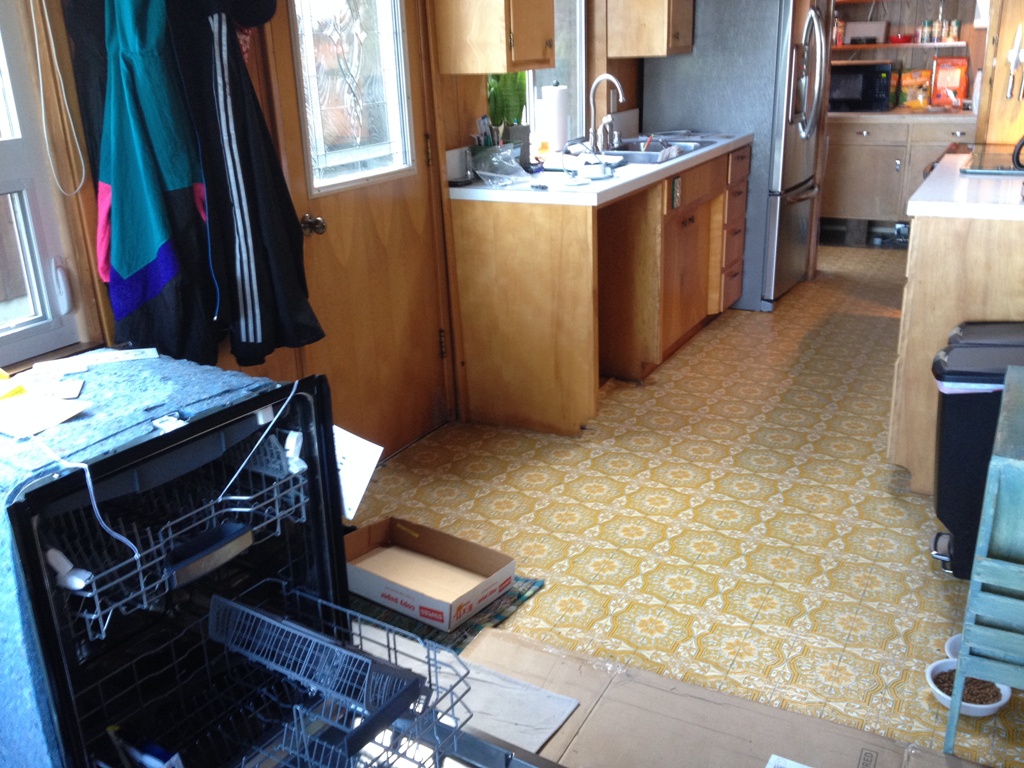
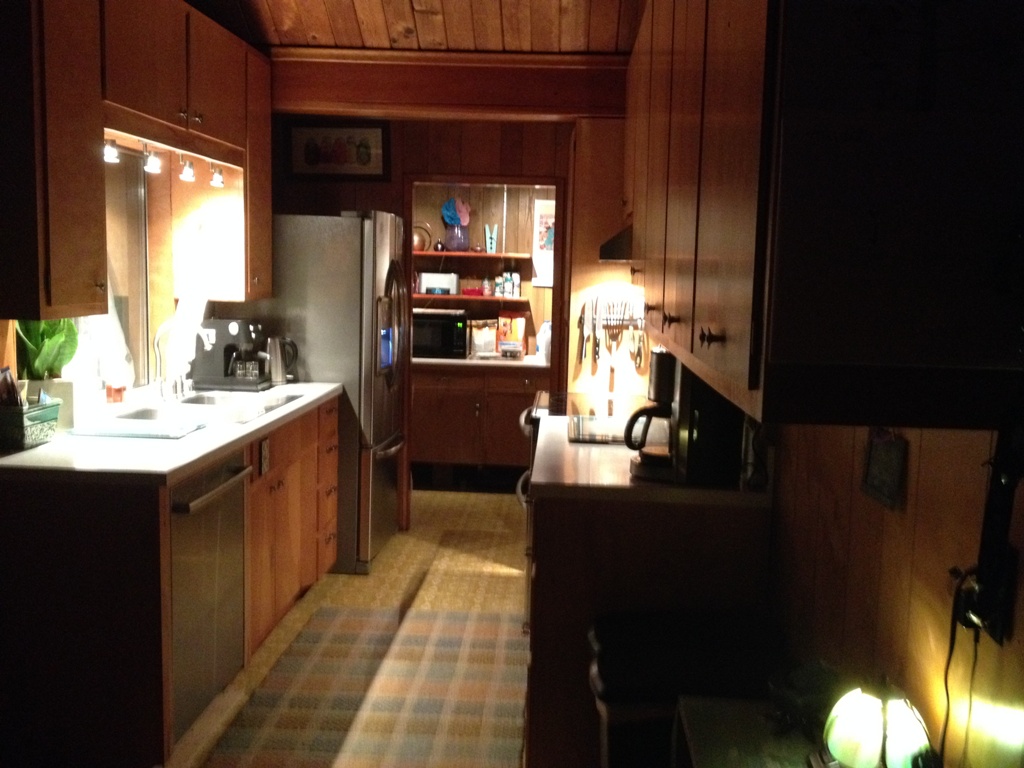
At long last, new appliances are in and working.  I had to put plywood under the stove to bring it up to the correct height, and plywood under the dishwasher to cover up some extensive floor damage.  They work.  They fit.  They are lovely.

Fridge

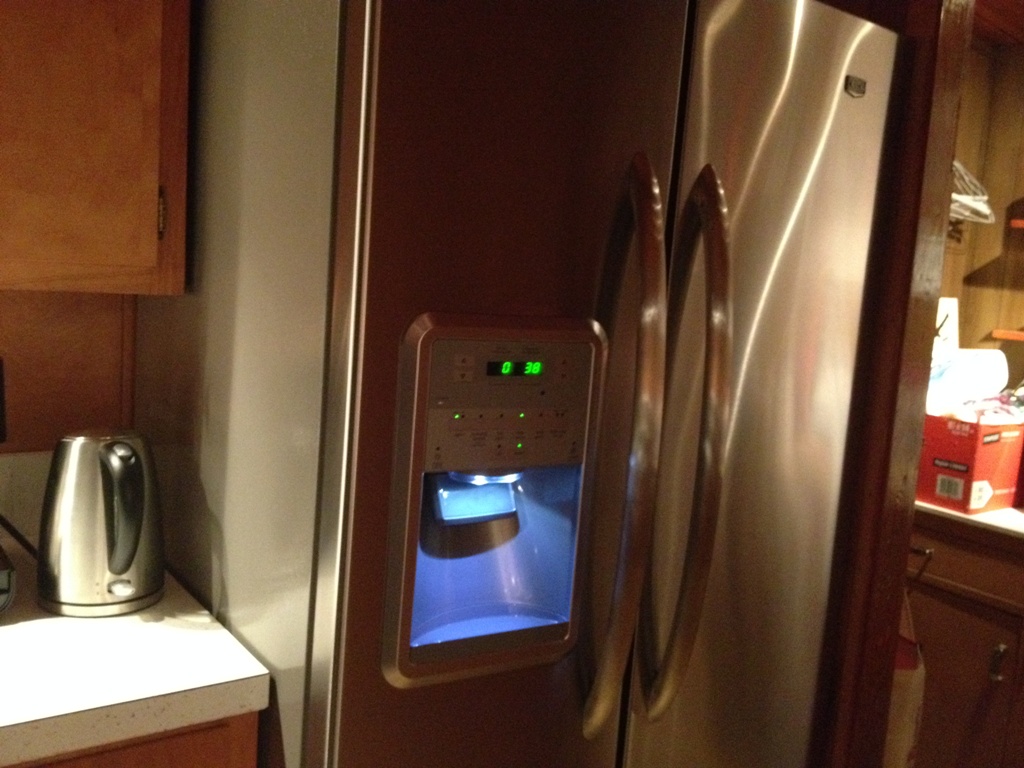
The fridge dispenses ice and water right out of the front door.  Seriously, you just push a lever and out comes the hydro of your choice, in liquid or solid form.  It’s an engineering marvel!  It has been my lifelong ambition to own a refrigerator that serves cold water out the front door.  Everything leading up to this moment has been building up to this pinnacle of achievement.  Nothing from this moment on will ever compare.  It comes with other bells and whistles (and beeps, literally) but who cares about them?  Not me.

Stove


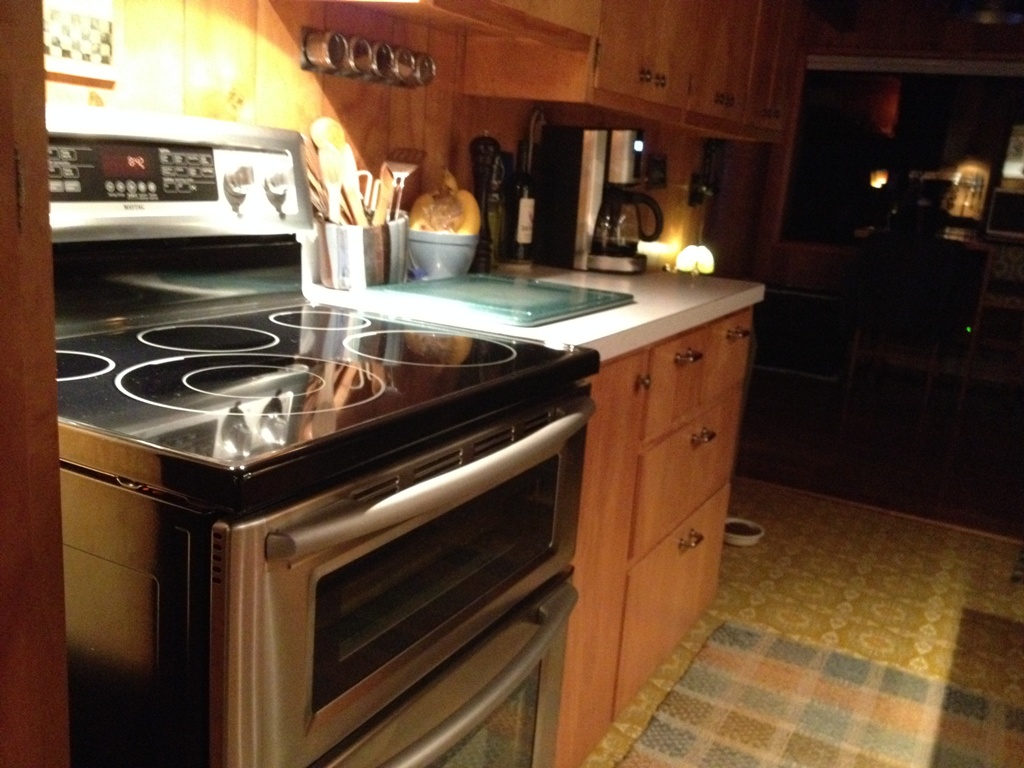
The stove is really cool too; it has lots of buttons and lights and stuff that works.  And the dishwasher is about as quiet as those deer grazing in our side yard.  Who freaking cares?  The fridge dispenses water from the front door!!!  We can get water out of the fridge!!!  Without even opening the door!!!!  Oh man, I’ve waited my whole life for this.  I can now die happy.

Oh, in the myriad of pics above, please ignore the ridiculous countertops, the awful paneling, the crappy kitchen cabinets and the lousy floor.  If you do that, it actually looks like a nice kitchen.  Just focus on the water dispenser in the fridge door, and you’ll be happy.


Please don’t use 16 gauge speaker wires for electrical

No No Bad Bad


Just a public service announcement.  Please don’t use 16 gauge speaker wires to hook up your overhead kitchen lights.  Future homeowners who have not yet died in an electrical fire will appreciate it.

It’s probably okay for low voltage and short term applications but if you’re installing some fancy new halogen light fixture you will want wires that don’t melt and burn when a bunch of electrons go racing through them.  And seriously, for like $5 you can buy a length of the correct wire, two staples to set it into place, a pack of electrical connectors, eight inches of black tape and gas money to drive to and from the hardware store.  Just go get 12/2G NM-B indoor yellow cable.  It comes with a grounding wire that is absent from speaker wires.  Connect black to black, white to white, ground to ground and Bob’s your uncle.

Thanks.

Alright, 1/8 of the house is finished.

Snowing


It’s snowing.  No better time to make sawdust.

Okay, I finished a corner of the house.  The area around the wood stove.  The mantle is done, the trim work is done, and I’m ready to declare that one eighth of the house is now completed.

One Eighth Finished


The wood stove has a mantle.  Solid oak.  I set sheets of steel (painted copper) as a backsplash on the wall above the tile.  It’s painted with high heat enamel.  It is bulletproof.  If our wood stove explodes in a flaming conflagration that threatens to burn the house down, the metal sheets won’t help it a bit.

A patch of drywall


I built a little built-in bookshelf to help with the book creep.  Oh, what’s book creep?   That’s when your bookshelves are too full, and the books you’re reading start to litter shelves, tables, couches, chairs, pretty much any horizontal surface not previously occupied by a cat or a candle or anything else that takes up space.  Book Creep means you don’t have enough storage space for books.  Ergo, I build book shelves.

Oh, and that rectangle of drywall up there?  That was wood paneling.  Now it’s drywall.  We cheer, seriously cheer, for every square foot of old paneling that leaves this house, never to return.  We’ll paint it.  It won’t be white for much longer.

Mantle


I was worried that the stove got too hot for a wooden mantle, but so far, the oak mantle has held up very well.  Hasn’t even burst into flames yet, and we’ve had quite a few fires in that stove since I installed it.  Those oak dowels conceal the fasteners that affix the mantle to the wall.  There’s quite a few of them.  That thing will never move.

Anyway, one eighth of the house is complete.  Fans of the computer game Ultima will rejoice, for I have not lost an eighth.


A to Z Plans

A brief glimpse into the mind of an Orcas Island Homeowner.

So, about a year and a half ago I installed some big 24” pieces of ceramic tile around our wood stove.  It looked lovely and was nice and fireproof but area above the tile has remained unfinished.  In fact, it’s on a long, long list of unfinished projects.  As with every project, it goes through a number of iterations before it reaches its final state.

Wood Stove Before

Plan A:  I’ll just drywall it.  Put a little wooden shelf over the tile and put drywall on the wall behind it.  Problem:  Okay, that area gets hot.  I put my hand on the wood paneling above the stove when it was burning and it was almost too hot to touch.  I’m surprised that wood paneling hasn’t ignited by now.  It’s a deathtrap the way it is.

Plan B:  Okay, not a wooden shelf but a stone shelf.  Long blocks of cultured stone set into place right on top, and we’ll figure out a wall surface later.  Problem:  Never did find stone that I liked.  I’d have to find something that matched the ceramic tile, which isn’t as easy as it sounds.  And attaching it would be problematic.

Plan C:  Build a hardwood shelf since I think that would look best.  But treat it with some kind of fireproofing compound.  Problem:  Good luck finding a fireproof compound that doesn’t stink or look horrible.  No point making a nice wooden mantle just to ruin it with the fireproofing agent.

Plan D:  Build a metal shelf.  I have stacks of roof metal sheeting left over from the prior owner’s project.  I could strip that down, paint it whatever color I like and it would be completely fireproof!  Problem:  Okay, I spent about six hours cleaning, cutting, bending and filing that crap and the final product looked awful.  Absolutely cheesy.  Stupid.  I hated it.  Can’t I just make the mantle out of wood, a material I know how to use?  No!  Wood is flammable.  Choose something else.

Plan E:  Fine.  I have a bunch of leftover ceramic tile from the wood stove surround.  I can rent a tile saw, cut them into strips, and make a shelf and a little runner to go along the front so it looks like it’s a little sturdy.  Let’s just do that.

MantelPlan F:  The idea of renting a tile saw when it’s 36° F outside just horrifies me.  It sprays water everywhere.  Your hands get drenched in it and they will freeze.  So I’ll just use some edging pieces that I have that don’t look as nice but I don’t want to cut big pieces of tile in this weather.

Plan G:   No front strip either.  Hey, I can use a piece of window flashing to at least make a metal lip that will cover the backerboard.  I can even paint it copper.  I have some hammered copper spray paint that looks great.

Plan H:  The copper spray paint isn’t made for hot applications.  Need to special order high heat paint.

Plan I:  How about the area over the tile?  Painted drywall would probably work ok, as long as you get the special stuff with no combustible paper.  Hey, how about copper sheets!  That would look so freaking cool!!

Plan J:  Copper sheeting would run about $800.  A pity, that’s $700 more than I wanted to spend on this crap.  Maybe I can cut up some of that metal roofing material I have in surplus.  I have enough to roof a small airplane hangar.

Plan K:  No, that would look hideous and take way too much work.  Hey, the hardware store sells these 24” steel sheets for like $6 each.  I could buy a bunch of those, paint them copper, set them in a diamond pattern and it would look great!  Like a copper backsplash.

Plan L:  Sorry, they’re $16 each.  And they only had enough to do most of that wall.  Not all of that wall.

Plan M:  I can do a built in bookshelf on the section of wall it won’t cover.  It’s in an area that doesn’t get hot at all.  Problem solved.

Plan N:  Alkyd based paints will not adhere to galvanized steel.  F#@&^#!

Plan O:  They sell primers that adhere to galvanized steel, but they’re water based latex.  I’m not sure how they will take to heat.

Primer

Plan P:  High heat engine paint is proof up to about 800°.  As long as they’re not exposed to direct flame they are good.

Plan Q:  High heat paints should not be used with a primer, so sayeth the label.  HOWEVER – they are toluene based which means they will adhere to galvanized steel without a primer!!  I can just paint the stupid things.  This is the first thing that has gone right on this project since its inception.

Plan R:  Some of the tiles are coming loose from the wall.  The temperature variation is not good for them.  Get some epoxy resin that will take the heat, and attempt to fit it into the cracks to keep them affixed.

Plan S:  Paint some test sheets of galvanized steel with my high heat paint.  One was primed, the other was not.  The two strips of flashing are not galvanized and I actually don’t care if they rust, melt, rot or jump out of the wall.  I’m using them and that’s that.

Will Paint

That’s where I’m at now.  Maybe in a month or so it will all be finished and I can show you how it turned out. Still need to move some electrical, mill some trim pieces, and get everything situated so it’s safe and fireproof and doesn’t look embarrassing.

Plan Z:  If all of the above fails, I will just order the stupid copper sheets for $800 and nail it to the wall with a nail gun.  By the time we get to this letter of the alphabet, I won’t care what it looks like or how much it costs anymore.

It’s finally gone

yuck


That’s the old oil tank.  It held the fuel that fed our dilapidated furnace.  It had no redeeming qualities.  It weighed about 600 pounds when empty and Zeus only knows what when full.

it's goneYeah, now we know how Frodo felt when he finally got rid of the Ring of Doom.  Seriously it is like a huge weight lifted off our minds, something far heavier than steel and hundreds of gallons of diesel fuel.

The plants back there may look a little dead, but you’ll be surprised how rapidly the earth takes it back and makes it lush and verdant again.  It’ll soon look fine. Now that the tank is gone, the healing process can get underway.

This was kind of the last domino before we could start landscaping.  I couldn’t finish the shed with the tank in the way.  Now that it’s gone, I can work on that ugly shed, lay down a brick patio, put up some deer fence and make a nice courtyard garden.


Sword Rack

fogIf you’re like me, you have a large number of Japanese swords cluttering up your house.  All manner of Nihon-to, katana, bokken and shinsakuto edged weapons just leaning against walls or lying on the floor like a trip hazard. I really needed to do something about this.  Storage space is hard to come by in this house so I thought my best bet was to design a wall mounted sword rack.

The PlansThere’s not much wall space in the house either, but there’s a few spots I can mount at least one or two of my better blades as long as I keep the mount a little compact.  I didn’t want a traditional Japanese design either, and I came up with my own, something a little more modern.  Simple, though.  Fit and function are a lot more important than looks.

When designing something small, it can be helpful to make a full scale drawing of what you’re trying to make.  Drawing it out full scale really helps you see exactly what you have to cut out of wood.

More PlansI used a slab of 7/8″ burled rock maple.  It is not easy to saw and not very forgiving, but it is bulletproof.  The prongs that hold the sword tend to be the weak point of any sword rack – if the sword twists against that prong, it can easily snap.  This is why I like to use a really hard wood.  When you draw it out life size, you start to realize there are things you may not be able to do, and you adjust your design accordingly.

fit


I have a mortising machine that cuts square holes like that, but it broke on the first mortise.  Haven’t used it in over a year and I guess it was mad at me.  So I had to cut all four mortises by hand with chisels I haven’t sharpened in over a year.  I probably should have stopped and sharpened them but I know me, that would have taken all day.  I wanted to get this project done before moving on to another project.

village of toolsIt takes a village of tools to do even a small project like this, especially the smoothing, shaping and sanding.  I cut out a lot of that with a jigsaw (don’t own a scroll saw, and I’m not sure how a scroll saw likes an inch of rock maple anyway) and it was very rough after cutting.  I smoothed it out with rasps and files and a nice straight router bit where I could get it to fit.

wedgesWhen I have exposed tenons like that, I like to put a wedge in there for some added stability.  I don’t need them for structure, it’s only got to hold about 5 pounds of swords.  Could have made this out of cardboard and still had enough structure.  But wedged tenons not only look great but really make a strong joint that should never fail for the life of the piece.  Last time I made wedges, I needed about 84 of them for my desk, and I cut them all by hand.  Thankfully, the zero tolerance insert on my table saw lets me cut them on the saw.  The wedge goes flying once it’s cut out, but it’s small enough that it doesn’t hurt anybody.

keyholeI’ve never cut a keyhole like this before but it seemed like the best way to mount it to the wall (and saved me a trip to town looking for hanging brackets that would fit). It’s not a difficult cut to make on a router table.  The holes came out perfect and are actually stronger than I thought they would be.


finishedAnyway, all finished.  Two less swords to trip on now.  The top one is a crappy replica but it’s okay to train with.  The bottom one is a very real wakizashi, folded steel, and extremely sharp.  I’m going to re-do the handles on both of them and probably do some more work to that wakisashi at some point.  Another project for another day.


What’s been happening lately?

Lots going on but not a lot of finished projects yet.  Some hints below:

That spider is big enough to pull a cart.  I’m going to have to start charging him rent.

Measure fifteen times, cut once

Measure and MarkI’m making a jigsaw puzzle out of tongue and groove boards.  But first I have to cut the boards and make the tongues and grooves.  Some pieces have both tongue and groove on both sides, others have just tongues, others have just grooves.  If I mis-cut one piece, I won’t have enough left over to complete the project correctly.


The Snowball Effect


The bathroom needs to be fully gutted down to the studs and completely redone.  Everything.  But we can do small things in the meantime to make it a little nicer.Knobs and PullsLet’s replace the cabinet knobs.  And the drawer pulls.  That’s cheap, right?  Takes ten minutes.  Just order some nice ones online and install them.  It’ll make a big difference.

HingesOkay, the new knobs and drawer pulls make the hinges look ridiculous.  Let’s get some new hinges.  Find some nice ones on the internet and swap them out.

Lets PaintOkay, if I put new hinges on then I’m going to have to putty the holes left by the old hinges.  You know, may as well paint it.  That’s cheap, right?  Doesn’t take very long.  And that way the holes are completely sealed up.

Oh, if we’re going to paint may as well put some trim pieces along the floor too.  And paint those.  And that’s going to make the walls look awful, going to need to paint them.  And if we paint the walls, may as well get new towel rods.  They’re not cheap, not in the least, but this is our forever house.  Going to want nice towel rods.

Shiny new hardware


Nice, what a difference. But you know, now that countertop and sink look so awful up there.  That stupid two-tone swirled plastic, with fungus growing in the cracks.  I can’t live with that a minute longer than I have to.  There’s got to be something out there we can replace that with.  That’s cheap, right?  Doesn’t take long, just a weekend.

So now we need a new sink and new towel rods and I may as well get started replacing the vanity with some new cabinetry.  And new trim around the windows.  Could use a new fan, too, that thing is awful.  Oh, and the shower doors are disgusting.  And don’t get me started on the toilet (we did get a new toilet seat lid).

Better I guessThis story doesn’t have an end.


Every light fixture that came with this house sucks.

Ugh


Where did they find this crap?  This is shortly before we painted, and shortly after I sliced my finger on the glass bowl that shattered instead of coming out.

The odd thing about this light fixture was it had a switch but it still plugged into the wall.  However, when we got the house there was no outdoor light fixture.  So it was just sitting there, the only illumination on the back deck, with nothing to plug into.  I did put an outdoor outlet to plug it into but it still offended me that I had to plug the light in.

We are very close to having replaced all of the light fixtures in the house.  Just two more to go.