Never A Dull Moment

Lots going on here as usual.  No finished projects to report on so I’ll just share with you a little slice of Orcas summer.

frog

Frog in our strawberry plant.  I think he wants to eat a strawberry, but they are bigger than he is so it poses a logistical issue.

path

How the path has grown.  I just keep adding stuff to it:  rocks, moss, plants, whatever.

grinder

Sparks flying in the shop.  I bet you wonder what I’m working on now…

sun

Forest fires in our region have given us dramatic sunscapes.  This was from shortly after sunrise.

anchor

All manner of pirate booty washes up on our shores.

birds eye view

Flying over Eastsound.  On the island, we just call it “town”.  It’s best avoided from June to September because of the tourist infestation.

boat

Sailing around from island to island in a wooden boat?  These guys have the right idea.

deck

This really would be a nice place to rest, if ever I would rest.

lizard

I saved this lizard from Inky’s deadly fangs.  She was fairly well convinced that it was a cat toy.

landscapingDoes it look like a mess?  It is.  Give me a few weekends, I’ll have it all sorted out.

My First Screen Door

It Fits

I love a finished project.  Now the door is stained and has a couple coats of spar urethane on it and I even put a little brass handle on it so we can open and close it.  It’s everything one would want in a screen door.  The only thing it lacks is hinges, I had to order them and they have not yet arrived.  But other than that, it rests in the frame and is held in place by magnetic catches and as far as I’m concerned it’s done.

Screen

Screen technology has come a long way.  It used to be a big pain in the ass when you needed to make a screen, often involving special tools and working with aluminum frames and steel mesh that all had jagged pointy ends to cut yourself on.  Well nowadays, it’s still a big pain in the ass.  But at least the screen fabric isn’t steel anymore, I think it’s nylon.  The old steel sheets were awful to work with.

Fittings

I got the screens in the frames and affixed them to the door with brass washers and screws.  The brass washers came super shiny and bright, but here’s a trick.  Put them on a metal wire and hang them over the flames in your barbecue grill.  Let them cook for a while, get them as hot as you can.  These cooked to about 700 degrees, and at that temperature the brass takes on a nice antiquated patina.  (I actually didn’t want to use washers, they sell special brackets that hold these things in place, usually used for mirrors or glass panes in cabinet doors.  But good luck finding those on an island.)

Shaping Up

Here’s the finished door.  I’m glad to have some room to move around in my shop, makes projects like this a lot easier.

Plans

These are the full extent of the drawings I used to make the door.  On some projects I draw everything from every angle but on this one I just kind of winged it.  Didn’t even need to do much math.

More Driftwood Projects


Driftwood.

DriftwoodMesh plant basket.

Bowl

Copper wire.

Copper

Yes, on occasion, I go down the artsy-craftsy path where it’s not always easy to tell the good ideas from the bad.  Sometimes you just have to follow it and see how it goes.  In this case, I think it went well.  The driftwood I found looked like it could hold a potted plant, maybe something that trails down the sides.  I initially thought to embed it in the ground but it would basically be a ground mounted deer feeder.  That’s when I figured I could mount it on the wall, like a sconce.  I just had to affix it to a slab of wood.

Wired

That’s where all the copper wire comes in to play.  It weathers well outdoors, like driftwood, and the 12 gauge stuff is plenty strong enough to hold it in place.  Just drilled through the wood in a few places to get it started and wrapped it tightly around the ends.

Staples

On the backside, the copper wires go through holes and are held in place by staples.

MountedThere.  Now the prongs can hold a basket.  I did wire the basket firmly in place and gave it some support so it wouldn’t deform too badly when I put dirt in it.  That’s the last thing I’d need.

Installed

I nailed it to the side of the garage with copper colored boat nails.  The slab of wood will protect the garage wall from getting wet.  We put some kind of fuchsia in the basket and I think it will do well.

Flower Sconce

And it holds the plant well above deer level so it shouldn’t turn into chow anytime soon.


Bathroom Cabinets Completed

There’s nothing like a finished project.

Finished

Finally have the bathroom cabinets all finished and the bathroom trim is painted to match.  I’m not terribly happy with the paint job on the cabinets, no matter how much I sanded it and tried to get it smooth it just came out a little lumpy.  It’s fine.  I’ll live with it.  It’s much improved from what was there.

Need More Clamps

I had some nice, dark brown wenge leftover from a previous project and I just needed to order a little more to make shelves for the entire cabinet.  But even after I ordered more, I still didn’t have all that I needed.  I had to join some narrow strips together to get the 4 1/2″ width I needed to complete the shelves.  I’ve never joined an exotic wood like that; I’ve heard this wood can be a little oily and that sometimes interferes with the glue bond.  That, and these are going to live in a damp environment and if they start to warp or deform at all they’re going to split right apart.

Shelves

They seemed to glue together just fine and I think it’ll work.  I would have preferred solid slabs but the wood is so dark and evenly grained that you can’t really tell that some of the shelves are joined.  Here they are in place.  Great fit, very sturdy.

Driftwood Handrail

Handrail

We’ve had this handrail on the side of our house since we moved in.  I guess building codes require a handrail next to the stairs because they care about people, or something.  It was installed at the last minute and at a very low budget. It wasn’t much to look at but I guess it got the job done.  Well, I finally found something pretty cool to replace it with.

New Handrail

I’m not really a fan of making everything out of driftwood, but I found this piece a while back that would make Gandalf proud to use it for a wizard’s staff.  It looked like it would fit well at the side door so it didn’t take me long to rip out the old handrail and affix this one to the wall.

Handrail 2

I was going to make or buy some nice brackets to affix it but I discovered it was faster to simply use lag bolts and plug the holes with dowels.  Actually fits fairly sturdy that way.  I think it will work nicely.

Path

Landscaping is coming along slowly but nicely.  It’s cool to live in a place where you can use what you have on your own land for landscaping materials instead of having to go to home depot.  It’s one of the very few ways you can save a little money out here.

The Worst Medicine Cabinets on Orcas Island

Do you want to see some ugly medicine cabinets?  I’m warning you, these are bad.

Yuck

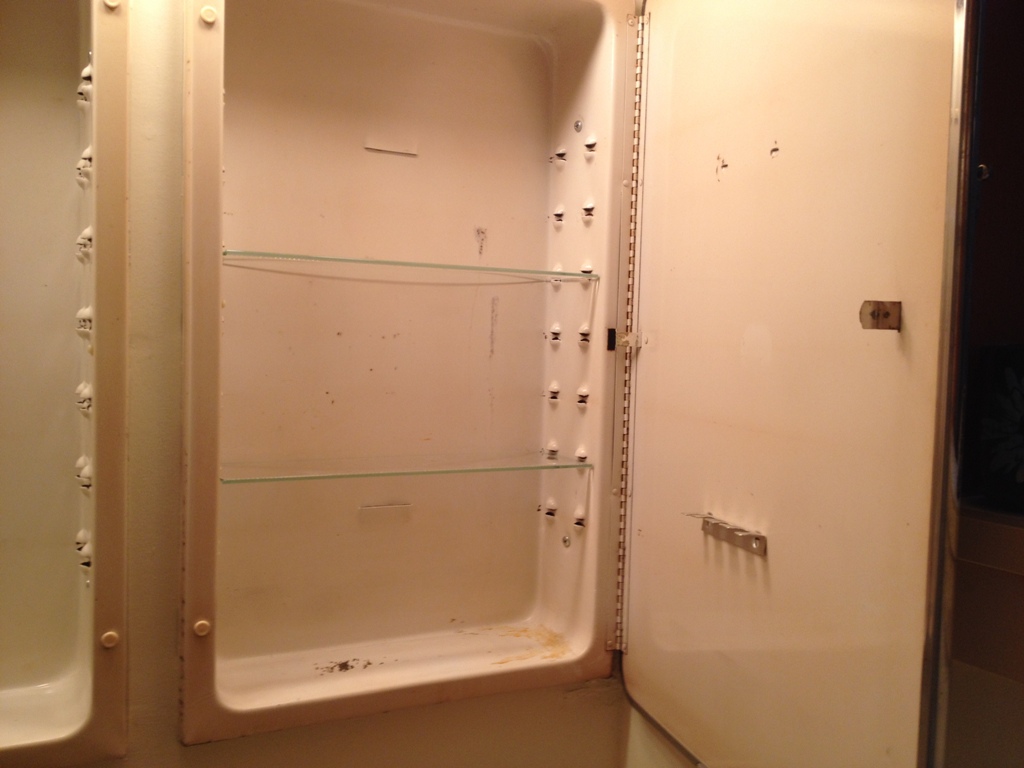
Wasn’t kidding, was I?  Poorly fitted contraptions of stamped sheet metal, rusting in too many places to adequately fix, that look like they belong on a tug boat that takes barges to Severodvinsk every three months.

Old Cabinets

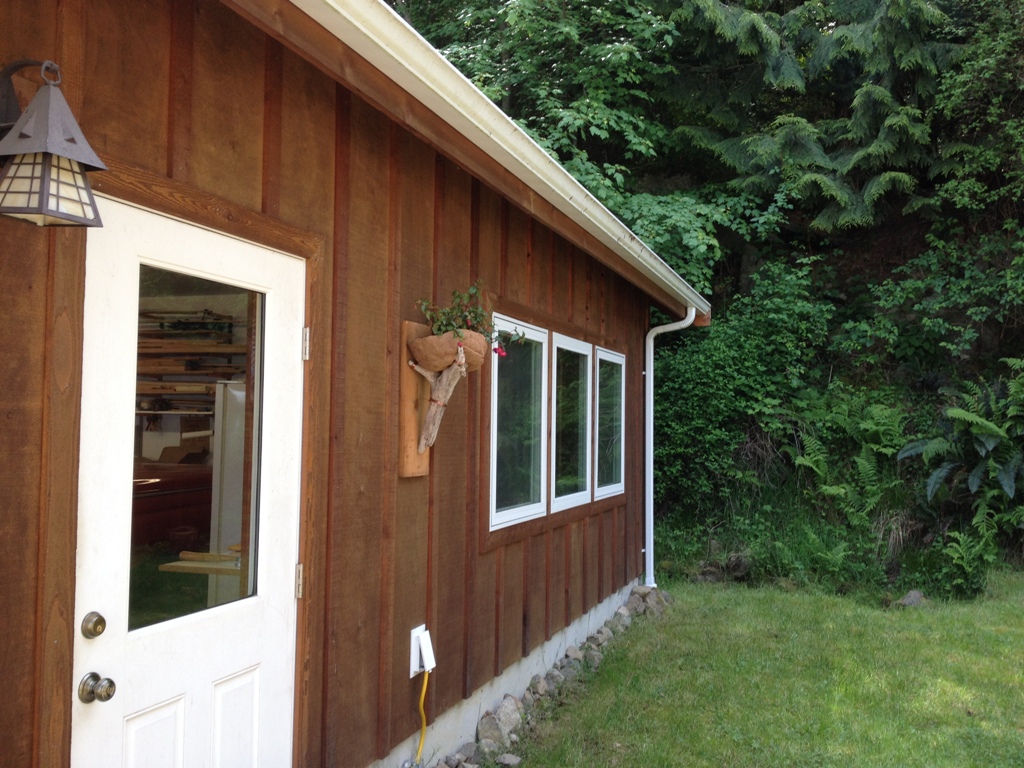
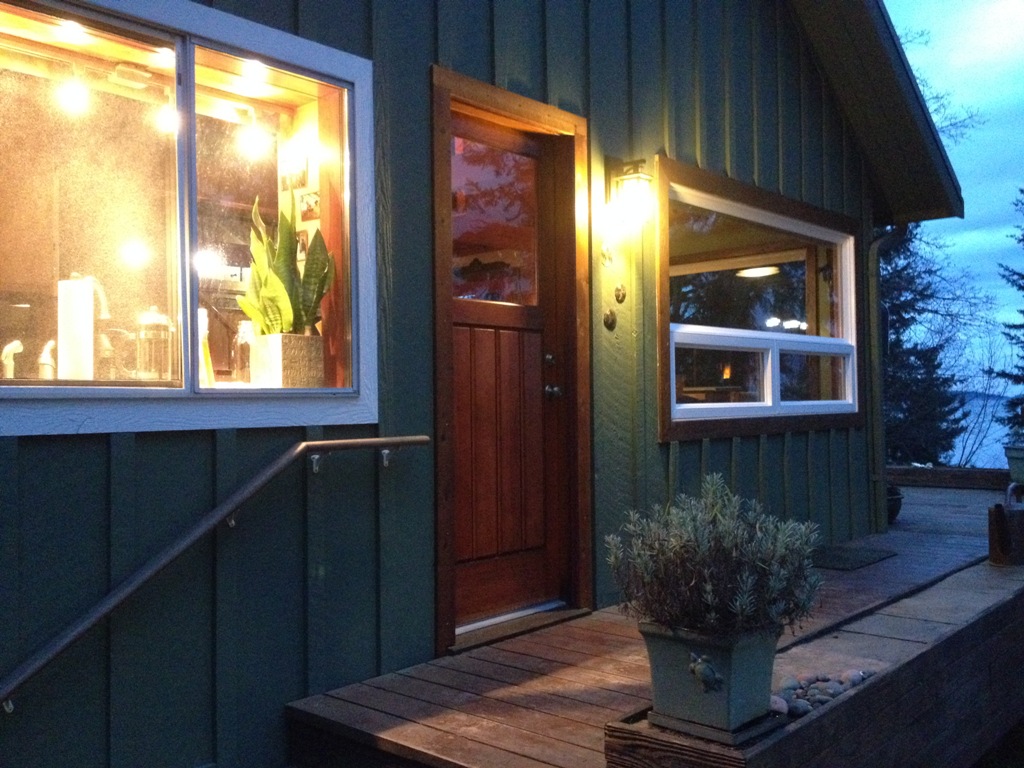
I suppose they’re nostalgic in a way.  When I arrived, on my first night here in the house, that light fixture had three of the only four working lights on the entire property.  Do you want to know how many places are open on Orcas Island at night that sell light bulbs?  0.

So, yeah, I’m thankful for that old light fixture so I didn’t have to go to the bathroom in pitch blackness in a strange house.  I’m quite fond of them…. NOT.  It’s at the dump now.  Good effing riddance.  I hated that thing.  The cabinets too.  I would have thrown knives at them but, you know, seven years bad luck and all.

Box

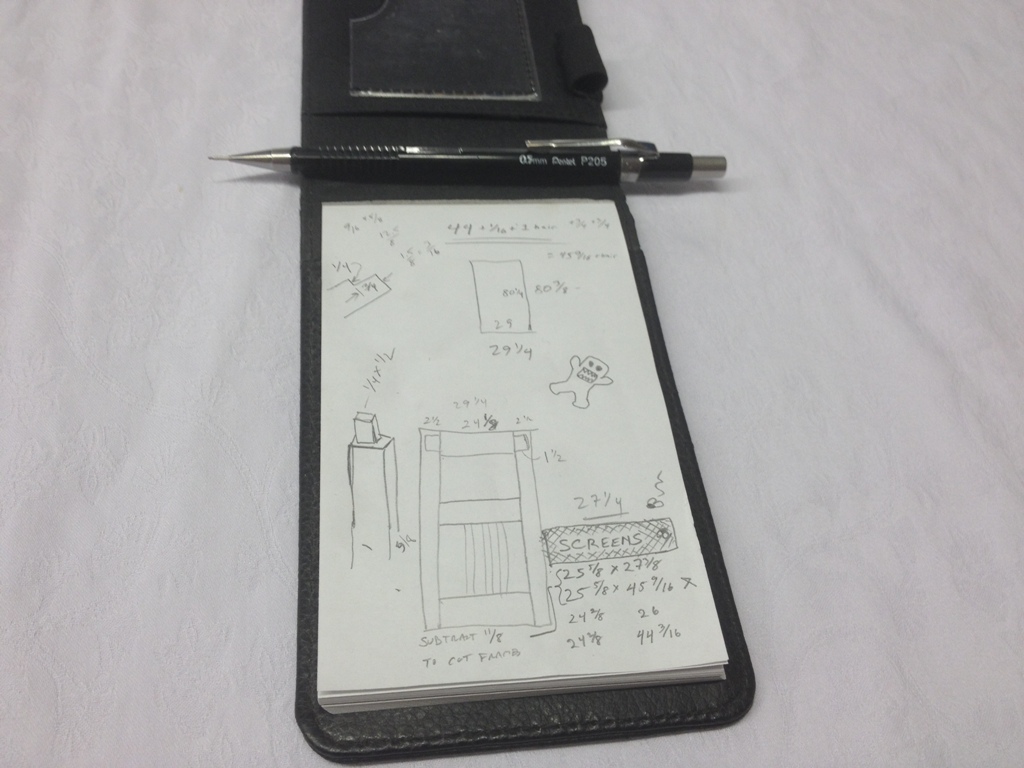
I drew up full plans to build new cabinets about one year ago, and they’ve been sitting (like many plans I draw) and waiting for me to start cutting wood.  I had a full cut list, dimensioned drawings from every angle, and even a materials itinerary of all the hardware and woodware I’d need.  I bought the hinges, the knobs, the little metal pegs that go into the holes that hold up the shelves, I even bought the custom cut mirrors !!! all about a year ago.  This is one very procrastinated project.  In my defense, I’ve been a little busy.

They Fit

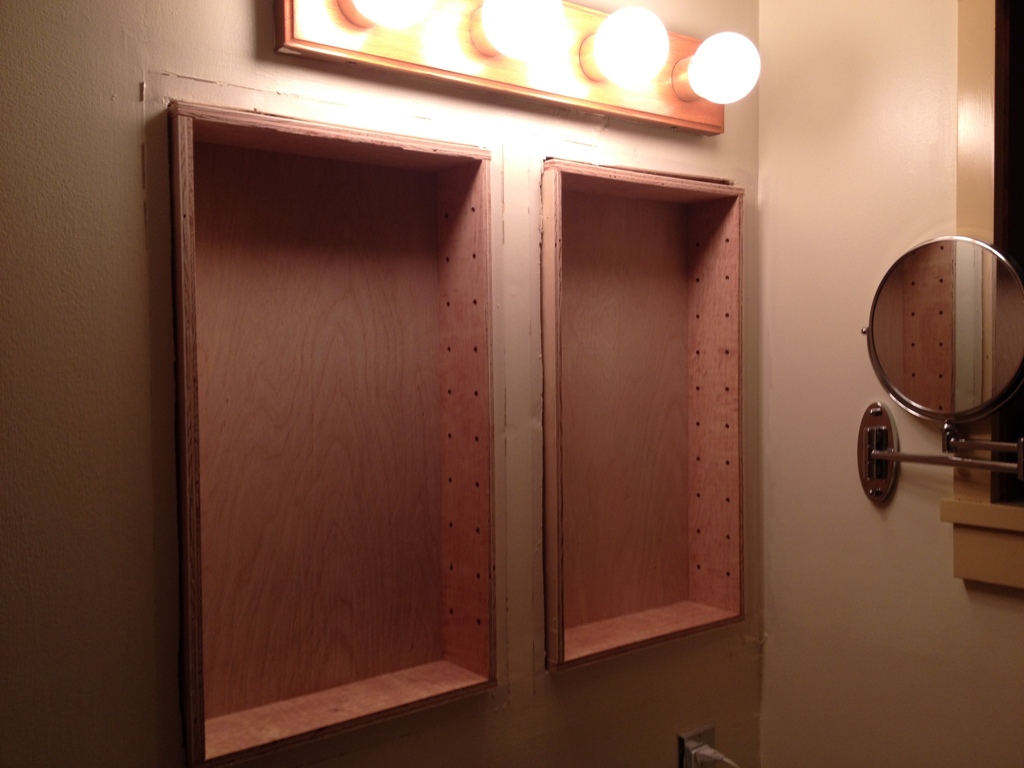
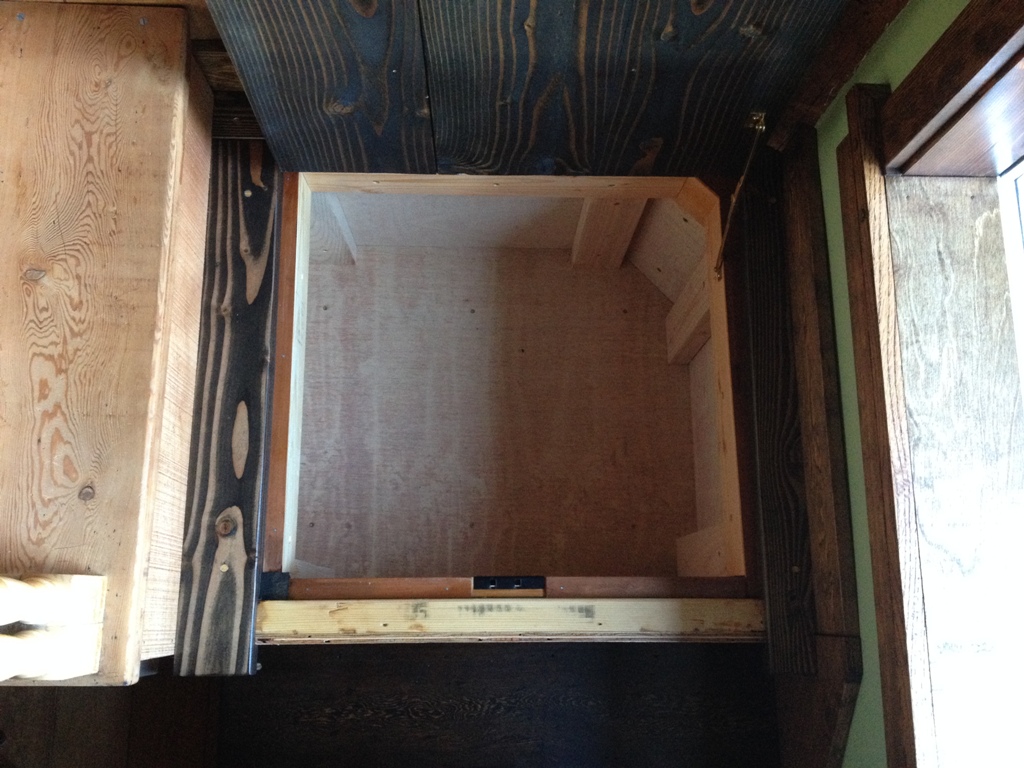
I constructed the two boxes to exactly the dimensions that I had measured a year ago and they fit PERFECTLY!   How often does that happen in a woodworker’s lifetime?  Not often, for me at least.

Lap Joints

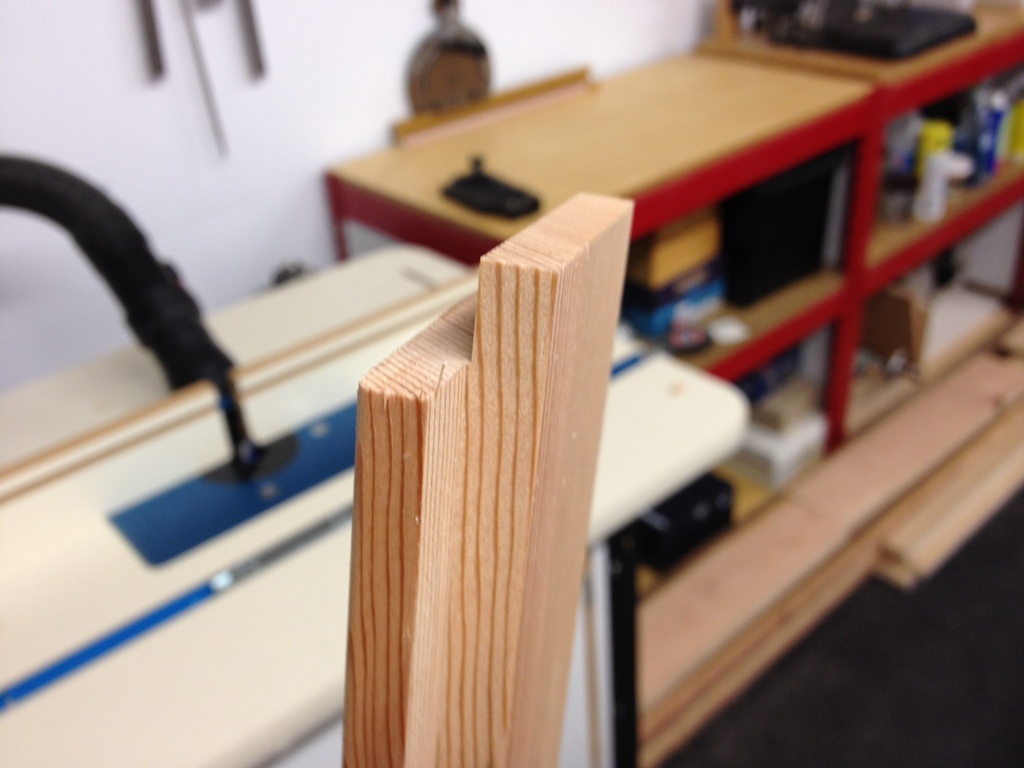
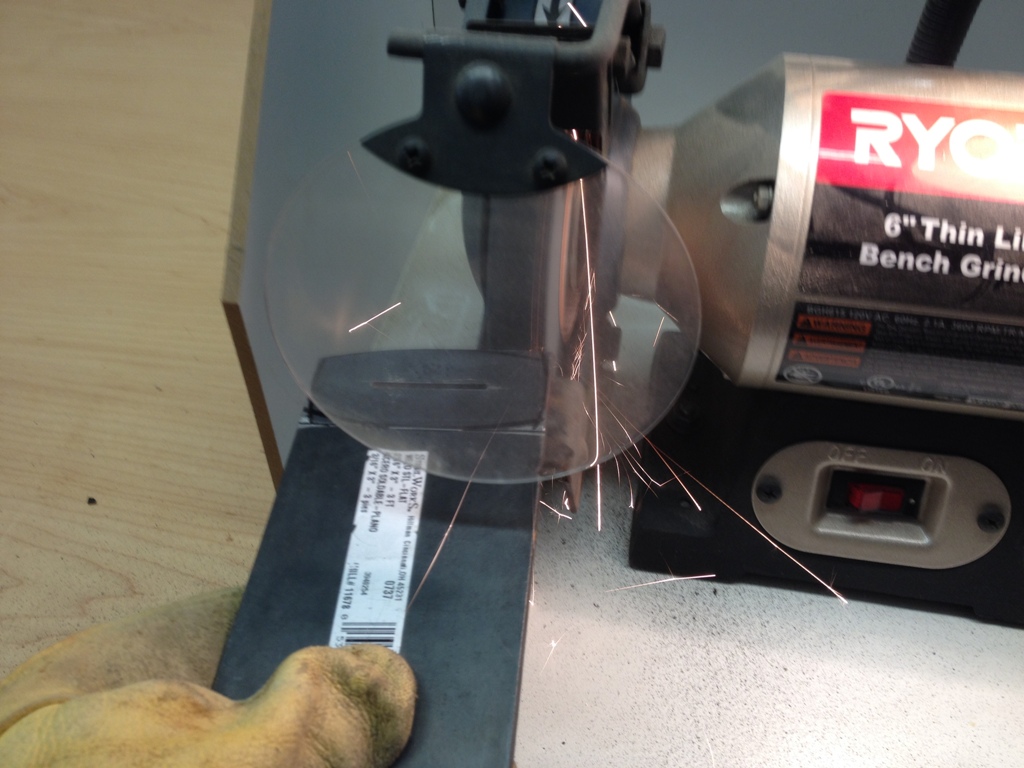
Once I knew they fit into place, I could start cutting the inner frame.  Everything is going to fit together with lap joints, like the ones shown above.  Nothing too fancy, just what works.

Shelf

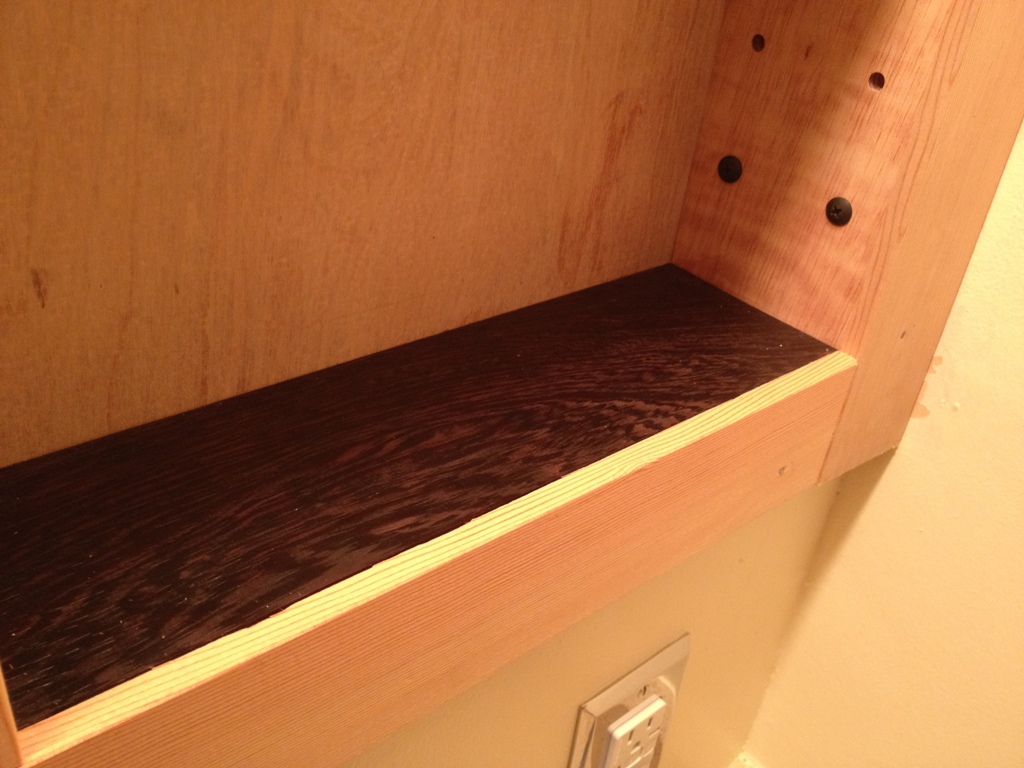
I’ve had these pieces of wenge, which is an African hardwood, just lying around from another unfinished project from long ago.  I’ve probably had them for about ten years.  Finally found a use for them, they are going to be the shelves and bottoms of my bathroom cabinets!  Hooray for them.  I used to think of wenge as a poor man’s cocobolo (a central American hardwood) but since then the price of wenge has increased.  I only need a couple more pieces.  There goes my play money for the month of April.

Light

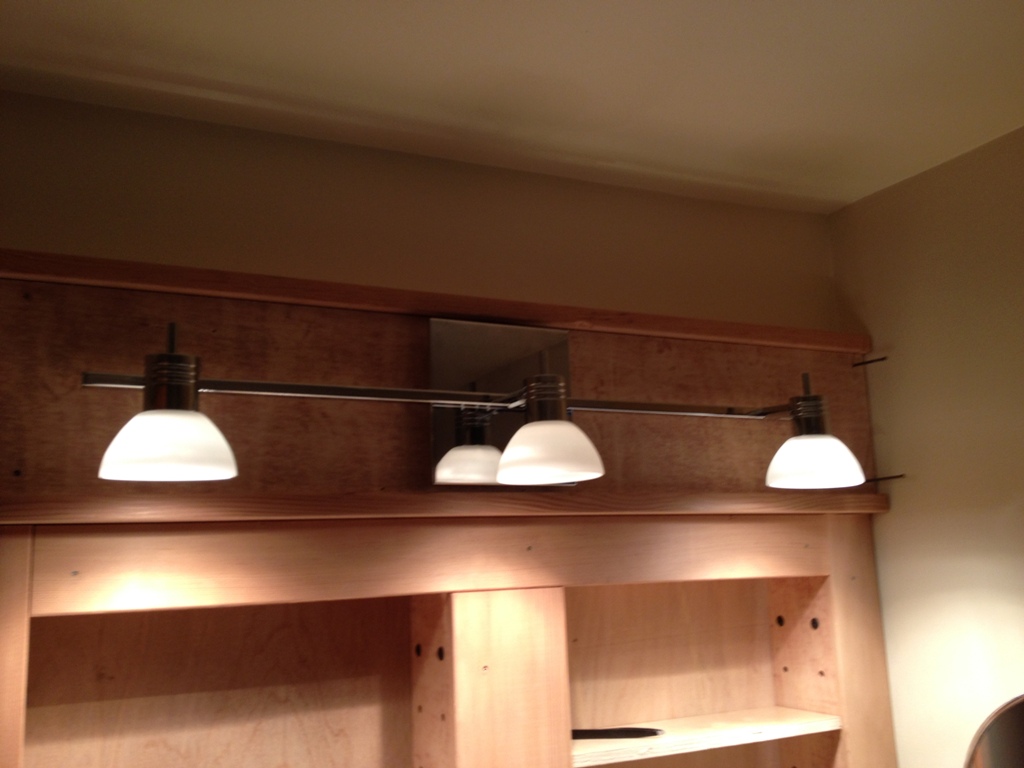
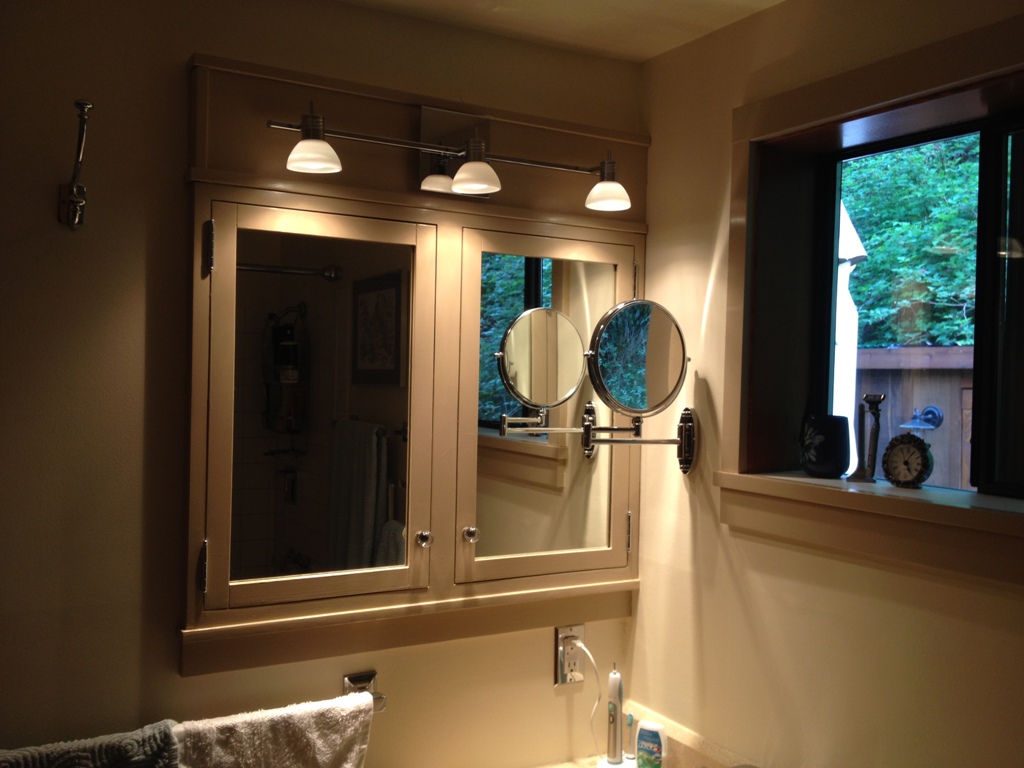
And yeah, I bought that light fixture about a year ago too.  It’s simple and it works well for the room.  I’m not terribly happy with the housing I made for it, I may have to re-do it at some point.  I intend to paint these cabinets, which will conceal a lot of defects, but I’m still not happy with this top part.

Frame
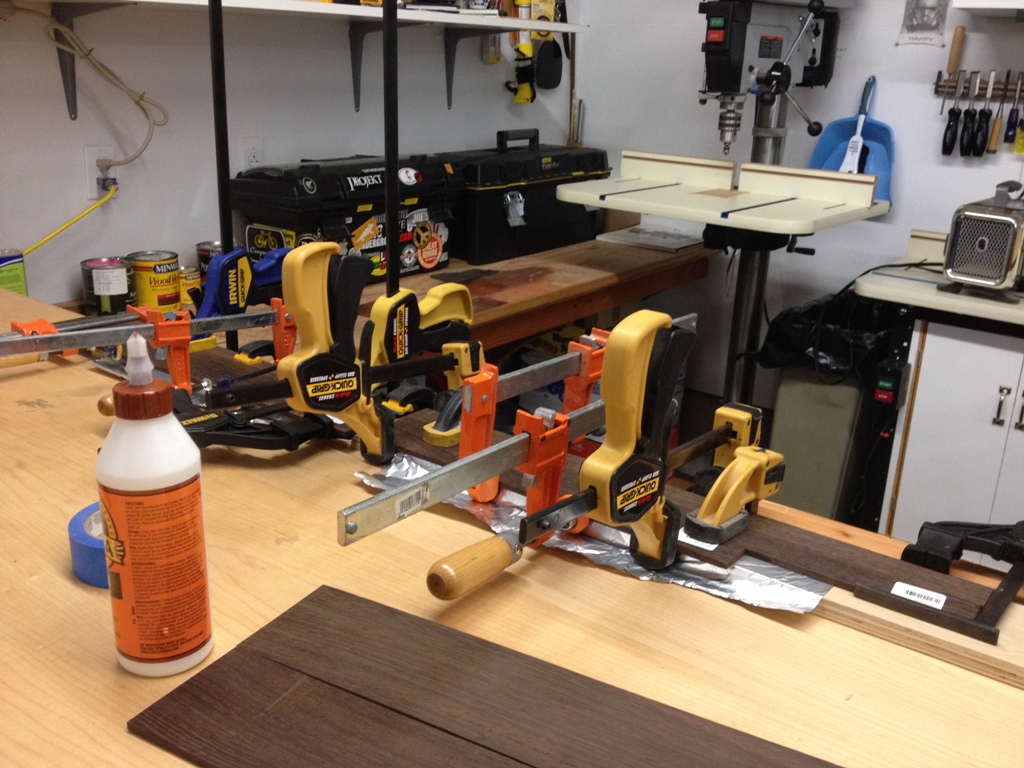
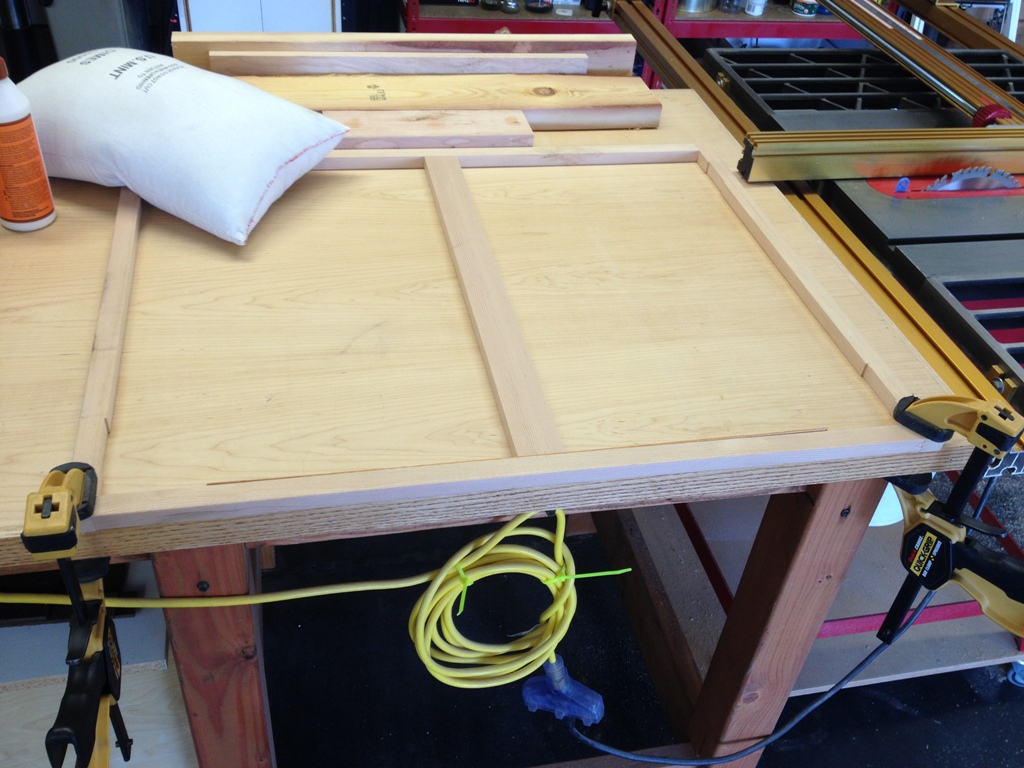
So after the boxes were framed in it was time to construct the outer frame that goes atop it.  The cabinet doors fit into this part, so it needs to be Perfectly Square and Flat. Lots of clamps and sand bags went into the making of this frame.

Improvement

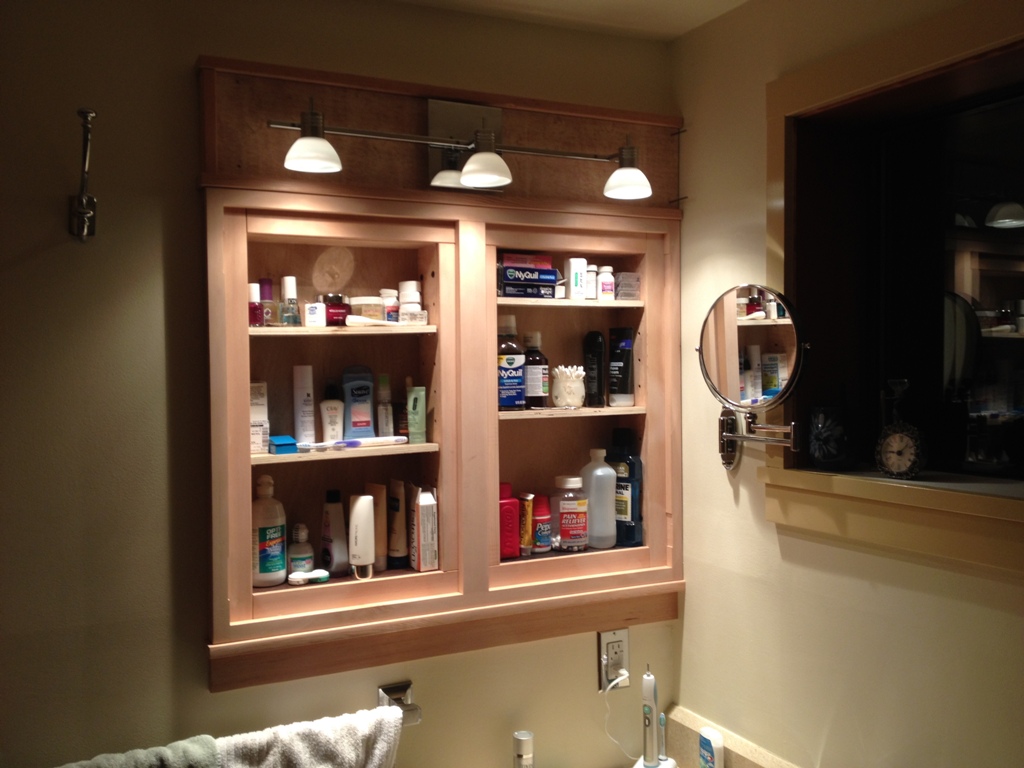
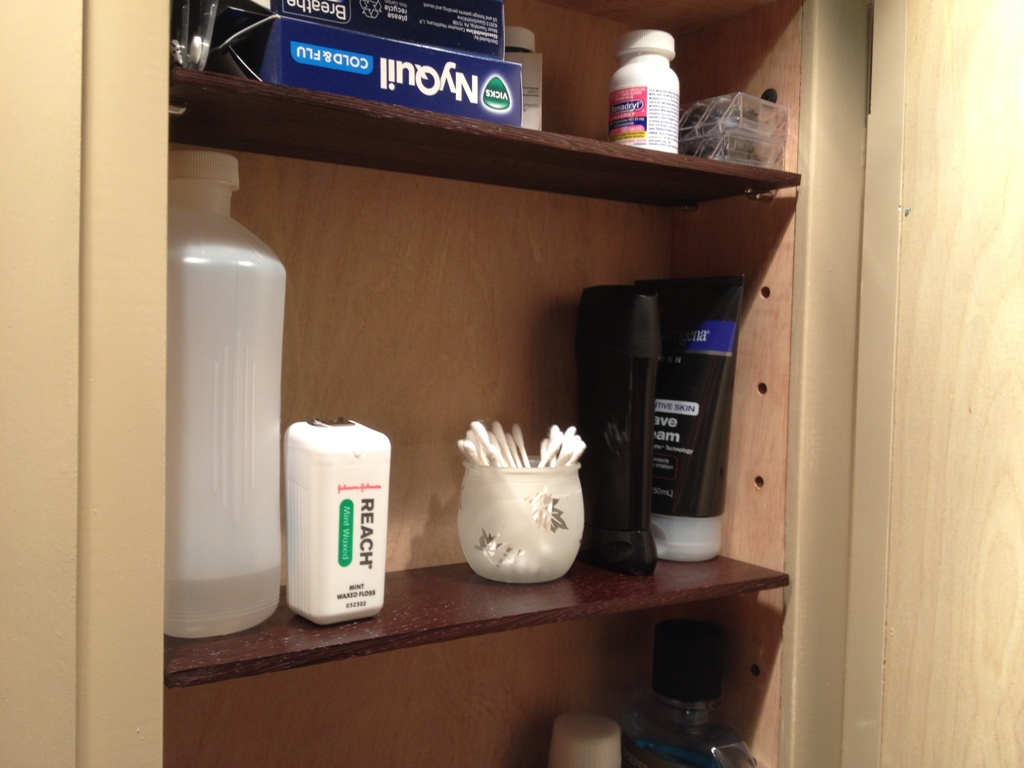
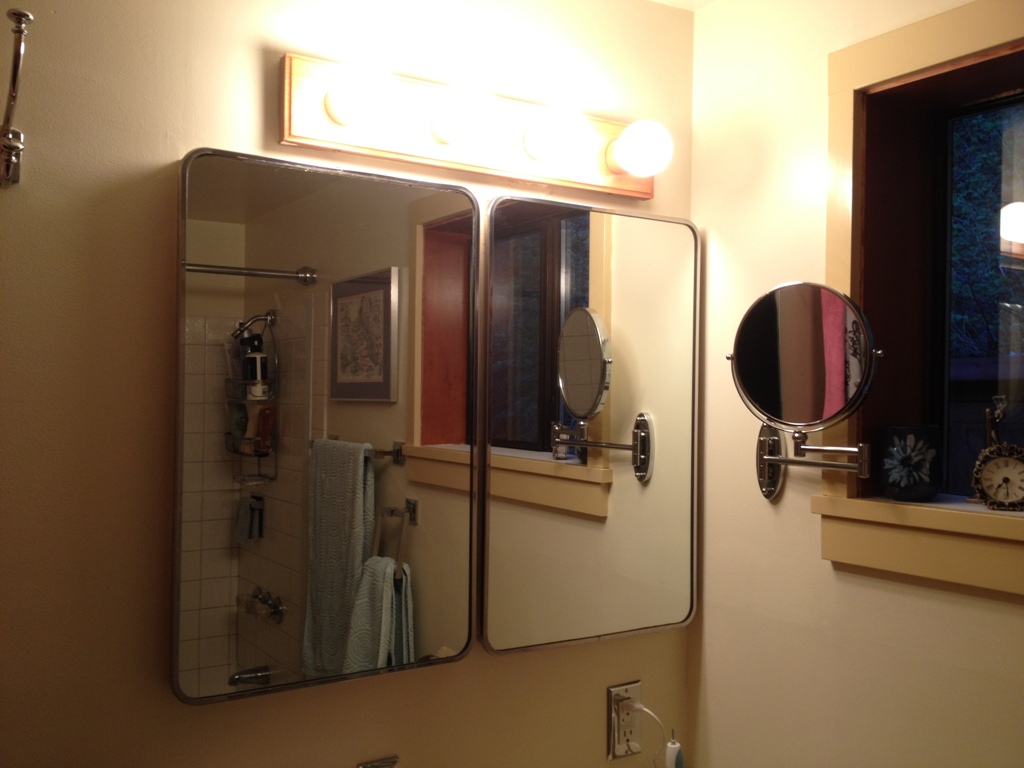
Some people get all offended if you look inside their medicine cabinet.  Here I’m posting pictures of it on the internet!  Look all you want!  There’s tylenol, nyquil, deodorant, mouthwash, all sorts of embarrassing things in there.  But I know you just came here to see the awesome cabinetry and how well that frame fit into the wall.  Looks significantly better than the old Severodvinsk-bound cabinets.

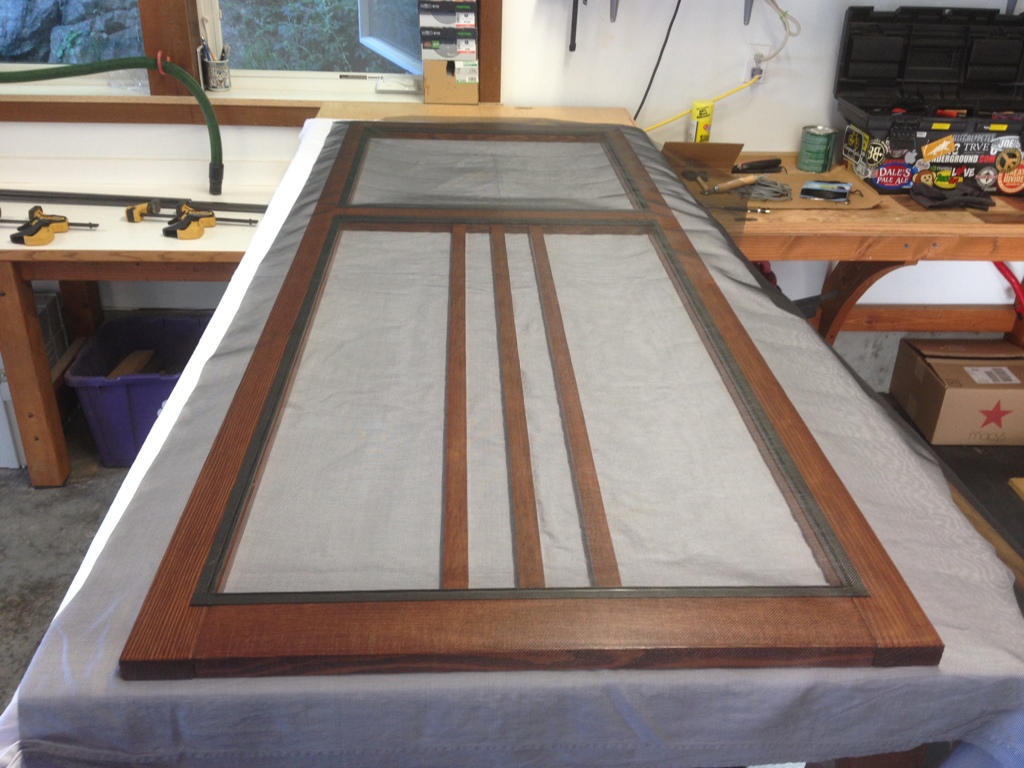
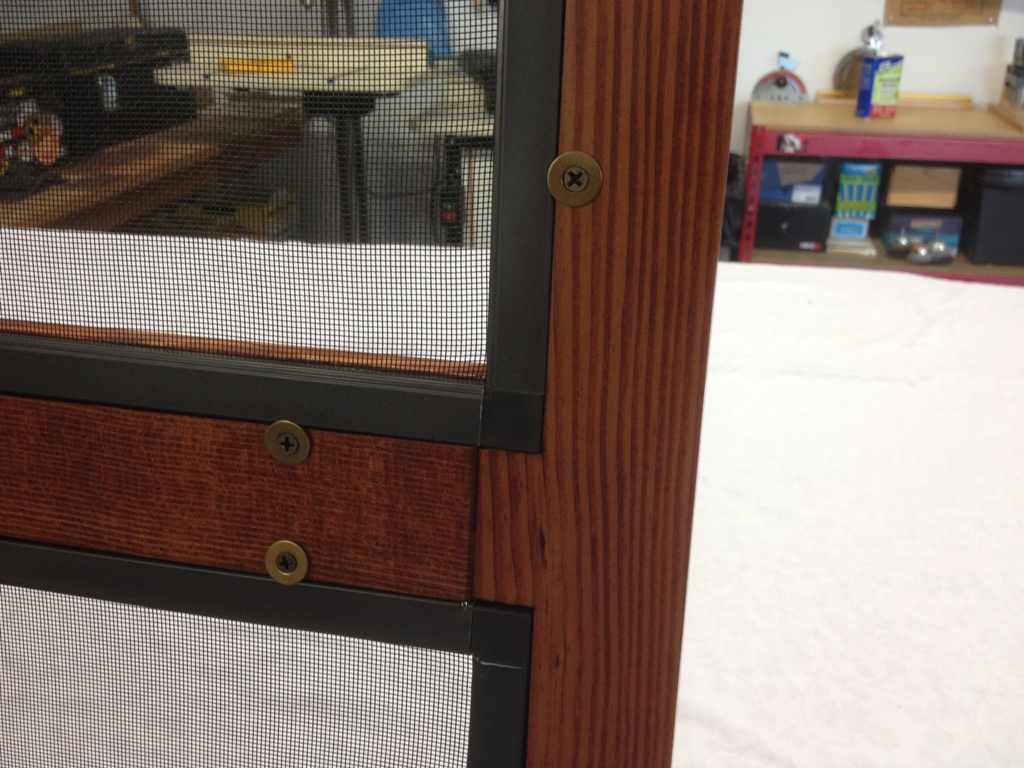
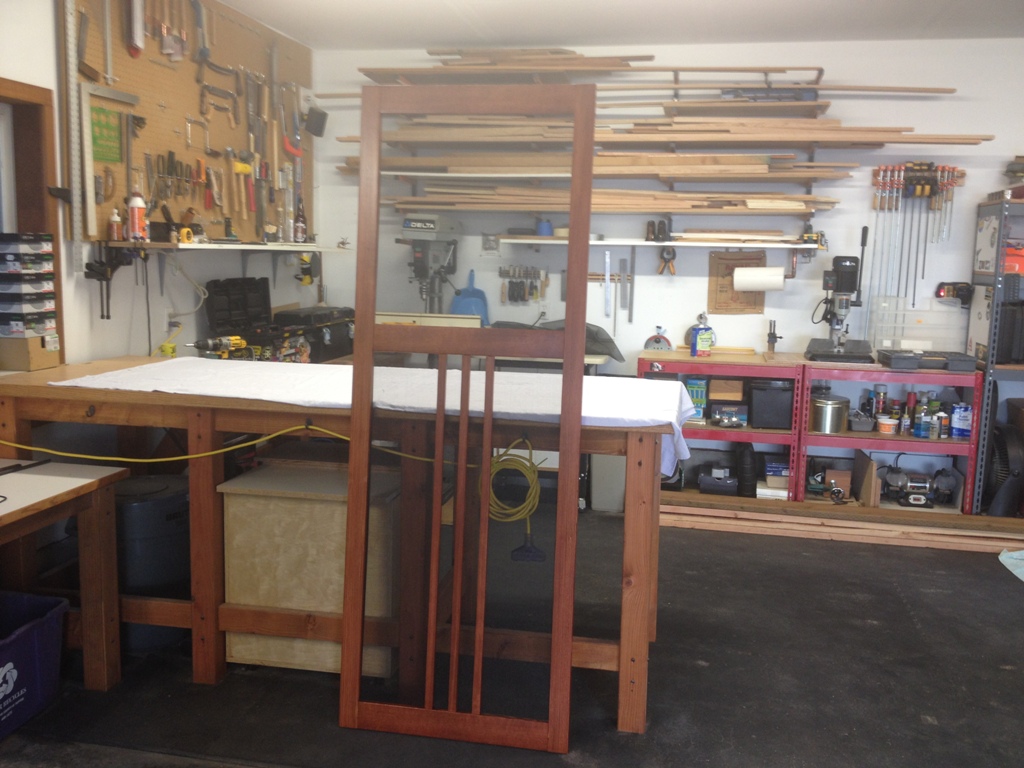
Oh crap, I forgot to make cabinet doors.   Well, I guess there’s next week.
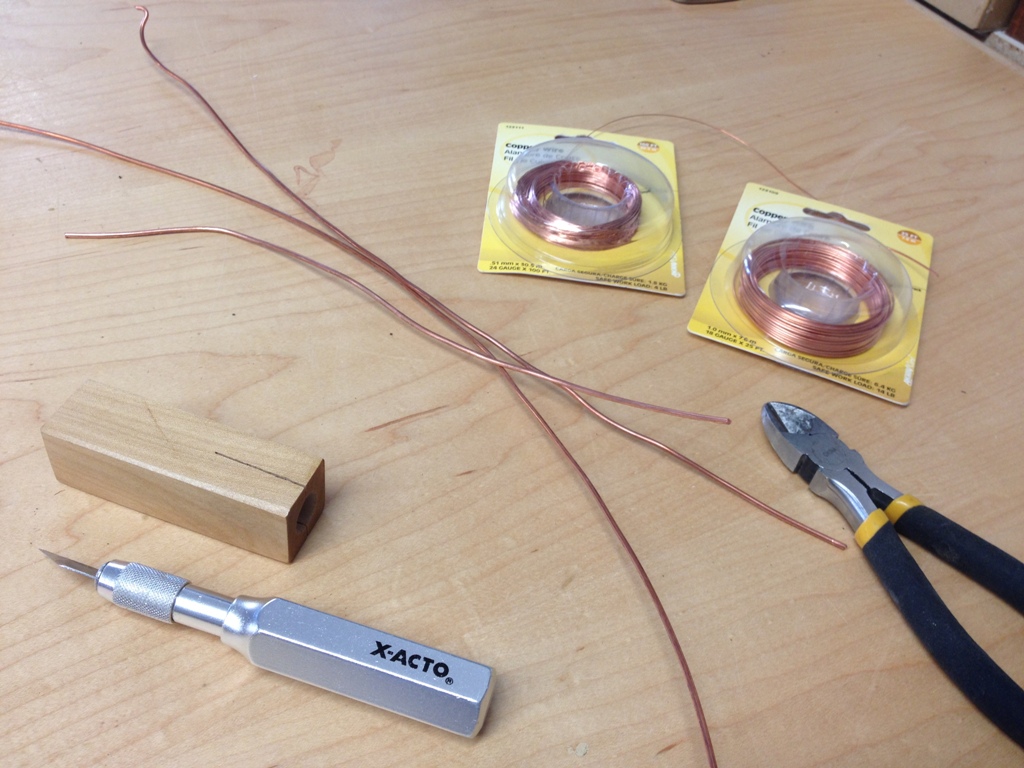
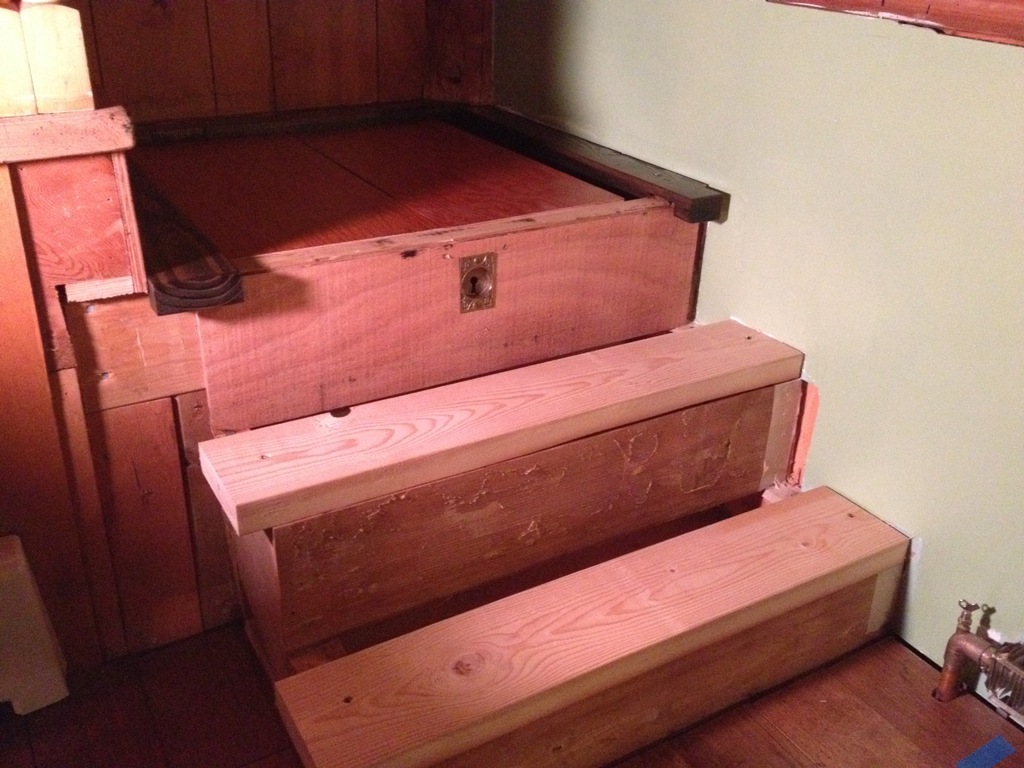
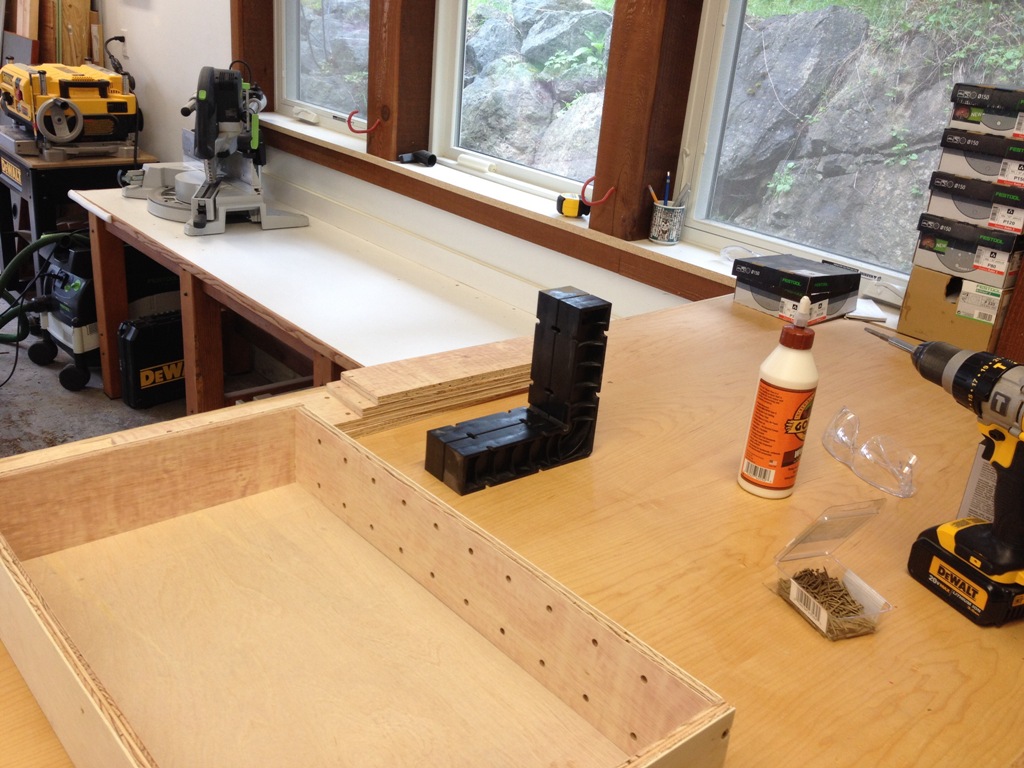
Trap Door!

open

Now it’s open…

shut

… and now it’s shut.  Check it out!  Our very own locking* trap door storage, ingeniously located under the stairs.  How many houses come with a trap door storage area?  How cool is that?

8 cubic feet

That is eight cubic feet of storage space that was completely unused and wasted, and now we can hoard pirate treasure in there if we want to.  When you live in a small house, storage space is really valuable.

landing

That bottom riser needs to be replaced at some point.  I used some T-111 cedar paneling that I had, which I think looks great, but the bottom one has kind of a defect on the right hand side that wouldn’t take any color.  I’ll use it for now, but only because the alternative is to buy a whole 4′ x 8′ sheet just so I can cut a 5″ x 28″ strip out of it.  Nah, I’ll wait until I do the rest of the stairs.  It’ll work for now.

staple madness

I’m telling you, whoever stapled the carpet down to the original treads was a madman.  Staple holes galore.  I could have put wood putty in the holes but then they’d stick out white instead of black.  I think this way, the treads look finished but distressed, and not artificially distressed like what you pay extra for at pottery barn.  No, this is the real thing.  This wood was not only distressed, but beaten, mugged and left for dead.

ecclectic

So, the house has got a lot of different colors and textures going on and I think overall it’s working great.  We don’t like everything to be matchy-matchy, we like to have a little variety of styles going on.  Again, it’s a small house, and if we did everything in one color set and one style, it would dominate the entire house.  A little variation is a good thing.

front

* so yeah, the trap door doesn’t actually lock just yet.  Due to a math error by the designer (me), the key is about 1 centimeter too short to engage the lock.  The beam ended up being a little thicker than I intended it to.  Well, it’s not like that lock would stop anybody, and it’ll take more than a stiff wind to open the trapdoor anyway.  It’s pretty heavy and manages to stay in place by itself.

side

So with this project completed and the weather outside getting nicer, I think I’m going to spend the next few weeks doing some landscaping and outdoor cleanup and just generally finding other things to spend money on.  I’m anxious to continue remodeling up the stairs (you can see those atrocious wooden spindles in the above pics; they must die) but the next phase is going to be pretty big.  It’ll probably turn the house into a war zone for six weeks.  The more prep work I do before demolition, the smoother it will all go.  So I’ll take my time before I get started with it.

Next: Front Door

old

Before – old front door, probably taken from the set of the Brady Bunch.  Its diamond shaped panes of glass were impossible to clean.  From the outside, the wood was about the same consistency as year old driftwood found on the beach.  You could carve it with your fingernail.  But it was sturdy and sat correctly on the hinges and closed reasonably well, and it only had one bullet hole in it.

Yeah, time for a new front door.  We commissioned a local artist and master woodworker, Todd Spalti, to make us a new front door.  There are people who would argue that I’m a woodworker too and I can make a front door myself.  Well, maybe si and maybe no, but Todd came very highly recommended and I completely trusted him to make a magnificent front door for us.  Besides, I got enough projects of my own right now.

Check out his website.  He does really great work.  http://www.toddspalti.com/

new

The new door is absolutely amazing.  Solid oak.  No bullet holes.  Clean lines.  Clean windows!  We got a nice handle and lockset as well, not to mention new hinges (completely devoid of rust, I might add).  You may have noticed there is some new trim around the door, and drywall has magically appeared on the left hand side of the door.  Yeah, we’ve been busy.

front door areaI’ve been working on the stair landing on the left.  I really only wanted to do the drywall on that side but in order to rip out the paneling I had to rip out the stair landing too.  Gee, may as well just work on that while I’ve got it all torn up.

And yes, that’s a hockey game on TV in the reflection.

stair treads

We’ve oscillated quite a bit about whether to get new stair treads or work with the existing 2×10’s that someone sawed up and put down.  They were really in horrible shape, having had carpet installed over them for decades.  Whoever installed that carpet when nuts with the staple gun.  Seriously, it was Beavis after two quarts of espresso, driving staples into every square centimeter of those treads.  After I sanded them I didn’t think I wanted to use them, but after some dark stain I think they’ll turn out good.  They definitely have the distressed look to them.

windowsill


The garage is again full of trim pieces and windowsills and window aprons with stain and polyurethane drying atop their surfaces.  I think I’ve got about half of the trim in the house replaced, which means I have half to go.

stair landing


There’s the stair landing with temporary treads and a temporary landing.  They used to be shelves in the kitchen cupboard.  This is one of those instances where my packrat instinct to keep everything that might be useful someday paid off.  They’re even sticky from whatever goop accumulated on them during their life as a cupboard.  The stickiness makes them safer, less chance of slipping and falling out the adjacent window.

keyholeI’ve had this bronze keyhole escutcheon for about fifteen years, just waiting for a project.  Hmm, what could it be for?  Maybe we’ll find out next week…


Finished Side Door

And here is yet another small fraction of the house that I’m not ashamed of.

Inside

The side door project is now complete.  Fully complete.  Typically, any project I do has some residual “punch list” items that I never get to, such as touch up painting or recessing the nail heads and filling them with wood putty or stupid stuff like that.  But this project is one of those rare gems that I saw through to final completion.  If only I got to invoice someone for my troubles.

Anyway, it is FANTASTICALLY better than the old door.  Just look down a bit and you’ll see the Before Picture.  This is a door we see and use every day.  It welcomes us home from wherever our day took us, and it begins our journey into the outside world (or just to take out the trash).  The old door was a cadaver, barely clinging to its rusty hinges, begging to be put out of its misery.  Our new door is vibrant and cheerful.  We’re very, very happy with it.

Paint

Here is the door being painted (which took about nine hours total, I think this pic was taken during hour three).  We painted the inside only and left the outside stained wood.  There’s a lot of detail in this door for the accent color to paint.  We used two colors, a deep purple with a sort of lipstick accent color.

Outside

From the outside, more stately and less whimsy, but still a very attractive door.

Sneak Peek

And here’s a sneak peek of what’s coming, as I continue my way around the interior of the house, ripping out paneling and stair treads like there’s no tomorrow.  Those stairs, and the closet underneath, are going to be a major challenge.  I’m just doing the landing right now, a mere two stair treads worth of stairs, and it is very slow going.