The Stair Tread Conundrum

sanded

For some reason, some stupid, hair-brained, ill-conceived reason, I decided to use my existing stair treads instead of buying new ones.  I could have bought nice, perfect, new stair treads  But noooOOOooo.  I had to use the crap that came with the house.  It’s actually really good wood – old growth douglas fir, very tight grain, and it has a few knots and fissures but they are otherwise brick solid.  A little twisted here and cupped there, but they’re old enough that they’re probably done moving.  Something to be said for that.

Still, this is old, worn wood.  It’s not like using old reclaimed barn-wood, nothing so romantic.  These are more like some old pallet boards found beneath a dumpster behind an Arthur Treacher’s Fish and Chips.  Seriously, I’ve seen driftwood on the beach in better shape than this crap.

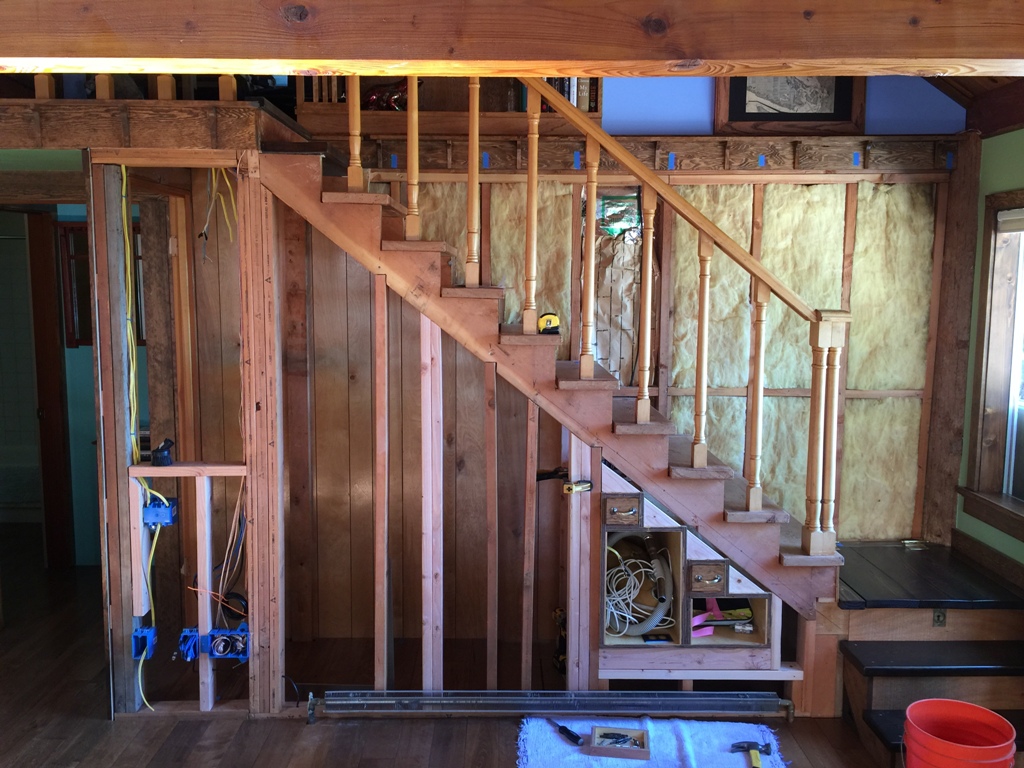
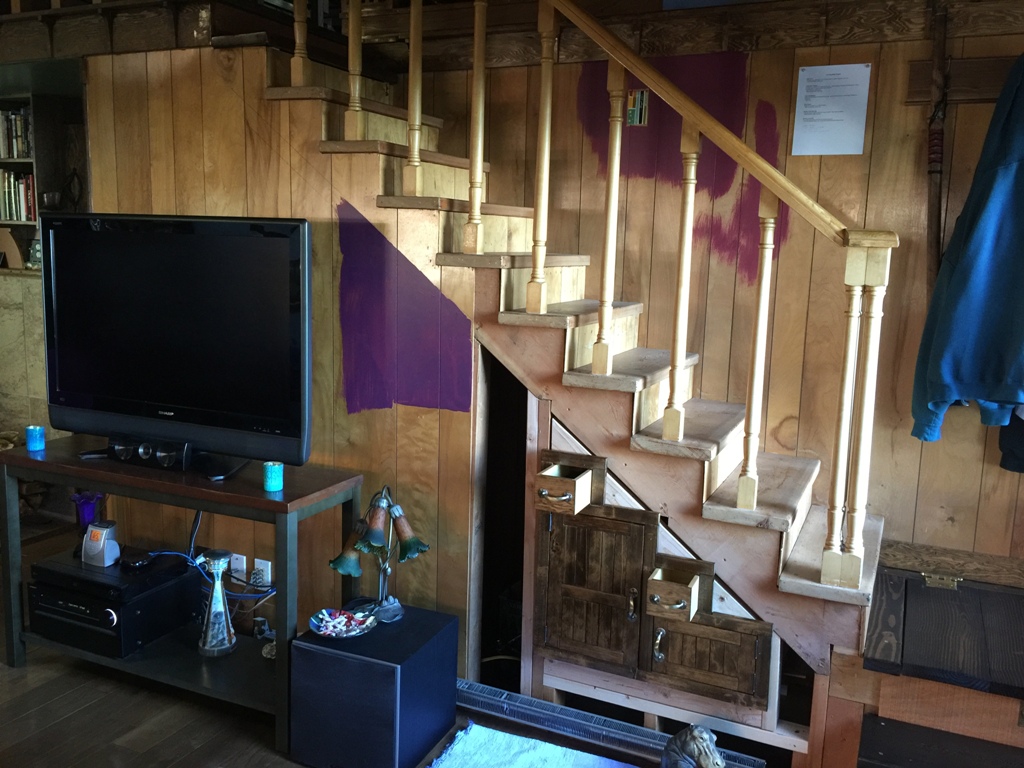
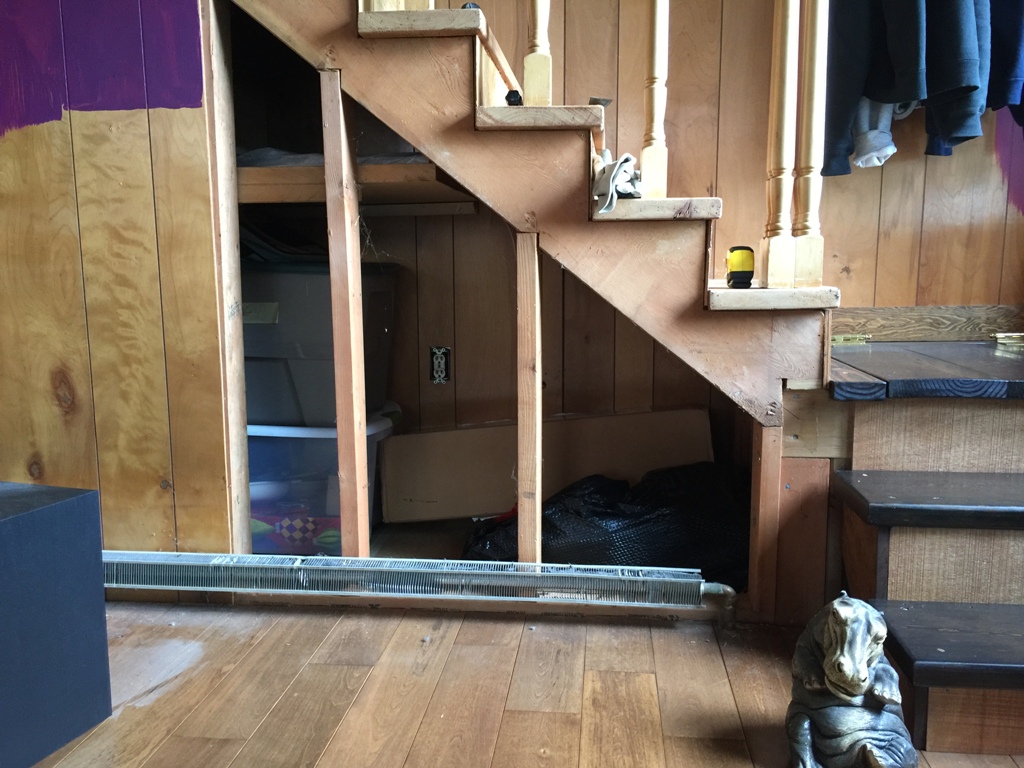
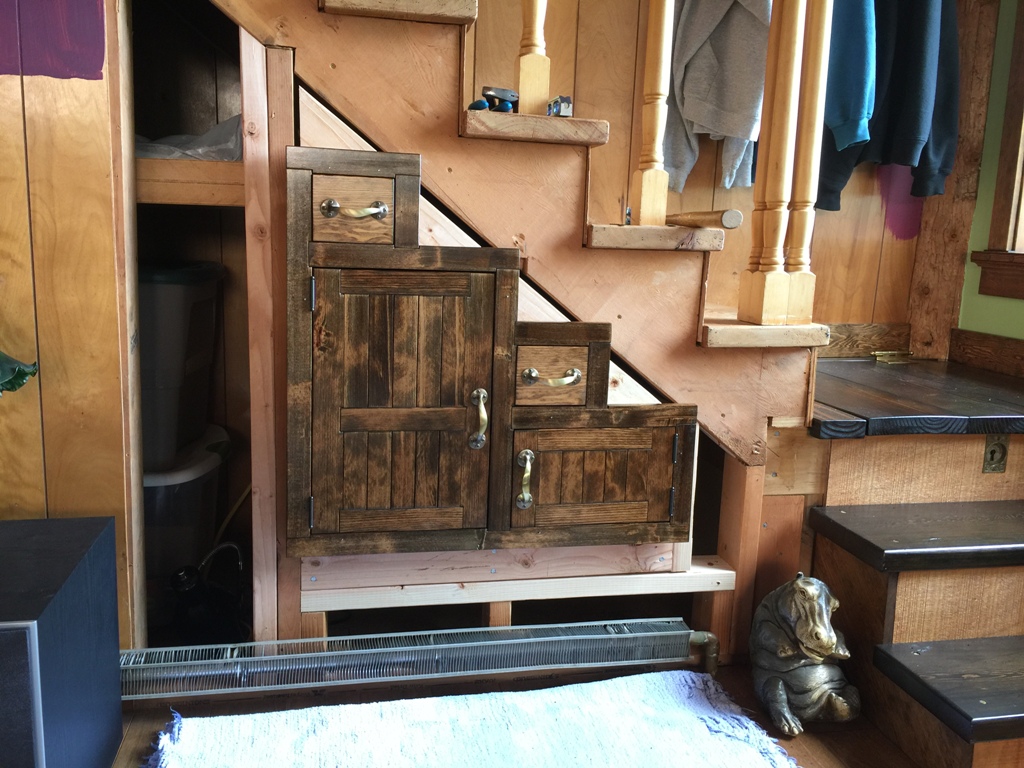
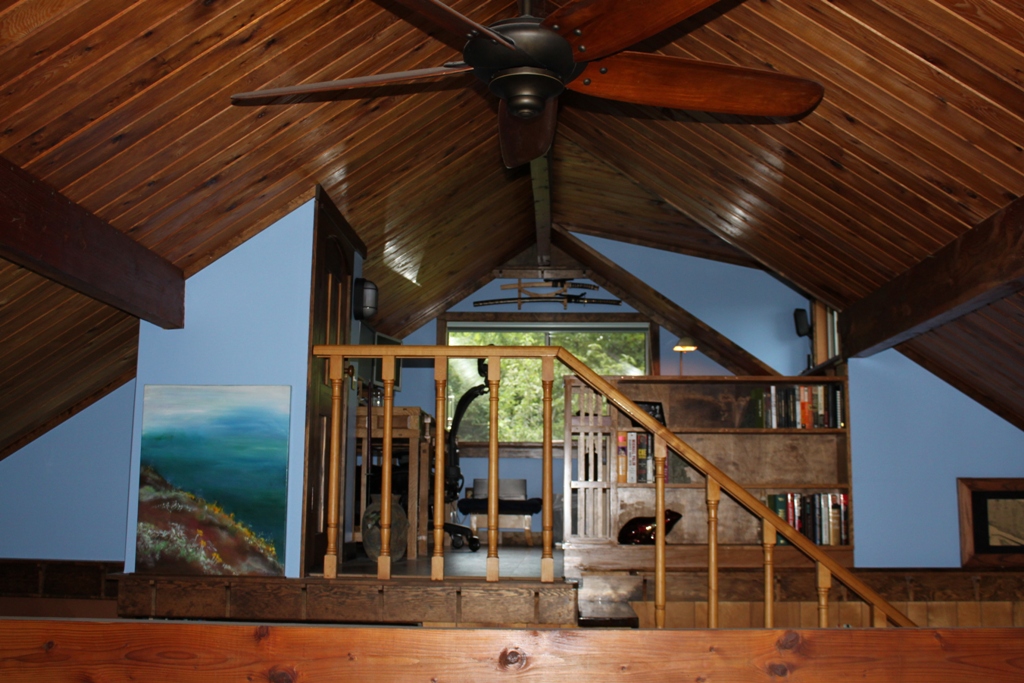
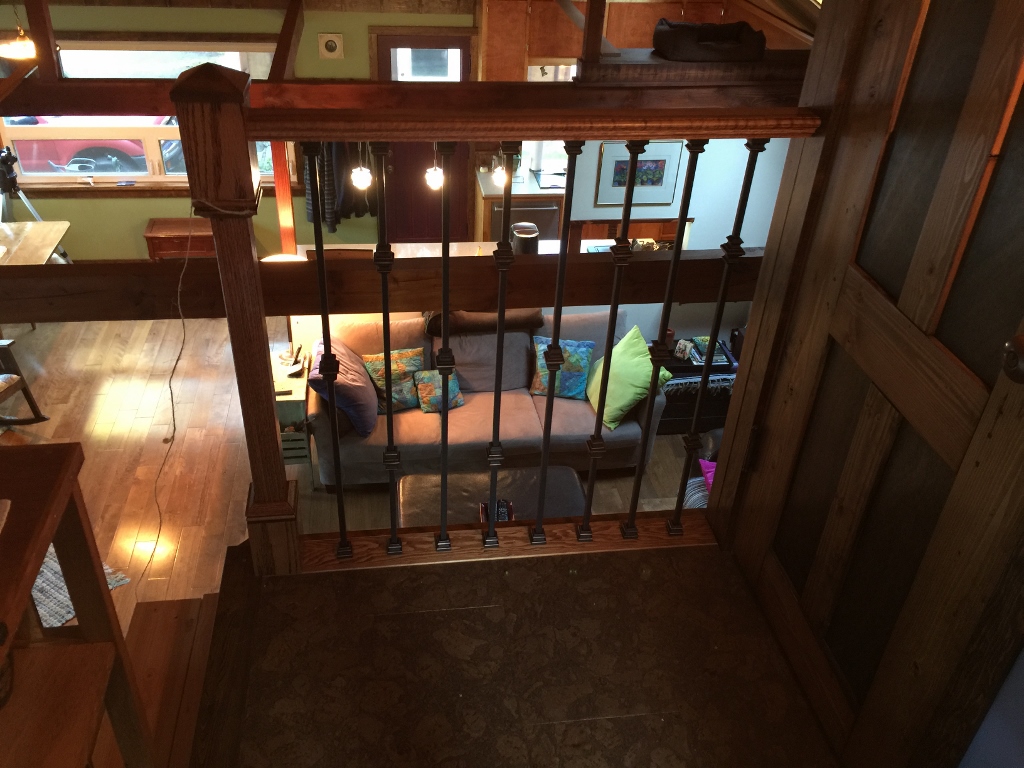
To lend a little perspective, here’s a Before Picture:

before

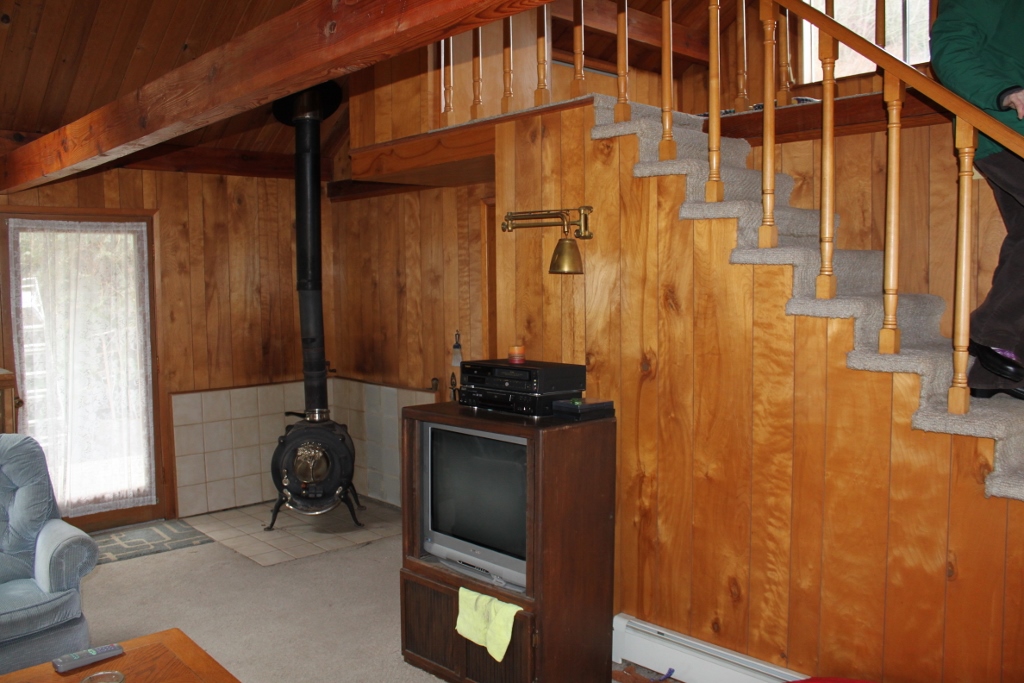
There’s the stairs as we first saw them.  Please note the ancient wood spindles, the bio-hazard carpet, the splintery old paneling, the wobbly handrail.  I won’t tell you what it smelled like.

stairs

We’ve renovated a lot of the house since that time but for some reason I saved the stairs until last.  Even though it’s a centerpiece of the house, even though we stare at it constantly, even though I climb up and down those god-awful things ten times a day.  And I’ve had a lot of time to think of how I want the stairs done, which is why it’s such a mystery to me that I couldn’t come up with a better idea for stair treads.


grain

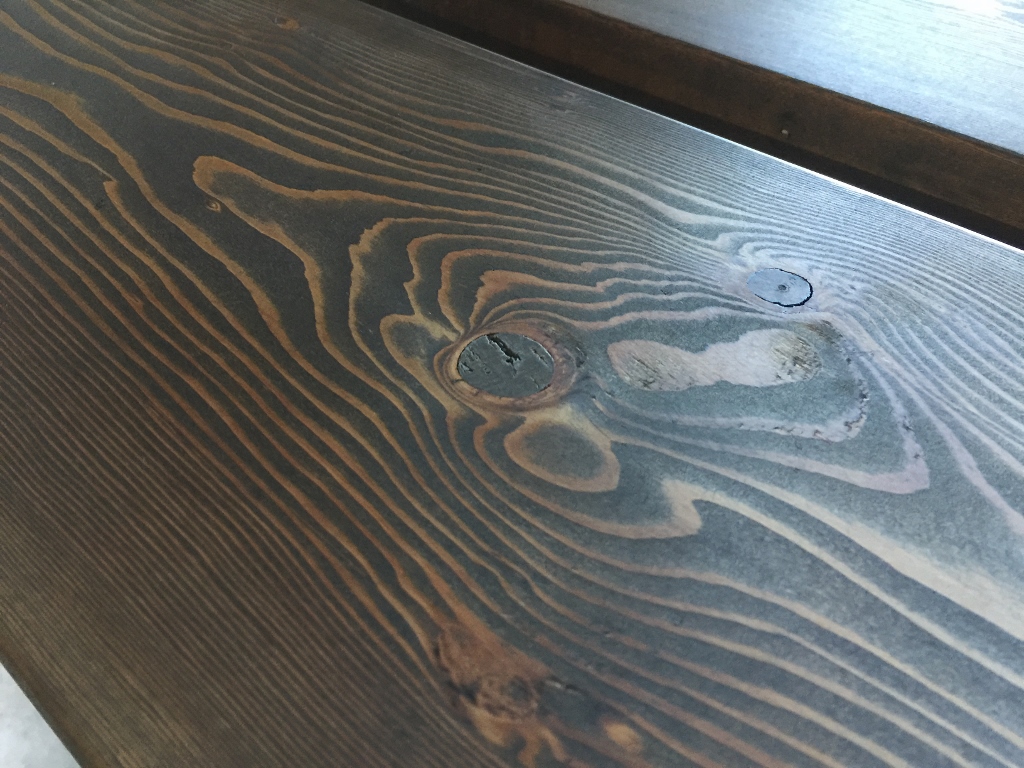
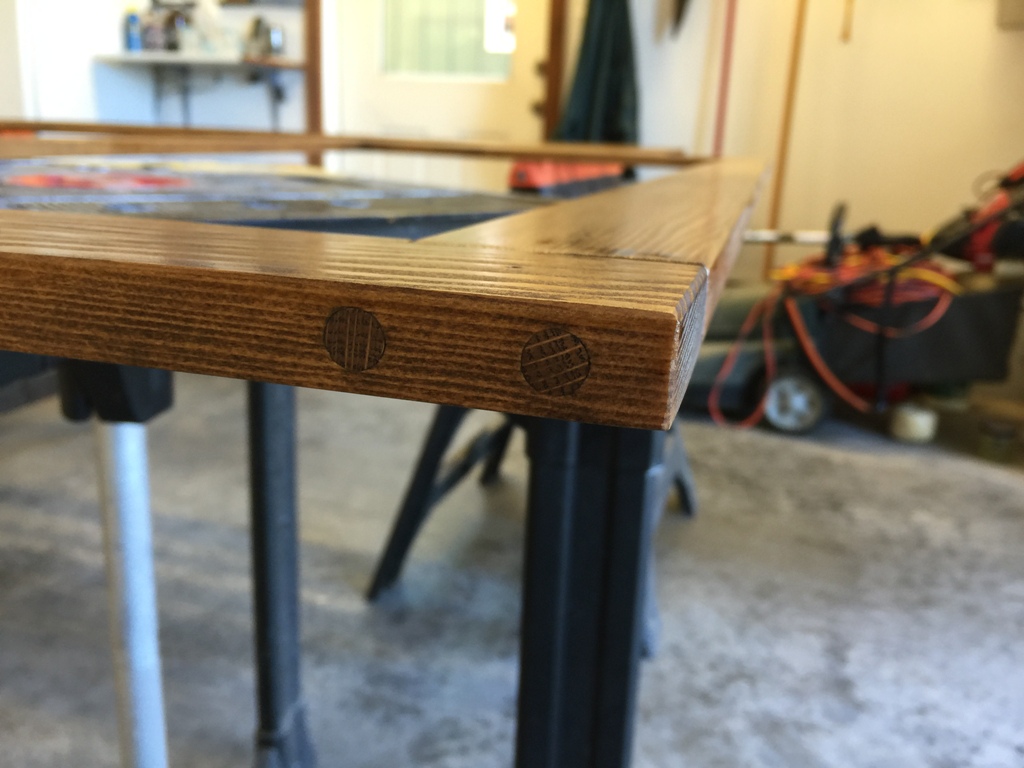
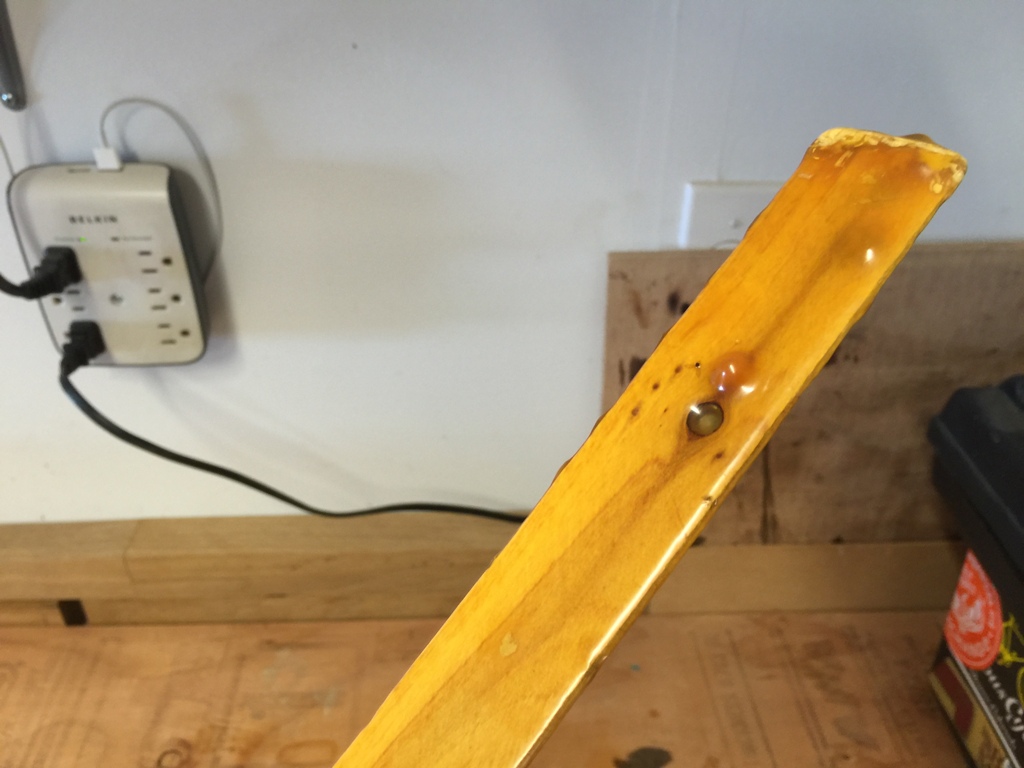
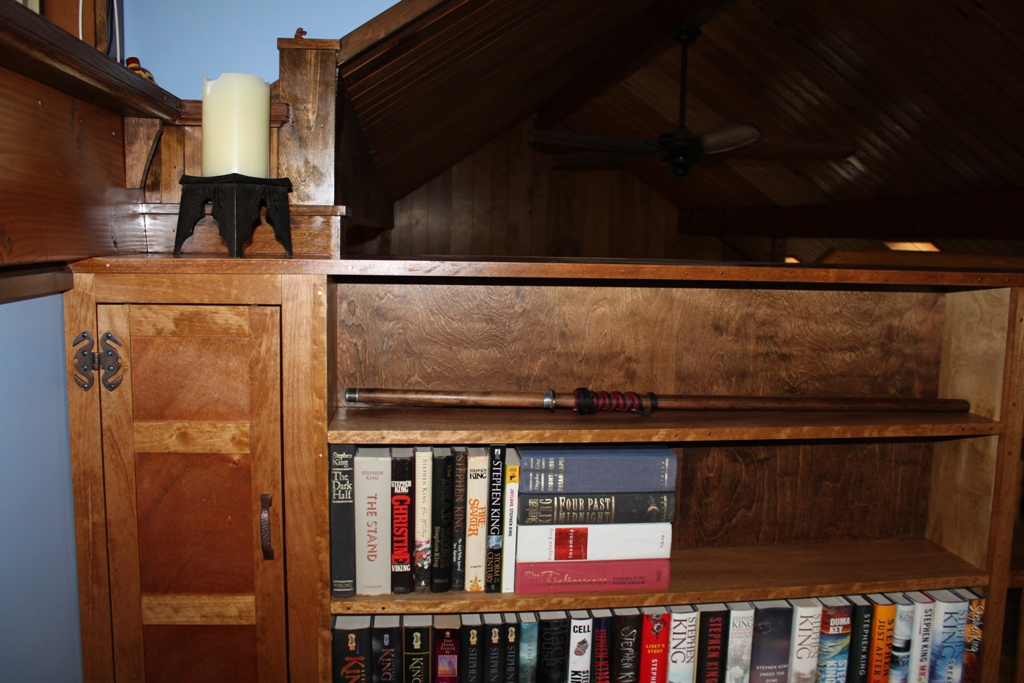
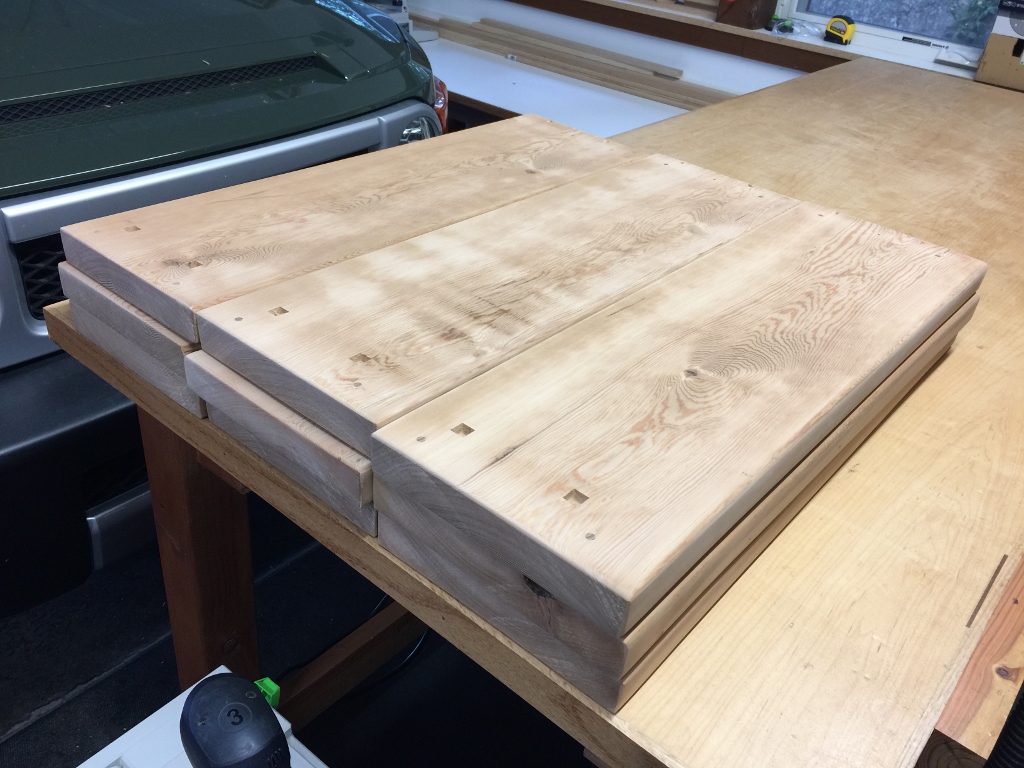
I do like the wood grain on these.  Lots of natural detail, and they polished up pretty well despite all the repairs I had to make to them.  I had to do everything:  wood putty, epoxy, dowels, wine bottle corks.  Sadly, I had to sand a lot of the natural patina off of it, but there wasn’t much getting around that.

stained

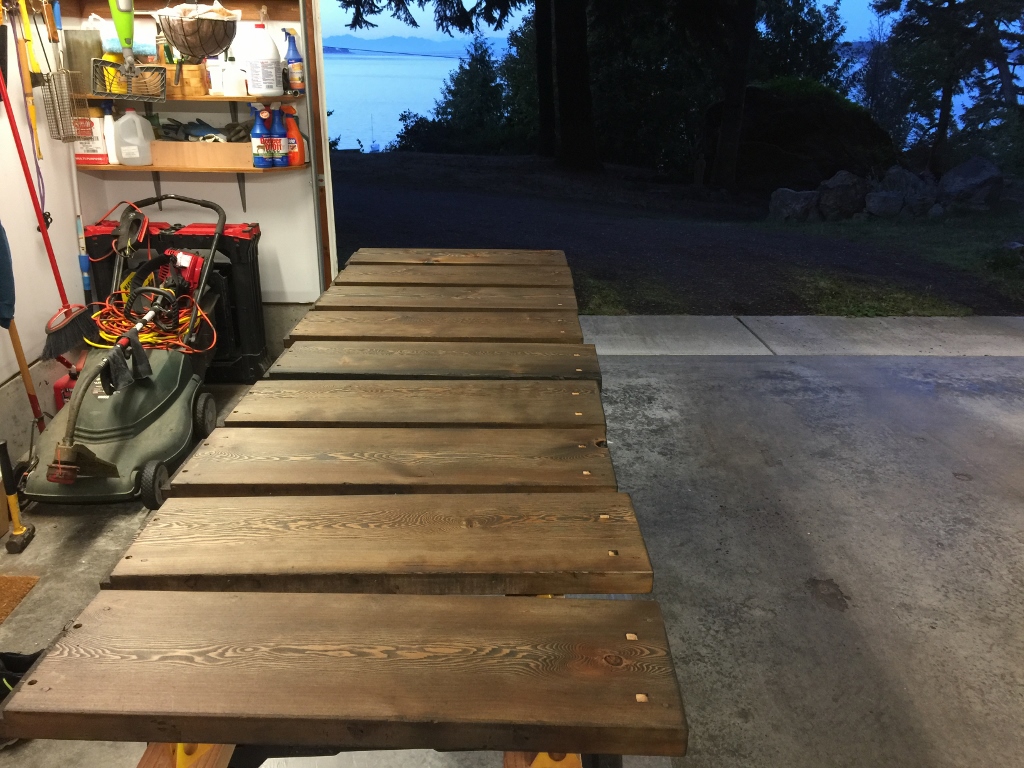
They did take the stain well.  I have all next week to slather on polyurethane before I install them, so they should be well sealed.

dry-fit

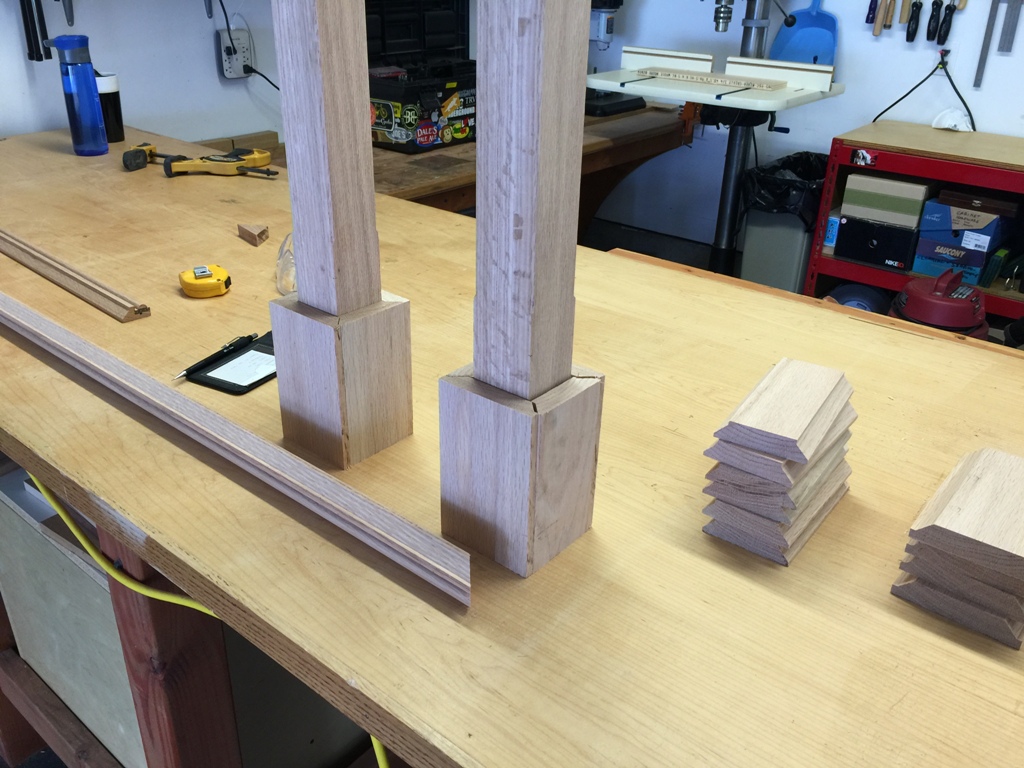
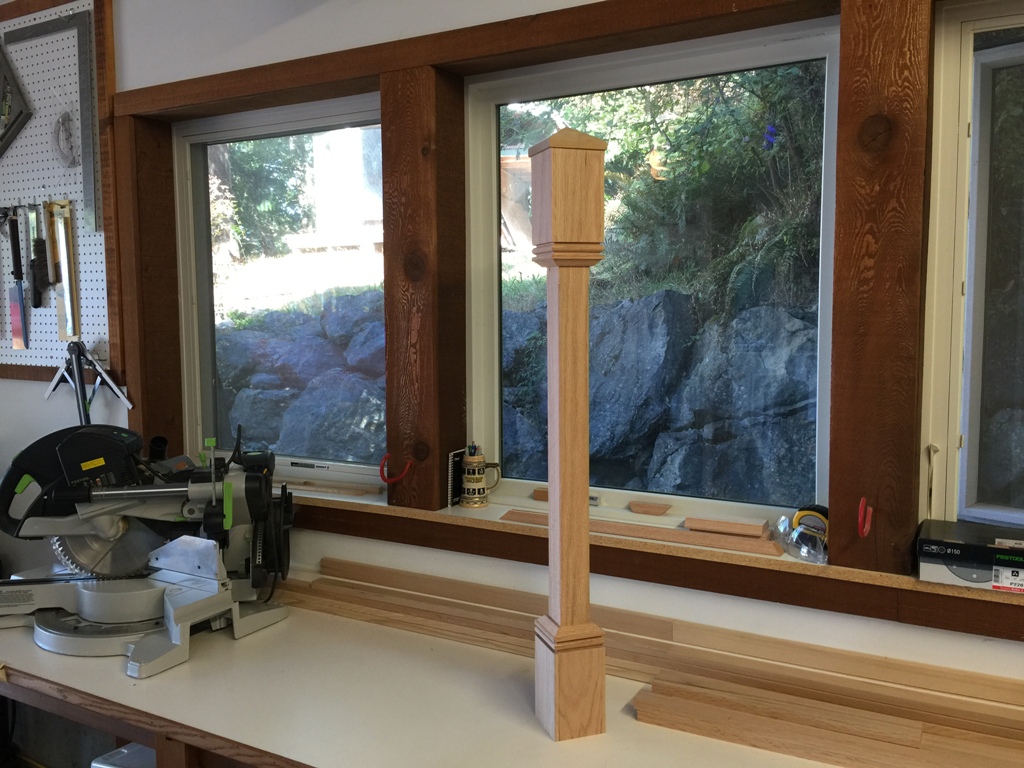
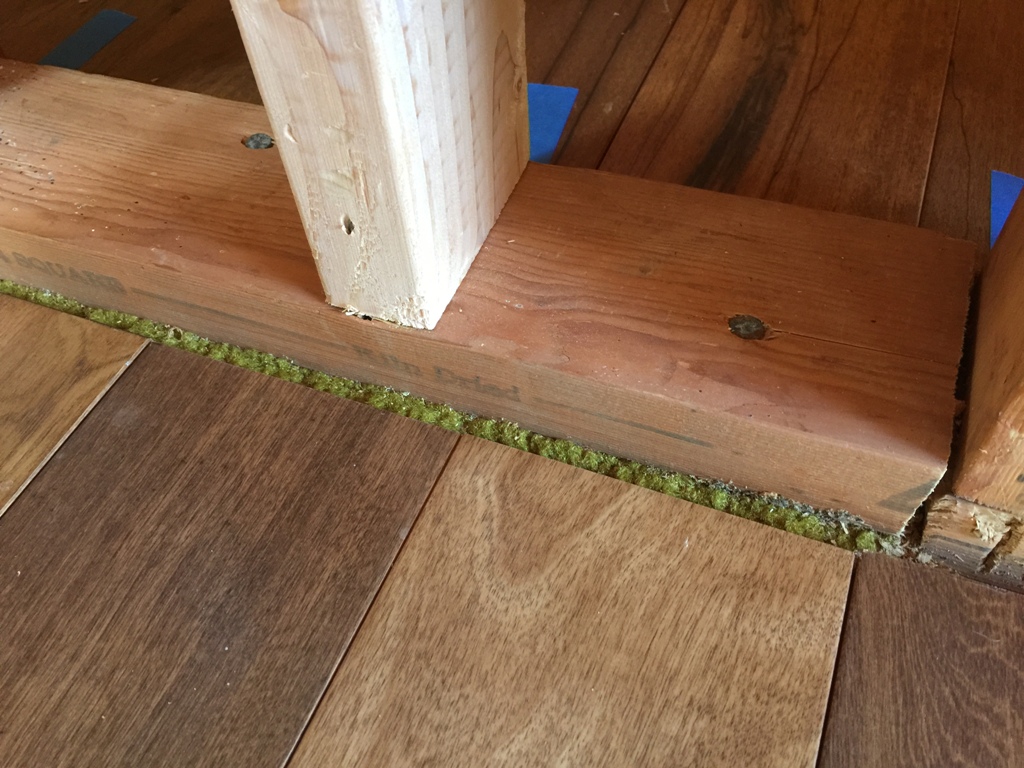
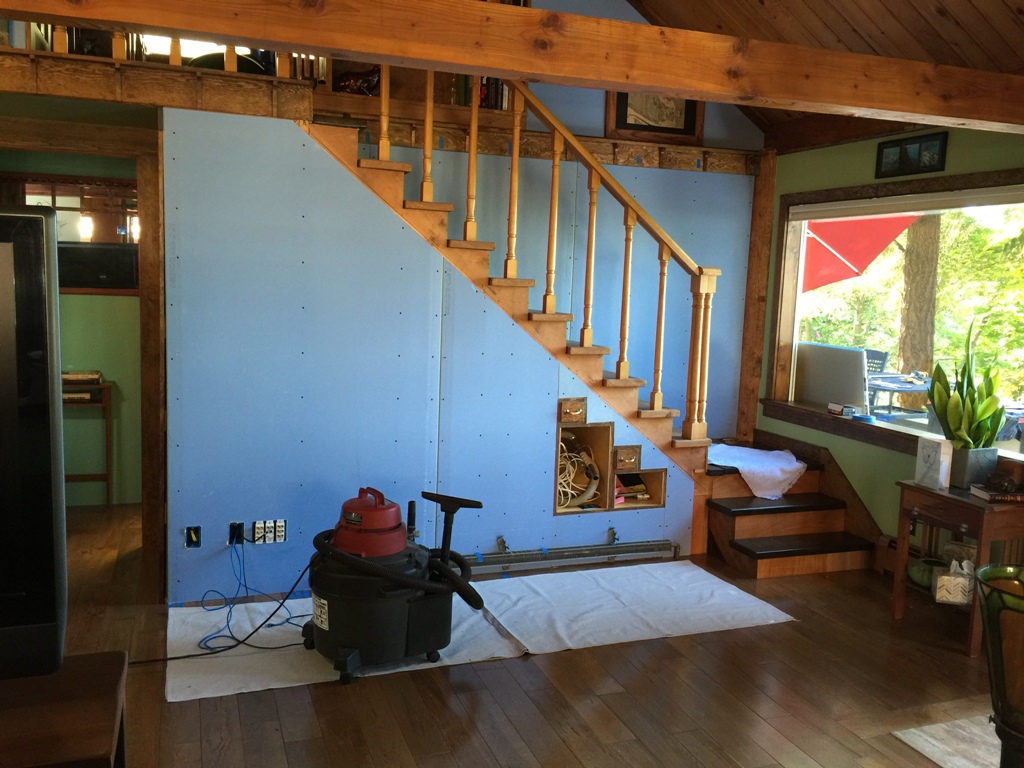
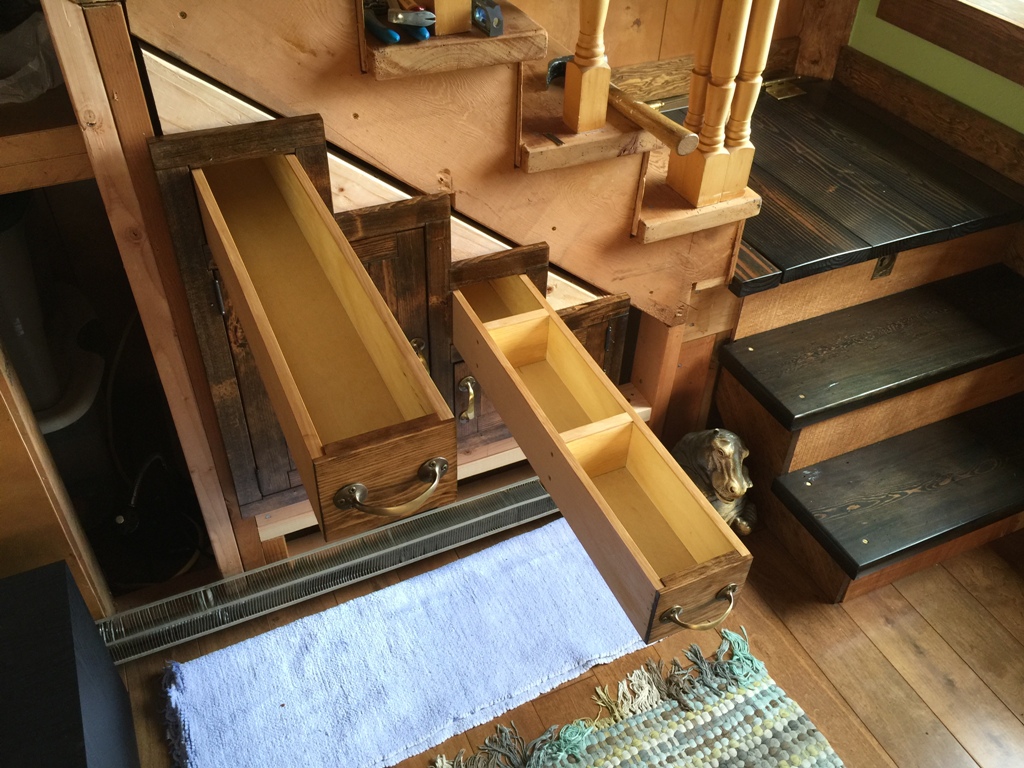
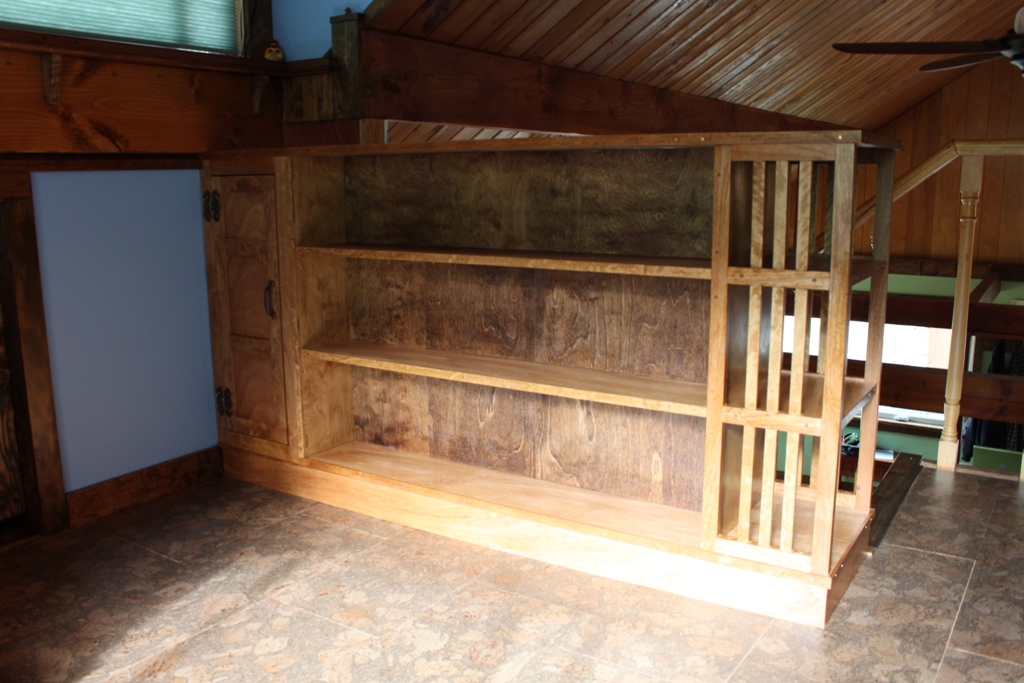
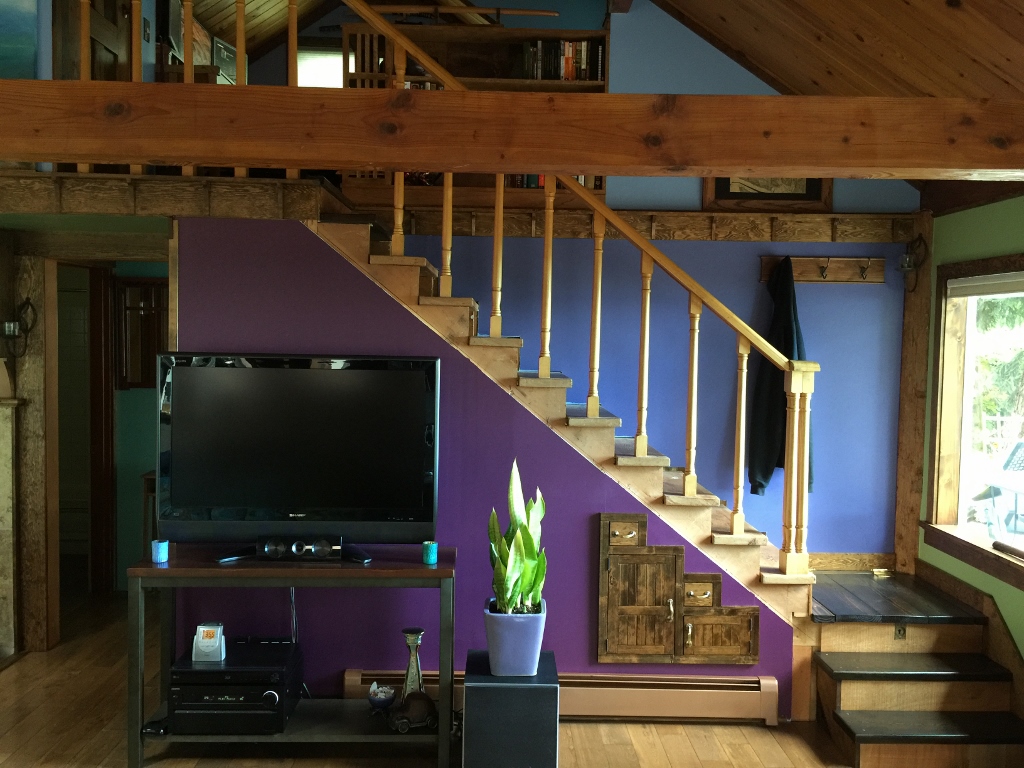
I’ve dry-fit the posts and a few of the iron balusters in place and they’re looking great.  It all looks so different.  When these stairs are done, it’s going to be so nice that it looks out of place in this house.

trim

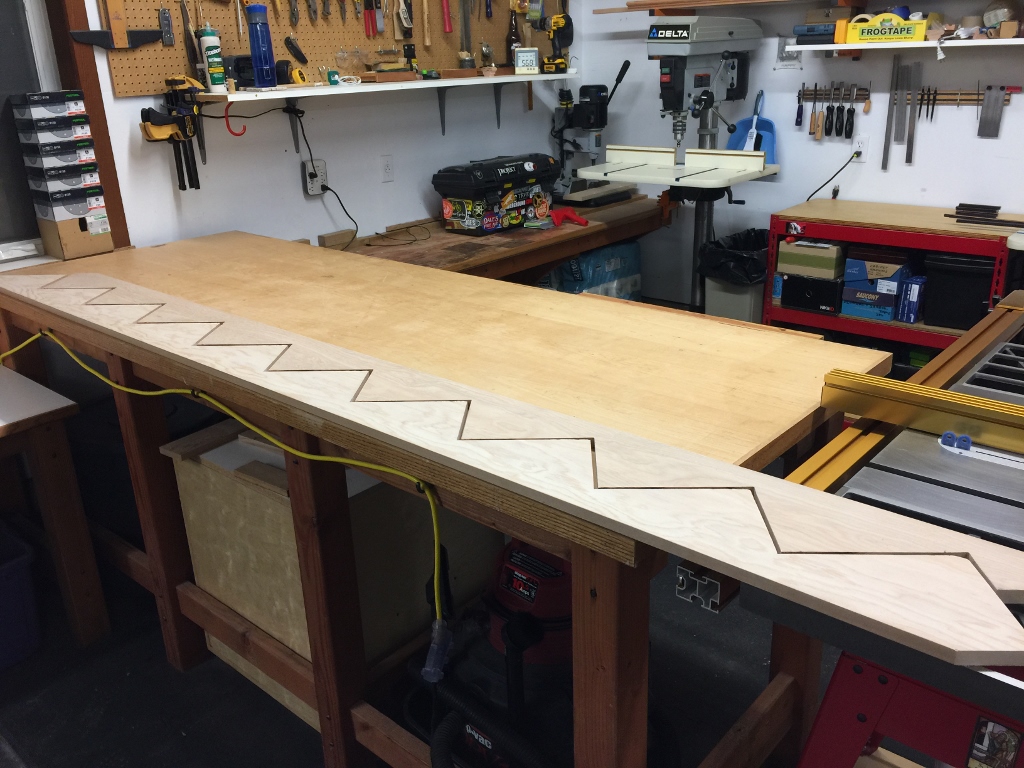
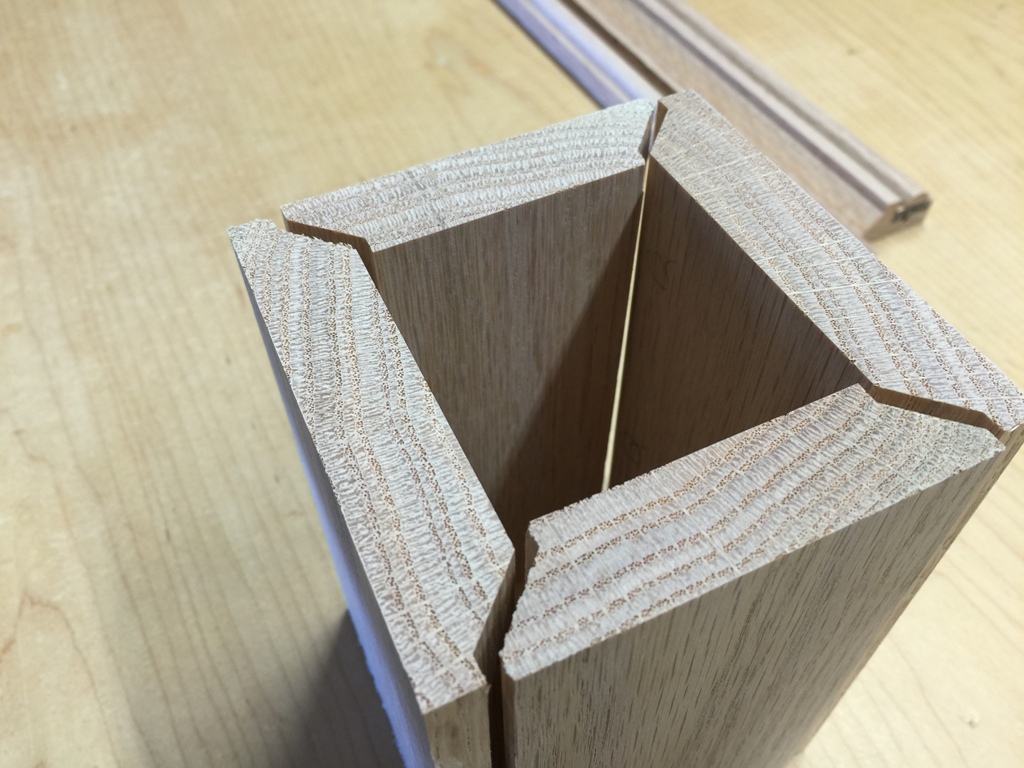
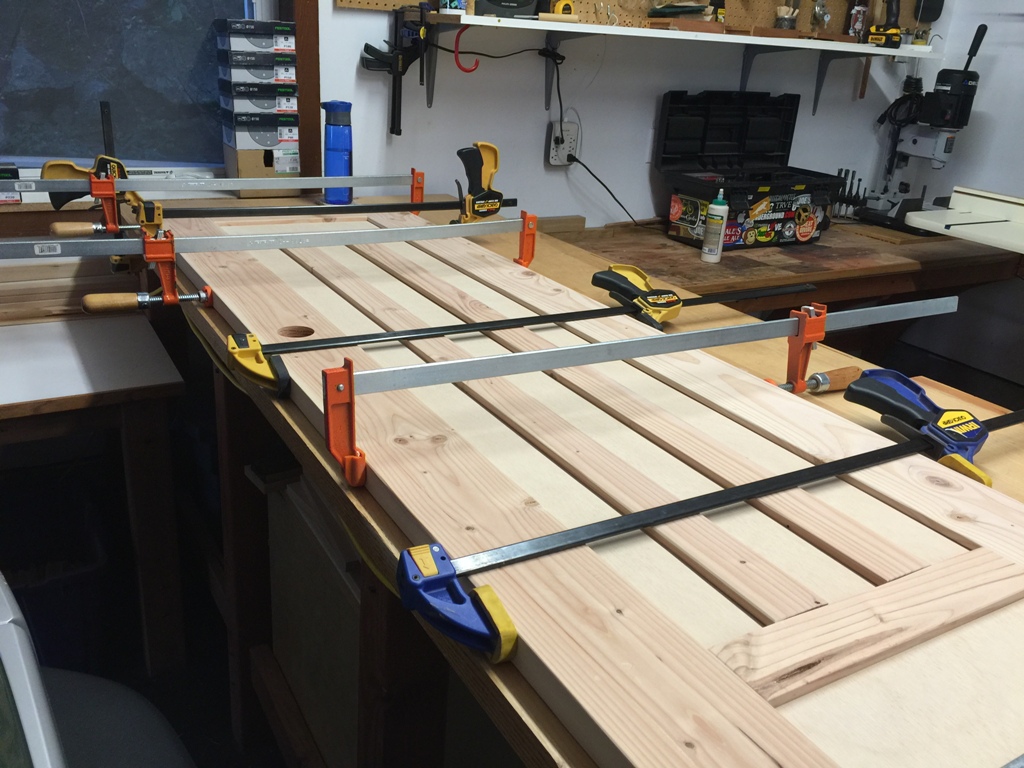
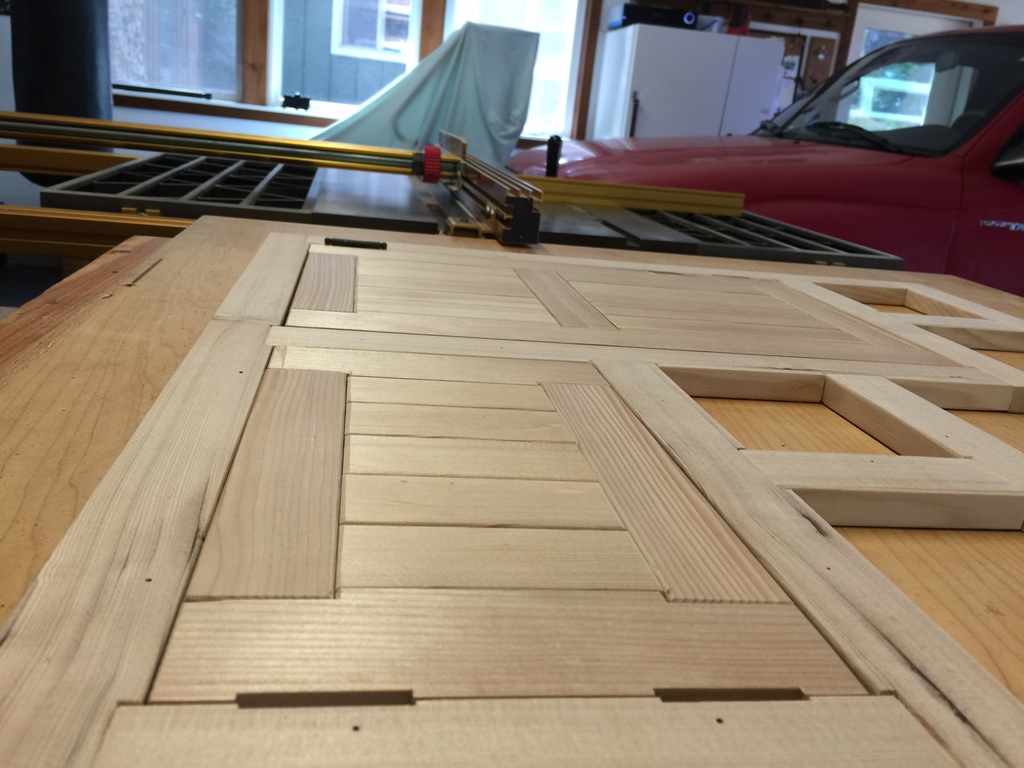
The cut trim pieces look like serrated jaws.  Just in time for Halloween!

How I Make Posts

(Formerly titled “How Posts Are Made” but I have no Earthly idea what that is.  I don’t know how professional postmakers make their posts, and I don’t know what the correct postmaking techniques are or what the appropriate post-making tools are.  All I know is how I make posts.)

clamps

The only stock I had available was all milled to 3/4, so I had to join a bunch together to make that middle part.  See, I don’t even know what post parts are called.  Whatever that middle part is called, that’s what I made.  Oh, and I made some strips on the router, and they’ll go around the, um, the other post parts.  Whatever they’re called.

plans

Laying out the joinery took some very careful planning.

joinery

This kind of joint is a lot stronger than just doing a simple mitered joint, and it fits together very squarely.  In fact, it’s hard to make it not square.  These will be for those things at the top and the bottom of the post.

assembly

Everything’s going together very nicely.

clampery

Just because there were a lot of pieces being glued, I used tape to hold them all together, then clamped them.  And then I remembered what happened the last time I left clamps on tape overnight (the glue from the tape pressed into the wood and made areas that didn’t take stain very well) so I had to remove all the clamps and take off the tape and put the clamps back on.  Live and learn, and forget, and re-learn.

clampapalooza

It’s a clamp bonanza!  Not to mention a tripping hazard.

tricky

The top part thing (maybe it’s called the cap?) was a little more difficult than I wanted it to be.  Took a few tries to get it correct.  Plus, that wood’s just a bit too big for the saw, and there were cuts where the saw couldn’t cut all the way through.  The end result looks good, though.

post

In the end it all came together.  These are going on my stairs and they’ll support the handrail at the top and bottom.

secret compartment

There’s one block I didn’t glue on, and that’s so I could bolt it into place and affix it with a couple of pocket screws.  I’ve done this a couple times before on other projects, and it can get a little tricky to get them standing perfectly straight and tightly fitted to the floor.  I’ll have to be ready for anything.

toy

Here’s our newest toy, something to keep us toasty warm when it gets cold out.  A pity I can’t use it in my shop, it would be lovely to have that kind of heat in there, but it’s an outdoor toy.

A Closet Fit For A Magazine Cover

Yeah, well, almost.  The closet is nicely done, but now that it’s finished, we feel the need to get nicer stuff to put in it. All our current stuff looks like crap.  It used to look good, but that’s because it was in a really ugly closet.

closet

Yeah, this is a vast departure from the before pictures (need a reminder?  click here.)  Now our closet is nicer than our bedroom.  I’m really not kidding about that.  It’s clean, it’s painted, it no longer smells funny, all the mold is gone, all the splintery paneling is gone, all the exposed beams are wrapped and covered.  It’s really nice.

cactus pete

Thank goodness I only own one leather jacket, otherwise the closet would start to look cluttered.

light

That old bare light bulb with the frayed string dangling from it was really getting on my nerves.  It was kind of gross to even touch it.  It’s funny, I replaced it with a dirt-cheap light fixture and it looks ten times better.

switch

And it has a freaking light switch.  And the power outlet is up to code.  You no longer fumble around in the dark wondering if you’re going to get electrocuted by the exposed wiring, because there are no more exposed wires!  It’s all in boxes and covered by switchplates.

shelves

That shelving back there really helps.  Okay, a little honesty here:  we own more than one jacket.  Right now you see just the one jacket hanging in there but I have to admit, while this closet is not posing for photographs it has like ten or twelve jackets hanging in it.  So those shelves are a little hard to get to.  Who cares?!  I have shelves!  It’s the back of the closet, it’s where we store crap we never need and never use.

mysterious box

All I really ever need is my gym backpack, and it’s front and center.

door

And the door is finished and installed.  It’s fantastic.  It was by far the easiest door install I’ve ever done.  It fit perfectly!  I must have measured everything correctly for once.

hinge

These hinges cost more than the door itself.  I don’t skimp on hinges.  I get solid brass, well machined hinges.  They won’t rust, and they’ll last longer than the house will.

doorknob

I really like the rough, weathered, distressed look of the wood.  Some of it was artificially done (me stabbing the door with a knife, etc.) but a lot of it was purely natural.  This lumber was sitting outside for about a year, and I did not treat it gently.  I love the result.  It has the look of old reclaimed wood from some remote corner of the world.  And given that our hardware store is in a remote corner of the world, that’s not far from the truth.

So, now I need a closet door

Don’t ask what happened to the old closet door.  It was one of those cheap, crooked hollow-core doors, the kind that I hate.  Really hate.  And I have a lot of martial arts weaponry in this house.  Let’s just say the old door is no longer in one piece, and we’ll leave it at that

Sandpaper

I seem to have made a few doors since I got here.  I’d actually prefer to restore old salvaged doors (yeah, I’m weird. I know.  No need to tell me that.) but around here that’s not easy to obtain, so I’ve just made my own.  I just use construction lumber, a little distressed and more than a little imperfect.  It’s knotty.  It’s naughty!  It’s bent and twisted.  But I like the look of it when it all comes together.  On this door, the sandpaper I went through cost me more than the actual lumber.

Door

Dry fit.  Yup, it’s a door.

Clamps

Glue-up went really easy and the door seems like it’s going to be flat, straight, and square.  Not a lot of huge defects on this, despite all the knots there weren’t a whole lot of fissures or cracks.  All the cuts went well, nothing split and there were no huge splinters to impale my hand on.  I foresee a little shrinkage in its future, as its final resting place is right next to the wood burning stove, so it’s going to dry out like a bone in the desert.  But I can handle that.  As long as it opens and closes without having to use a fireman’s axe I think I’ll be happy.

Hippies Use Side Door

Speaking of doors…

Demolition for Every Closet

I started asking myself what was different about my closet compared to, say, normal peoples’ closets.  Why is my closet never pictured on the front of magazines?  What is so wrong with it?  Why do people threaten me with violence when I offer to put their coat in my closet?  Something is just different about mine, and to make it more socially acceptable, I started by removing all the things that I didn’t see in those magazines.

framing

Well, I ended up with this.  No paneling, and a bunch of uneven posts that by some miracle hold up the stairs.

electrical

Long gone is the bare light bulb and its frayed pull-string, though these electrical wires will pose a challenge to do correctly.  I drew out the circuit, and I have to connect four 12 gauge wires together in this box.  Sucks to be me.

wiring

Not to mention the ethernet cables, the HDMI cable, all those speaker wires for all the speakers I planted around the house.  This is a lot of copper.


carpet

This section of wall has always been a little off, and now I know why.  They installed the bottom plate right on top of that green carpet.  They couldn’t even be bothered to take up the carpet to extend their wall 24 inches.  That is seriously lazy.

wired

It took a while to get all the electrical tucked away neatly (not to mention correctly) and put in a few more studs for the drywall.

pay n pak

Anyone here still remember Pay n Pak?  Yeah, didn’t think so.

drywall deck

The weather was nice, so the front deck made for a really good area to carve up all that drywall.  This is a small closet, but it still swallowed up six sheets.  Lots of irregular pieces going in there, not to mention I had to carry them into some confined areas.  It was like playing Operation:  carry that big heavy sheet of drywall and don’t hit a door frame.  Bzzzzzt!  Oh, you’ll have to sand out that dent now.

drywall

Finally, some nice, shiny, mold-resistant drywall up, inside and out of the closet.

no help

No help.  No help at all.


Solutions for Every Closet!

solutions

The pictures on these magazines crack me up.  You know, if my closet only had to store twelve items or less, it might look so picturesque too.  Yeah, all I need to store is a pair of antique tennis rackets, a cyan volleyball, the world’s cleanest baseball, and a basket that has no use and serves no purpose.

real closet

Sorry, but my closet is not a shallow set of cubbyholes designed to hold yellow galoshes in singles.  Mine is more like the Black Hole of Calcutta.  The area behind where those coats are hanging?  Astronomers call that the Event Horizon; beyond that point, nothing can escape, not even light.

bare light bulb

The bare bulb is actuated by a pull string so worn and frayed that it quietly sobs “kill me” whenever you grasp it.  No effort has been made to conceal those exposed wires, or insulate them, or even bring them up to code.  There is no code in the Closet of Doom, only a deep, eternal blackness that smells like dog pee and cigarette smoke.

interior

The pitted backside of the paneling is what rubs up against whatever clothes you deem fit to hide in here.  You don’t store things in this oubliette as much as you just forget about them.

unfinished

Definitely a tripping hazard.

holy

Reluctantly, daylight creeps through the various cracks and holes from the outside, but the deeper down it goes, the darker it gets.  The unwritten horror stories of HP Lovecraft are down there somewhere.  I should seal it off for the safety of us all.

just before demo

I’ve been staring at these awful stairs for years now, and the time has finally come for a little remodeling.  Out with the paneling, in with new drywall.  This is going to be a lot of work in a small tight space and it may not turn out like the front cover of anyone’s magazine, but anything will be an improvement.

Hole in the Wall

You know that space in the way back of the closet that you can’t ever get to?  We have a space like that, and it’s really inconvenient.  It’s near the base of the stairs so the only way to get there is to crouch and crawl, and remove the boxes and baskets and whatever else got put in the way.  It was to the point that if I knew something was stored way back under there, I’d rather go buy a new one than crawl in there and retrieve it.

hole in the wall

I thought this would be a great place for some built-in cabinetry.

the plans

The logistics of this was actually a little tougher than I thought.  The little heating thing down there meant I couldn’t make these cabinets all the way to the floor, they’d need about a foot of clearance, so that right there eliminated 12 cubic feet of storage space that I’ll never get back.

gravity

But still I was determined to make this thing work.  The final cut list would consume exactly one sheet of plywood, which I took to be a sign that this was meant to be.

cabinet

But once it started coming together full scale, it made me realize there were still problems to overcome.  Those small boxes seemed a lot bigger in my head, but now it was clear that I had to make these long, narrow drawers, or they’d be useless.

brush on a stick

Not to mention the problem of how to get polyurethane in there.  I should have finished everything before I assembled it.

light

I did find an unused electrical outlet in there, and it works and tested out okay, so I decided to move it to the front of the cabinet.  Make it a little more useful.  Please consider that it was 100% useless before, so anything would be more useful.

frame

Once the carcass was assembled, it was time to make and fit the frame.  Nothing fancy, just a bit of hemlock I had lying around.

dry fit

The doors came out looking really good.  And they were flat this time too.  And square.  I’m getting better at making doors, I think.

hinges

I think the hinges cost about as much as the plywood and the hemlock put together.  I like good hinges, though.  Makes the install go a lot smoother.

fill the hole

And here it is stained and finished and hardware installed and fitted into its hole.  Still some adjustments to make before final install, but I think I’ll wait until I have the rest of that paneling knocked out and I’m ready to drywall.  I just pinned it in place so I don’t have to look at the hole in the wall anymore.

drawers

Not sure if that storage is anything good except for ninja throwing stars and nunchucks but I could make that work.

heron

Saw this heron out fishing at low tide.  If he seems a little annoyed at all the tourists, well, he is, I assure you.


Shop Tips

Everyone come running because I am giving shop tips today!

What?  No one.  Okay, everyone come running because you’ll get two bucks!

look out

Maybe these shop tips are things you already knew, but there’s still value in reading them, because even if you know 90% of this stuff, it’s the 10% that you didn’t know that might make you a better woodworker.

tape

Those long aluminum rulers are great, but they will leave marks on things like drywall and painted surfaces.  So cover the back of them with some masking tape.  It makes for a smooth surface that won’t leave marks.  Do not put tape on the front side, though, because then you won’t be able to read the numbers.

sanding pad

Sanding pads are expensive, so get the most out of them.  Even when they’re spent, there’s usually enough grit left on them that you can sand some things by hand.  I folded this one up and used it to sand inside the corner that the sander could not reach.

plugs

If you use dowels to plug holes, you probably know that it’s easiest when they’re tapered a little bit, that way they fit  into the hole.  Want a tool that does this for you ?  Try a pencil sharpener.  You can get a little hand held one for about $1 and it will very neatly taper your dowel plugs.

Phone Stand

You don’t need a fancy pants phone dock.  Two J-hooks on your pegboard will do the trick nicely.  I drilled a hole for the charger.  In my shop, the phone controls the music and it takes all these lovely pictures you’re looking at, so it’s nice when it’s in easy reach.

chisel plane

You’re going to own tools that you don’t have a use for except for very rarely.  This is okay.  When the circumstance comes up that you need it, you’ll be happy you have it.

duck tape

If you want to protect something with duck tape, but don’t want to risk ruining the finish with its strong adhesive, you can put down some masking tape and then put duck tape on that.  It will pull off the floor easily and won’t damage anything, and you can protect the floor’s finish from the edge of the sander.

drips

Don’t throw away your sponge brush until you’ve checked for drips.  Saturate the end grain with as much polyurethane as it will absorb.  You’ll never regret pre-drilling your nail holes, whereas you’ll always regret splitting your wood if you didn’t pre-drill.

view

If you’re fortunate enough to have a nice view, be sure to orient your shop so that you get to enjoy that view while you work.

stir stick

I’ve used the same stir stick for polyurethane for like 15 years now.  I now know what over a hundred layers of polyurethane look like.  I also know the consequences of adding layers of polyurethane without sanding in between coats:  nothing.  It makes no difference if you don’t sand.  It’s just a little lumpy, that’s all.

shop

A bug zapper for your shop may be the best tool you buy all year.

big bucks

As promised, here’s two bucks.


The Pirate Crate & Box Company

Storage Boxes

I’m really enjoying making these boxes out of scrap plywood!  These are all storage/organizer boxes for places like under the kitchen sink and some small tool boxes for in the shop.  I’m feeling a lot less disorganized now.  Anyway, I’m enjoying making these so much that this may be what I (eventually) do for a living!

Small Tool Boxes

I’ll call it The Pirate Box & Crate Company, and I’ll make boxes for organization, for storage, and custom boxes of whatever size someone would need.  We invest so much into plastic boxes and storage containers, and all that plastic either sits in a landfill or floats around in the sea and washes up on a beach somewhere.  I think it’s a good idea to get back to some basic wooden boxes like this.  They’re easy to make, and would be fairly quick once the process is streamlined.

Hammock Box

Here’s a chest I made for our hammock, when it’s not in use.

Clamped Box

And here I am assembling more boxes.  These things are a cinch to make!  This box will replace a cardboard shoe box that housed odd and specialty drill bits and replacement blades, and has been falling apart rapidly for years.  It barely holds together anymore.  This box here will last decades.

Sides of Boxes

And it’s all made out of scrap plywood and some 1x2s that I had laying around.

Box with Lids

I designed the lids to these guys from the traditional Japanese toolbox, with a lid that slides into place.  You can make them so the lid locks into place with a tapered piece of wood, but I didn’t see the need.  Both boxes are going to be for things I access regularly, and they won’t really need to travel anywhere, so I can leave the lids loose on top of them.

Top of Box

I’m enjoying this process more than I probably should be.  These things are quick and fun to build.

Glove Box

To the right is my old box of gardening gloves.  To the left is the new glove box.  How awesome is that?

Box Material

And I have got LOTS of scrap plywood left over to make more boxes.  Going to make some bigger ones next.  This is so fun!  And yes, I totally get that my non-woodworker readers out there completely don’t understand any of this.

Not a box

Not a box, but a toothpick holder.  Before this, I kept my shop toothpicks in a box made out of duct tape.

Also not a box

The low tide today was 3 feet below sea level.  It was surreal just to go down there and walk around on ground that is underwater for the vast majority of the year.  All manner of birds and critters were about, enjoying the newly exposed seafood menu.

Built in Bookshelf

The Loft

Please ignore that ridiculous handrail and those spindled balusters.  They’re going soon.  They’re going next.  In fact, as soon as I hit ‘publish’ on this blog post I may start tearing them out.  In their background is the finished loft, all done now.  I just completed the built in bookshelf and all the finish trim that goes around it.

I made the bookshelf out of the leftovers from the kitchen cabinet project.  I literally had just enough to do all this.  My pile of leftover scrap could fit in a lunch bag.  That didn’t leave a lot of room for error, if I screwed something up (which never ever happens) I couldn’t re-make any piece.

Empty

The bookshelf it replaces was half its size, and not only that, this built-in is double sided!  It can store about four times as many books as the last one.  Maybe after this house is all done, I’ll have time to read books.  For now, I’ll just have to collect them.

Crazy Hinges

This isn’t really fine woodworking, though I used traditional joinery for the cabinet door and frame, and for the little end cap.  One of these days I’ll make a nice piece of furniture, but right now I’m in a hurry to get this stupid house done.  Check out those crazy hinges on the cabinet!  They’re pretty solid too, I’m quite happy with them.

Half Empty

The shelves look a little bare now, but trust me, this house abhors a vacuum.  They’ll get filled up soon.

The Mink

Haven’t posted a critter pic in a while, so here’s a mink at the beach.